You can create several types of dimensions for a variety of object types in many orientations and alignments.
The basic types of dimensioning are linear, radial, angular, ordinate, and arc length. Use the DIM command to create dimensions automatically according to the object type that you want to dimension.
You can control the appearance of dimensions by setting up dimension styles, or by editing individual dimensions in special cases. Dimension styles allow you to specify your conventions quickly and maintain industry or project dimensioning standards.
Linear Dimensions
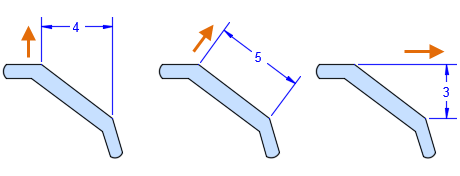
Linear dimensions can be horizontal, vertical, or aligned. You can create an aligned, horizontal, or vertical dimension with the DIM command depending on how you move the cursor when placing the text.
Radial Dimensions
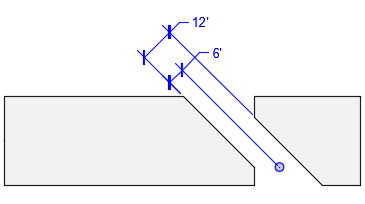
A radial dimension measures the radius or diameter of arcs and circles with an optional centerline or center mark. Several options are displayed in the illustration.

Angular Dimensions
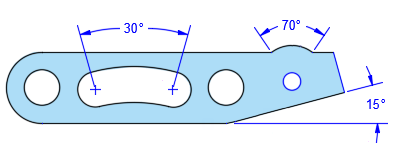
Angular dimensions measure the angle between two selected geometric objects or three points. From left to right, the example shows angular dimensions created using a vertex and two points, an arc, and two lines.
Ordinate Dimensions
Ordinate dimensions measure the perpendicular distances from an origin point called the datum, such as a hole in a part. These dimensions prevent escalating errors by maintaining accurate offsets of the features from the datum.
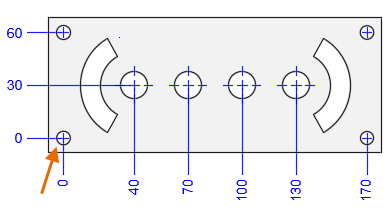
In this example, the datum (0,0) is indicated as the hole in the lower-left corner of the illustrated panel.
Arc Length Dimensions
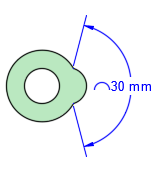
Arc length dimensions measure the distance along an arc or polyline arc segment. Typical uses of arc length dimensions include measuring the travel distance around a cam or indicating the length of a cable.
To differentiate them from linear or angular dimensions, arc length dimensions display an arc symbol by default. The arc symbol, also called a hat or cap, is displayed either above the dimension text or preceding the dimension text.
Baseline and Continued Dimensions
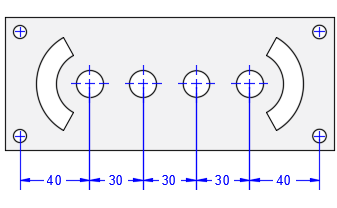
Continued dimensions, also called chained dimensions, are multiple dimensions placed end-to-end.
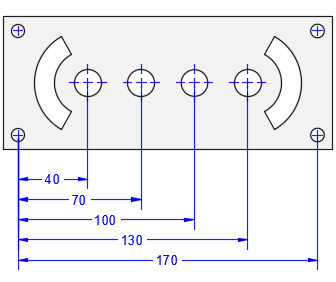
Baseline dimensions are multiple dimensions with offset dimension lines measured from the same location.
Rotated Views
Leader landings, components of dimensions, and text objects determine their horizontal and vertical directions from the UCS axes at the time when they are created. If a view in a drawing is rotated, you can first use the UCS /View option to set the horizontal and vertical directions relative to the drawing rather than the rotated view.