Use the multi-pass rendering capabilities of Action's Output menu to manage your outputs. Options are available to help you set up and prepare many different types of outputs (based on a specific camera), much as you would with render passes in a 3D application. You can process multiple outputs at once, from your complete Action scene, to specific Shadow or Z-Depth outputs, for example.
Note: If you accessed Action from the timeline, the output consists of a single Render Layer with Comp and Matte enabled.
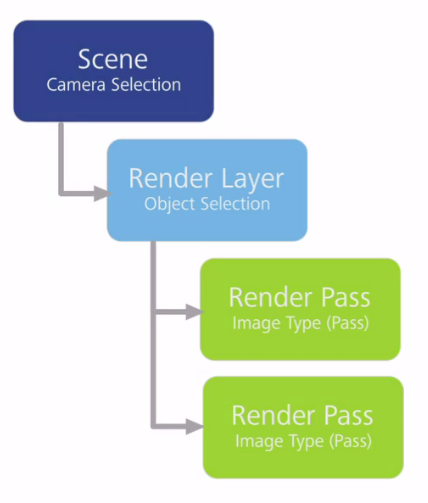
Action Output Workflow
When using the Action Output menu, you usually follow the options from left to right.
| Step: | Action: |
|---|---|
| 1 | Use the Render Layers list to add, copy, delete, and rename render layers. |
| 2 | Set Outputs Options: select the Primary output type, the camera to output, and any render passes per render layer. |
| 3 | Set Rendering and Ambient Occlusion Options, as necessary. |
| 4 | Select objects to output. |
| 5 | Render your outputs from Action (using the options in the Render button and dropdown list). |
To access the Output menu, click the Output button.