Story Editor
- Window > Story Editor
The Story Editor is a tool for creating simple animation on objects/units and entities within a level. You can add units and entities to Story and animate their transforms and other parameters using keyframe animation. (You cannot use animation clips in Story.) See also Create simple animations with the Story Editor.
This editor consists of the following main areas:

Refer to the sections below for more detail on each area.
Click to toggle Story mode. When on, the Story Editor is "live" so you can start to add keyframe animation on selected objects.
Important: When Story mode is on, changing the position of the unit in the level has no effect. To edit the position of the unit in the level again, exit Story mode. (Click LIVE to toggle the mode on and off.)
You can still select, move, delete, or modify key values when the Story Editor is not live.
Note: As you animate units in the Story Editor, the animation plays back only in the Level Viewport, it cannot playback on connected devices.

Click ![]() to add a new Story to the editor. If you select a unit or entity before clicking
to add a new Story to the editor. If you select a unit or entity before clicking ![]() , the editor automatically adds the unit or entity to a new level object track within the story.
, the editor automatically adds the unit or entity to a new level object track within the story.
When working on multiple stories within a level, use the Current Story drop-down to switch between them.

The Story Editor toolbar includes the following:
| Controls | Description |
|---|---|
Playback Controls  |
Use the playback controls to preview animations in the Level Viewport, as you edit the unit animation in the Story Editor. Use To change the playback mode, select  , right-click to select Loop or Ping Pong. , right-click to select Loop or Ping Pong. |
| Snap |
Enables snapping to frames or seconds in the timeline. |
| Autokey |
When on, after you keyframe an object once, the object is automatically keyframed every time you manipulate it in the Level Viewport. |
| Time mode |
Toggle the timeline to display seconds, or frames. |
Edit key fields  |
Manually enter time and value for a selected keyframe. |
Key & Tangent options 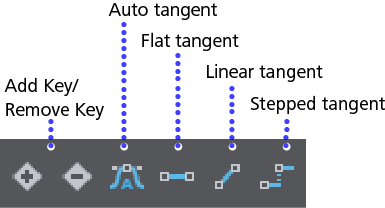 |
Use the key and tangent options to add or remove keyframes and tangent modes. |
| Story Selection mask |
Masks selection so that you can select only objects in the current story. |
| Onion skinning |
Toggles the display of ghosting on selected units. Right-click to specify whether to ghost Everything, or only Selected units. To access additional Onion Skinning Settings (including color) in the Properties panel, select a StoryRoot in the Story Editor tree view, or in the main Explorer panel. |
| Capture Frames Tool |
Opens the Capture Frames Tool. A Story must be selected to start capturing the frames. See also Capture frames to disk. Note: The Story Editor need not be "Live" for a frame capture. |
| Curve editor/Key editor |
Use the curve icon in the toolbar to switch between the different editing views in this area. Curve editing mode: 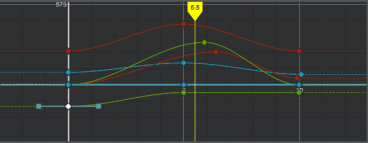 Tip: Select keys on the same curve and enter a value in the edit key field on the toolbar to edit multiple keys at once. Key editing mode: 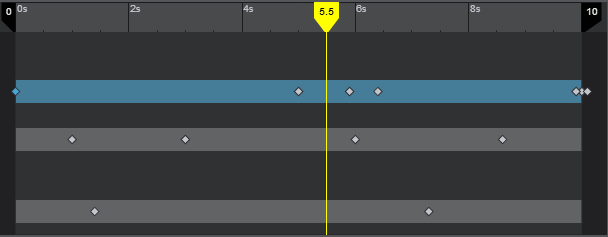 |
The Story Editor offers the following playback modes, which control what happens when the story reaches the end of its playback range.
- None
 : The animation stops at the end of the timeline range.
 - Loop
 : The animation restarts from the beginning each time it reaches the end of the playback range.
 - Ping Pong
 : The animation switches playback direction each time it reaches one end of the playback range. It plays forward until it reaches the end of the playback range, then plays the animation in reverse until it reaches the start of the playback range, and switches direction to repeat the cycle.
By default, unit animations play in None mode.
For a unit track, the Pre Infinite and Post Infinite settings (right-click the unit’s individual transform or other properties) define the animation curve behavior before the first key and after the last key of the track in the active timeline range. You can use these settings to make animations play longer in None mode, and to control the way curves are handled outside the playback range. To set the playback range,
- Drag the black sliders in the Story Editor timeline to a new time.
- Modify the story loop range value using stingray.StoryTeller.set_loop_range() function in Lua or Level > Level Story node in Flow.
- Select a StoryRoot in the Story Editor tree view or Explorer panel and modify the Story Settings start and end time.
Use the snapping icon
 to enable snapping to seconds or frames.
Use the clock icon
 to switch between showing seconds or frames on the timeline.
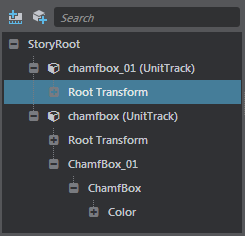
Use the tree view to browse and select stories, tracks, and properties for keyframing. The tree view includes a small tool bar with a search panel, and the following options for adding tracks:

Add level object track
Use level object tracks to organize the keyframe animation for each unit or entity added to the story. A unit track is automatically created if you select an object before clicking ![]() .
.
An entity track is automatically created if you select an entity before clicking ![]() .
.
Right-click level object tracks to add more properties for animation, including the object's material properties.

Add event track
Add event tracks and set keys that you want to expose in the Level Flow Editor. You can use keys on event tracks to trigger anything in the level flow. (Play a sound, trigger a particle effect, set up a camera switch, and so on.)
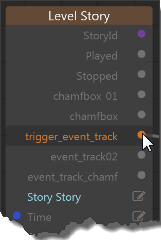
To access the event output in Flow after you create a key in Story, add a Level > Level Story node, then click Story.
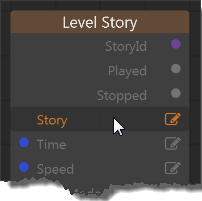
In the pop-up window that appears, select the Story containing the event track you want.
This adds the event track parameters to the Story node, so you can then connect the event output to trigger something else.
