List labels allow you to automate the labeling process. Lists can be prepared in Netfabb or beforehand as a CSV file.
To load a CSV file
The CSV file lists can be created with any common spreadsheet application.
- Select the part to be labeled.
- Click .
- In the context view, click
 Load CSV File.
- Browse for the CSV file to import.
- Specify the Separator and the Quote Character used in the CSV file.
- Enable the Trim Spaces check box to eliminate blank spaces.
- Enable the First row contains header check box to prevent the first row of your file from being included in the list of labels.
- Use the Column for Key drop-down menu to select which column in the file represents the future part name.
- Use the
Column for Value drop-down menu to select which column in the file represents the label on the part.
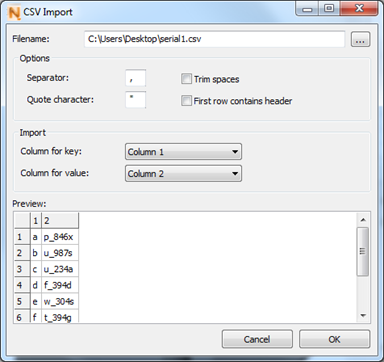
- Click OK to load the list.
- Choose a build type from the drop-down menu. Available options include:
- Add to Part: Makes the label stand out from the part.
- Add to Part (inverted): Makes the label stand out from the part, but flips the text which can be useful for mold making.
- Subtract from Part: Engraves the label into the part surface.
- Subtract from Part (inverted): Engraves the label into the part surface, but flips the text which can be useful for mold making.
- Click Apply to create the text label.
- Click Yes to remove the old part or No to keep the old part and the newly labeled part.
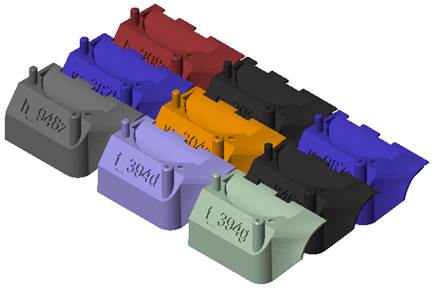
Labeling with a CSV list.
To generate a list
If you don't have a CSV file containing a list of labels, you can create your own list.
- Select the part to be labeled.
- Click .
- In the context view, click
 Generate List.
- Define the following fields:
- Prefix: Text that appears at the beginning of each label.
- Suffix: Text that appears at the end of each label.
- Start: The first part that will be labeled.
- Count: Determines the number of parts in the list.
- Step: Frequency of parts to occur in the list. For example, a step of 1 lists every part in sequence. A step of 2 lists every other part. A step of 3 lists every third part.
- Digits: The number of digits to display between the prefix and suffix. For example, 1 = 1, 2 = 01, 3 = 001.
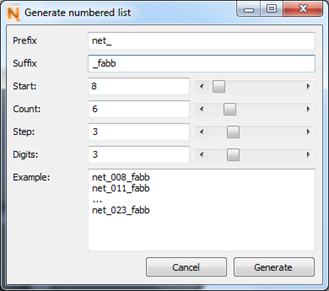
- Click Generate to create the list.
- Choose a build type from the drop-down menu. Available options include:
- Add to Part: Makes the label stand out from the part.
- Add to Part (inverted): Makes the label stand out from the part, but mirrors the text which can be useful for mold making.
- Subtract from Part: Engraves the label into the part surface.
- Subtract from Part (inverted): Engraves the label into the part surface, but mirrors the text which can be useful for mold making.
- Click Apply to create the text label.
- Click Yes to remove the old part or No to keep the old part and the newly labeled part.
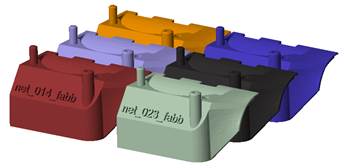
Labeling with a list generated in Netfabb.