After a fragment is created, you can assign structure cells to the fragment. The cells are arranged in a three-dimensional grid to form a connective structure in the fragment. You can assign a different structure cell to each fragment. Thus, different sections of your part will have different interior structures.
- Select a fragment.
- Choose a structure cell using the Cell drop-down menu in the tabsheet. If you choose solid, the selected fragment of the part will be sliced like a solid part. If you choose a structure cell, that cell is placed and multiplied within the fragment.
- Enable the
Show Cell Preview check box to see a preview of the cells in the fragment. The structure cells are represented with a red grid.
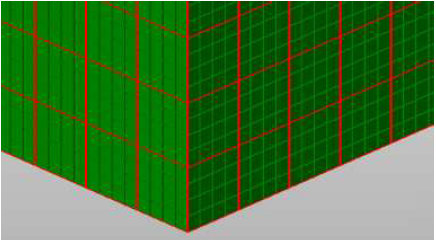
- If necessary, specify a translation along the X, Y, and Z axes to adjust where the first structure cell is inserted. The first cell determines the position of all other cells.
For example, if you have a translation of X=2, Y=1 and Z=0, a crossing of structure cells will be positioned after the second grid cell in X-direction and the first grid cell in Y-direction. If the red grid stands out of the fragment, the complete structure cells will still be realized in the structure and you may get overlapping structure cells.
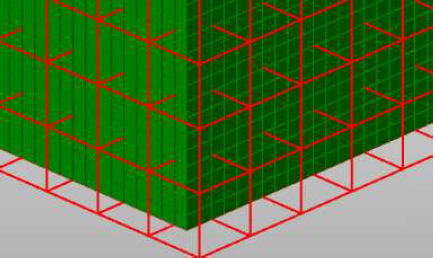
If the cell size and the voxel size of the fragment are identical, one cell is inserted into every grid cell. If the cell is smaller than the voxel size more than one structure cell is inserted into one grid cell.
If the cell size is bigger than the voxel size, the structure cells will simply occupy more than one grid cell. In that case, only part of a structure cell may be inserted at the end of the fragment.