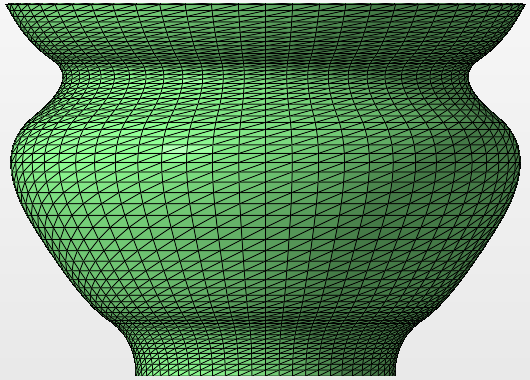
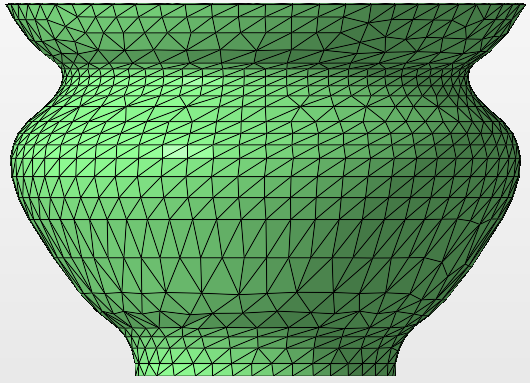
Reducing the number of files helps to reduce the file size and speed up the workflow. The more triangles used to make up the mesh, the longer it takes to load the model.
- Select the part.
- Click
Modify >
 Manipulate Mesh.
- Make sure the Triangle Reduction tab is active in the context view.
- Adjust the following settings as required:
- Target: Determines the desired number of triangles for the reduced mesh.
- Max. Deformation: The maximum allowable deformation allowed to the part while reducing the number of triangles.
- Max. Edge Length: The maximum length of edges to be unified. Be aware, extremely high values can result in distortion and self-intersections.
- Set target as low as possible: When enabled, the triangle reduction algorithm attempts to reduce the number of triangles as much as possible.
- Fast Mode: When enabled, the mesh reduction operation is faster, but less accurate.
- Click Calculate to produce a preview of the new mesh.
- Enable the Show Triangles check box to display the mesh edges.
- Click and hold Show Original Mesh to see original mesh before the triangle reduction.
- Enable the Autoupdate check box to immediately update the model as you adjust the triangle reduction settings.
- Click Save Settings to save the triangle reduction settings for later use.
- Click OK to apply the triangle reduction.