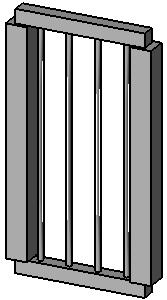
When customizing balusters for a railing, you can specify the design of start posts, corner posts, and end posts.
- In a plan view, select a railing.
- On the Properties palette, click
 Edit Type.
Note: Changes made to the type properties affect all railings of this type in the project. You can click Duplicate to create a new railing type.
 - In the Type Properties dialog, for Baluster Placement, click Edit.
- In the Edit Baluster Placement dialog, under Posts, specify a family for the start, corner, and end posts.
Select None if you do not want a post to appear at the start, corner, or end of the railing.
Baluster families are trimmed by default so they do not intersect a rail, as illustrated in the following image. This may not be your intent for posts. To set posts to intersect rails, right-click the family type in the Project Browser, and click Properties. Select the Post property.

- Specify a base for each post.
- Optionally, enter a value for Base offset for each.
- Specify a top for each.
- Optionally, enter a value for Top offset.
- Optionally, enter a value for Space.
- Optionally, enter a value for Offset.
- Select the location of corner posts, as follows:
If you… Then… want to place a corner post at the end of each segment of the railing select Each Segment End. want to place a corner post when a railing segment makes a turn greater than a given value select Angles Greater Than, and enter a value for Angle. If the railing turns at an angle that is greater than this value, a post is placed at the turn. Typically, this value remains at 0. Turn angles are measured in the plan view. Segment breaks in the railing that do not occur at a turn are ignored. do not want to place a post regardless of any separations or turns in the railing select Never. - Click Apply to preview your changes in the model.
- Click OK.