Contains commands for managing states and rendering them.
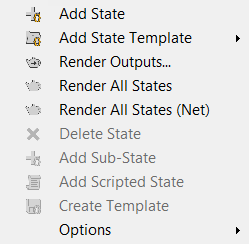
- Add State
- Adds a new state to the list, into which you can then record changes to the scene. To delete a state, click its name and then press Delete or choose Delete from the States menu. Alternatively, right-click the name and choose Delete from the context menu.
- Add State Template
- Adds a state using a preset template. To create a template, use the Create Template option (on this same menu).
- Render Outputs
- Opens the Set Render Output File Pattern panel, where you specify the output path and file names for all states when you use Render All States (the next option on this menu).
To close the panel, click the X button.
- Render All States
- Renders all states for which the Render Output toggle is on (
 ), including any enabled render elements. Render All States saves rendered output in files as specified with Render Outputs (see preceding).
If you haven't defined output files via Render Outputs, rendering takes place in the Rendered Frame Window only, and each state's output overwrites the previous one. If, however, output is defined at the scene level (via Render Setup
 Render Output but not via Scene States Render Outputs, each state is rendered to the same file. So, in general, use Render Outputs before you use Render All States.
Tip: To render a single state, right-click the state to open the context menu and choose Render Selected States. The state need not be highlighted first.
Render Output but not via Scene States Render Outputs, each state is rendered to the same file. So, in general, use Render Outputs before you use Render All States.
Tip: To render a single state, right-click the state to open the context menu and choose Render Selected States. The state need not be highlighted first.To render multiple states but not all, highlight the states to render, then right-click one of them and choose Render Selected States.
- Render All States (Net)
- Using network rendering, renders all states for which the Render Output toggle is on (), including any enabled render elements. For details, see Render All States, preceding.
- Delete State
- Deletes the highlighted state or states. Keyboard equivalent: Delete
- Add Sub-State
- Adds a new sub-state as the child of the highlighted state. Sub-states are useful for layering different rendering passes or object settings. States can be nested any number of levels deep.
A sub-state reflects conditions set by the parent state or states in addition to its own conditions. For example, if only Light A is on in a parent state and only Light B is on in a sub-state, then rendered output from the parent state will show lighting only from Light A, while rendered output from the sub-state will show lighting from both lights.
Note: If you record different changes to the same properties for a state and its sub-state, the sub-state's property overrides its parent's when the sub-state is active or rendered.Note: You can also nest an existing state within another by dragging the state to be nested on top of its prospective parent. - Add Scripted State
- Applies a sub-state that executes one or two MAXScript scripts as part of a state. You can add as many scripted states as you like to a state.
Highlight a state, then choose Add Scripted State from the States menu. Alternatively, right-click the state and choose Add Scripted State from the context menu.
This opens the Scripted State Properties dialog with two text windows:- An Apply State script that is executed when the state is activated by clicking the arrow at the end of its entry.
- A Revert State script that is executed when the script is deactivated.
For example, you could create a scripted state that adds an object to the scene when the state is activated, and then deletes the object when deactivated.
You can use any legal MAXScript commands, and each script can be as long as you like. However, if a script exceeds the bounds of its window, you need to scroll it with the keyboard (the arrow keys, Page Up and Page Down, and so on); no scroll bar is available. Other standard text-editing functions also apply, such as Copy (Ctrl+C) and Paste (Ctrl+V).
To edit the scripted state, double-click its entry in the hierarchical states list.
- Create Template
- Adds a template (preset) to the Add State Template submenu based on the highlighted state. You can then Use Add State Template at any time to add a new state based on that template. Templates persist between sessions.
For example, you could create a template that has a certain camera and lighting setup, and then deploy it as a new state at any time subsequently. However, in order to do so, the camera and lights tracked by the state need to be present in the scene.
Note: Templates do not save all the settings that states do. - Options
- Opens a sub-menu with these items:
-
Reset Window Layout
Restores the State Sets dialog to its original configuration.
-
Reset State Sets
Restores State Sets to its startup state, removing any existing states and recorded actions.
-
Configuration
Opens the State Sets Configuration dialog for specifying various aspects of State Sets appearance and behavior.
-
Reset Window Layout