Working with Shotgun
Shotgun for Alias does not come standard with Alias. Please contact Shotgun Support for access.
The Alias application family (Design, Surface, and AutoStudio) supports a Shotgun integration to fit the needs of all sized automotive design studios.
To begin working in Alias using the Shotgun integration, once you've signed into Shotgun, in the Studio or Automotive section of Shotgun Desktop, click the Alias icon. This will launch Alias through Shotgun.

Note: If you've already used Alias with Shotgun, an Alias icon also appears in the Recent section.
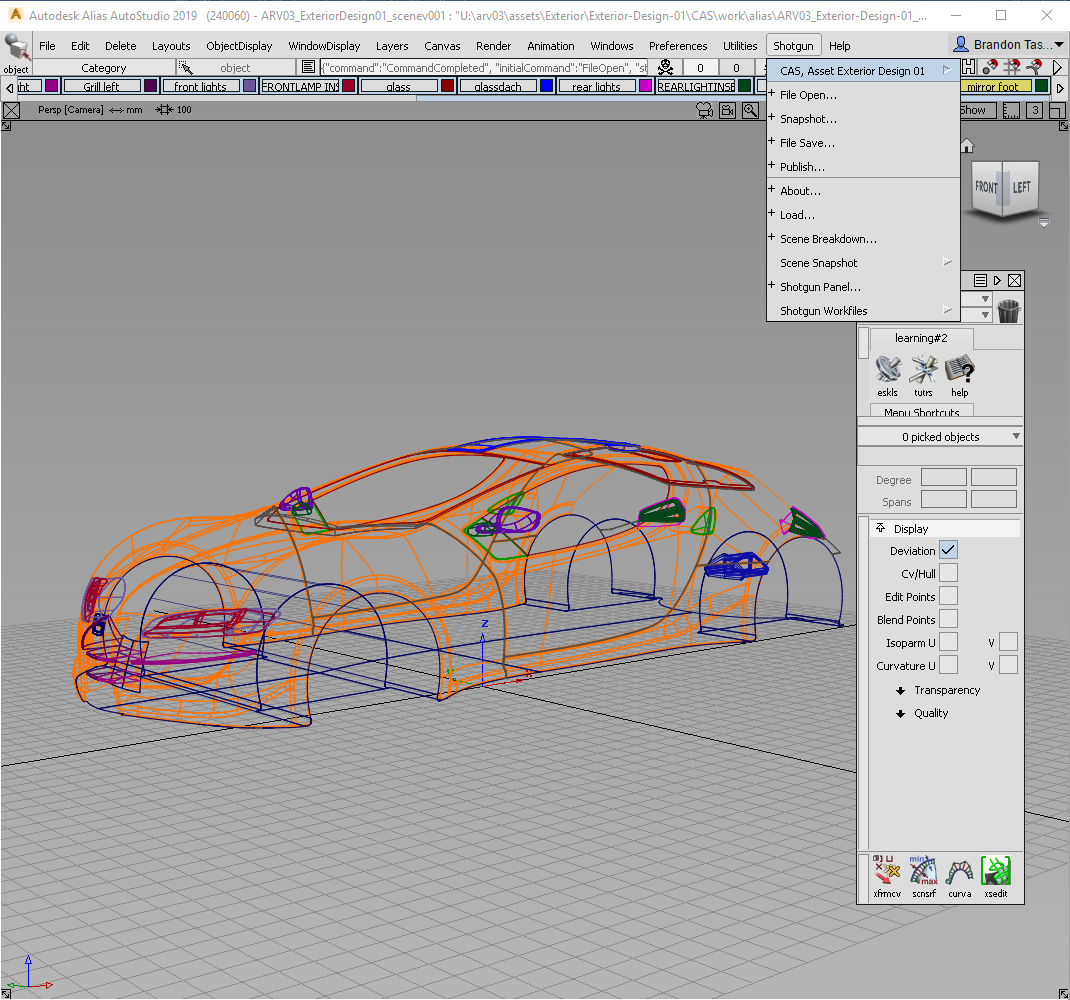
When Alias opens, a Shotgun menu (the Alias engine) is added to the menu bar.

The Shotgun Menu's Default Apps
Use the Shotgun menu (also referred to as the Alias integration engine) to access a default set of apps.
- Need to open a file? Use Shotgun > File Open. This takes you to your tasks, where you can select a file to work on.
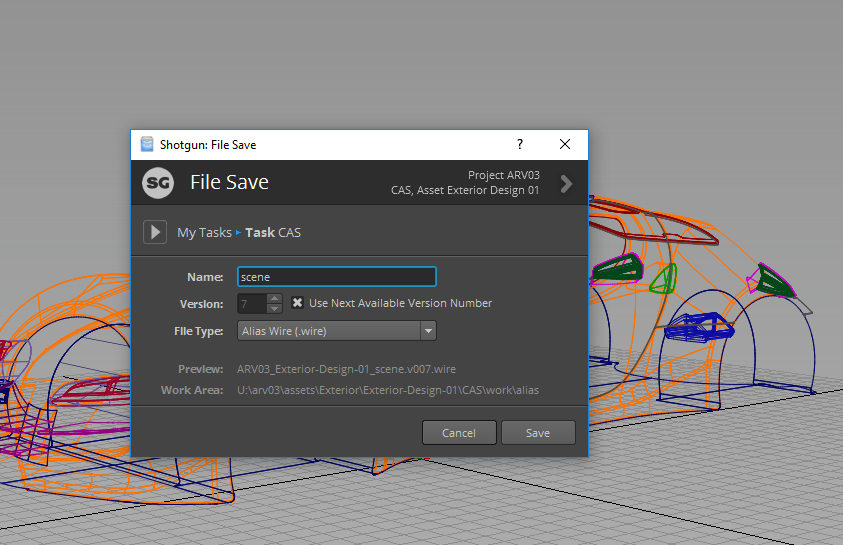
- Need to save a file? Use Shotgun > File Save. This saves it and updates the Shotgun linked information.
Use this default set of apps for opening and saving files, publishing work, and getting Shotgun information through the Shotgun Panel. Once a file is modified (opened or saved) and the context of the scene is set, more apps will appear under the Shotgun menu.
When you first access the Shotgun menu, the top entry in the Shotgun menu will be your current project. Select it to access these default apps:
Jump to Shotgun: Opens the project's Overview page in the Shotgun Web App.
Jump to File System: Opens a file browser for that project to access folders, such as assets, editorial, reference, and sequences.
Jump to Screening Room Web Player: Opens the Screening Room web player for reviewing work.
The current shot and assets are loaded. See submitted versions in context or review different submitted variations from inside the content creation application (such as Alias). For more information on the Screening Room, see Screening Room.
Open Log Folder: Opens the Shotgun Logs folder, containing log files for the software used. For example, if you used Alias, there will be a
tk-aliastext file.Work Area Info (technical tool): Shows the current work context, a breakdown of all currently running apps, plus all settings and configurations for the currently running Shotgun Apps.
Click the tabs at the bottom to switch from one to the next. Click the arrow at the top to expose more information on the Shotgun Pipeline Toolkit and your current work area. Use the buttons along the side to jump to the file system, reload the engine and apps, or access documentation and support.
File Open: Opens the File Open Shotgun dialog, where you can search for and select working files sorted by the Tasks you are assigned. Use it to open and manage all your daily working files.
Once you've used File Open, the top menu entry changes to a Shotgun contextual name, plus project name. Shotgun looks at the current thing you're working on, such as a task or asset to create the contextual name, then appends it with the project name.
Tip: Mouse over an asset to the left to see its notes.
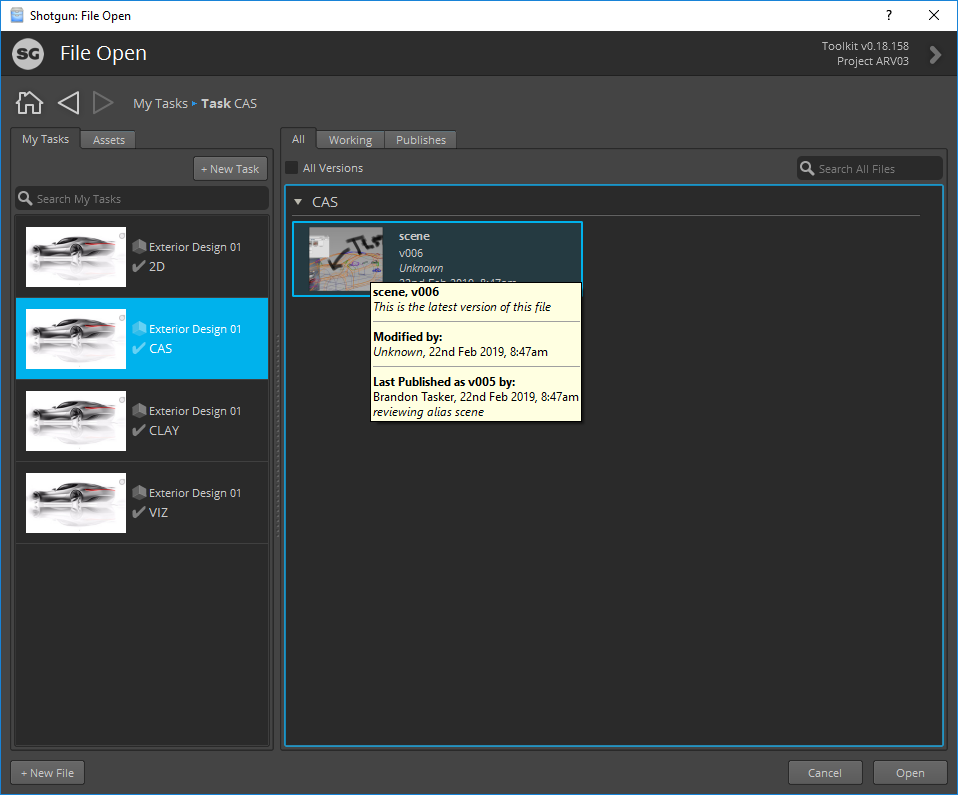
Use the My Tasks and Assets tabs to see all your assigned tasks and browse for assets. To the right, use these tabs to view all files, working or published files associated with what is selected to the left.
Use the All Versions box to access previous versions of files.
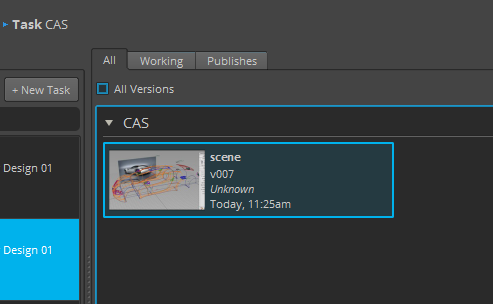
This displays all versions of the selected asset or task. Right-click a file to access options for:
opening the file
continuing work on a file
open a file from the Publish Area
continuing work from the Publish Area
accessing a previous version and doing any of the above
creating a file
accessing the file system
showing the published version in the file system or Shotgun
When finished, click Open to open the file in the engine's application.
About: Opens the Shotgun About box that lists attributes for third-party libraries used in Shotgun.
Shotgun Panel: Opens the Shotgun Panel, which is a small and lightweight window for accessing all information stored in Shotgun related to your current project, without ever leaving the application you’re working in. Easily access task information, the activity stream, notes, tasks, versions, and published files from Shotgun. Review versions sent by teammates, reply to notes, create new tasks, and search the Shotgun site.
Shotgun Workfiles: Contains two options: File Open and File Save.
The Shotgun Menu's Other Apps
As mentioned above, once the context of your scene has been set (by opening or saving a scene), more apps appear under the engine, such as:
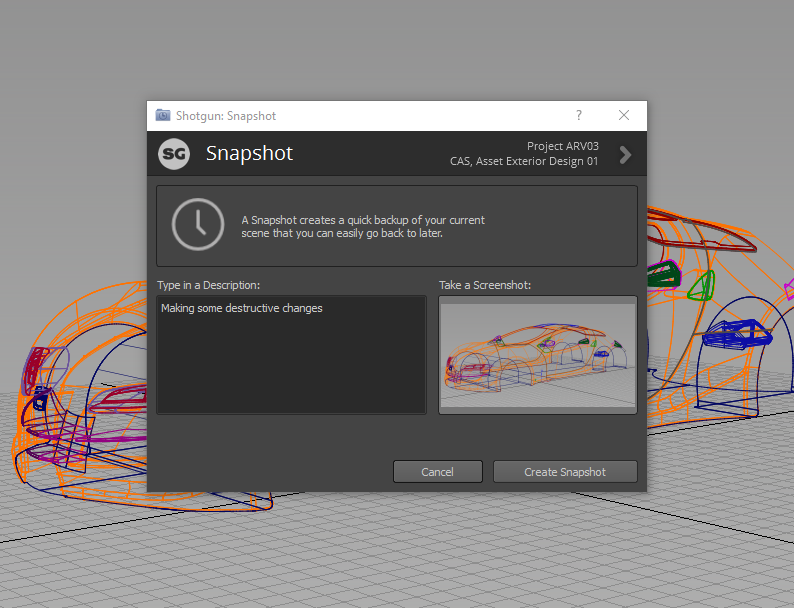
Snapshot: Opens the Snapshot dialog to create a quick backup of the current scene. Enter a description, click inside the Take a Snapshot area, then click the Create Snapshot button. Once the snapshot is created, a Success! message should appear. Either view your snapshot history or click Close.
File Save: (Same as the Shotgun > File Save app) Opens the File Save dialog to name the file, version it, then save it, updating the Shotgun linked information.
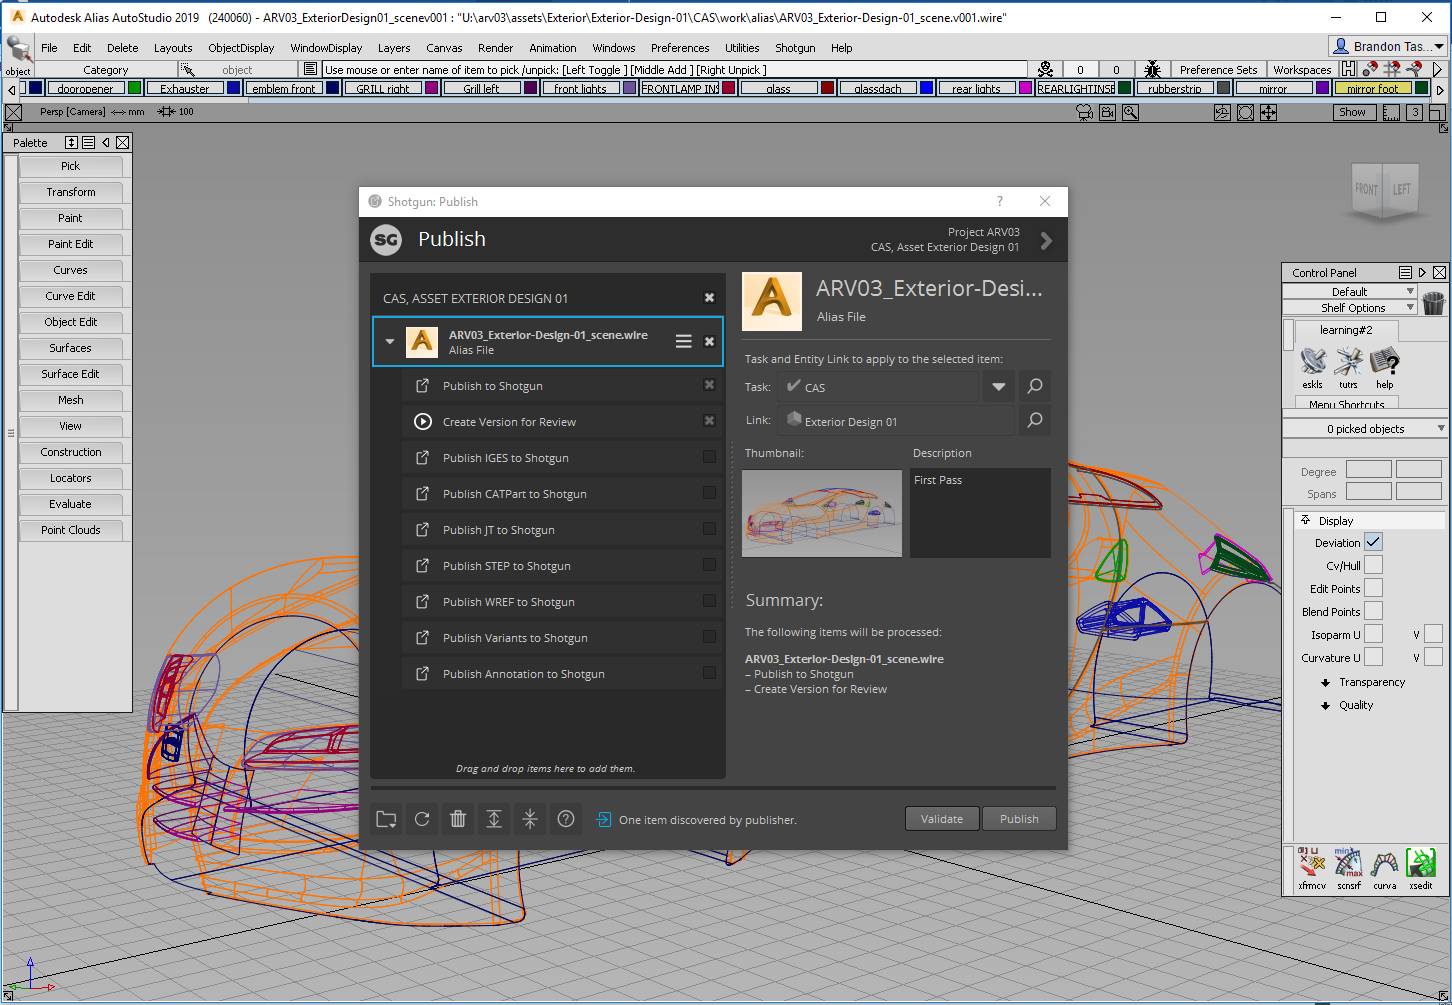
Publish: Opens the Publish dialog for publishing the file to Shotgun, which can then be used by artists downstream. For more information, see The Publisher.
Load: Opens the Content Loader app, along with instructional slides explaining how it works. For more information, see The Loader.

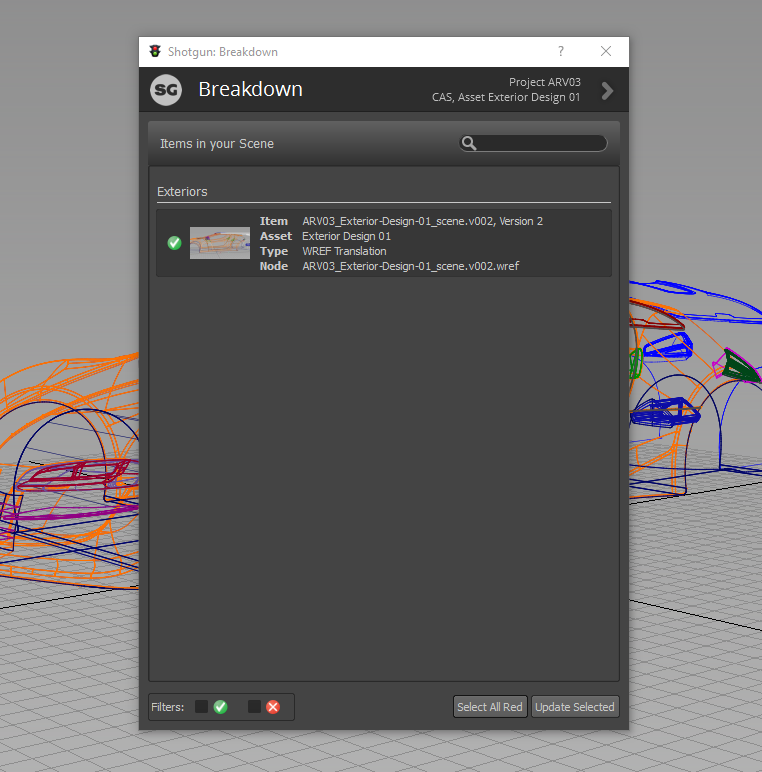
Scene Breakdown: Opens the Breakdown dialog, which displays a list of referenced (WREF References) content, along with what in the scene is out-of-date. Select one or more items and click Update Selected to switch and use the latest version of the content. For more information, see Scene Breakdown.
Scene Snapshot: Contains the following apps:
Snapshot: (Same as the Snapshot app mentioned above) Opens the Snapshot dialog to create a quick backup of the current scene. Enter a description, click inside the Take a Snapshot area, then click the Create Snapshot button. Once the snapshot is created, a Success! message should appear. Either view your snapshot history or click Close.
Snapshot History: Opens the Snapshot History dialog to view a list of all snapshots of the current open file. To return to a previous version, select it, then click Restore. To create a snapshot, click New Snapshot. When finished, click Close.
Tip: Another way to access the Snapshot History app is to click the View Snapshot History button from the Snapshot dialog.