Sets the defaults for creating new parts.
Access
File  Options
 Part tab
Sketch on new part creation
Sets the preference for creating the sketch when a new part file is created. Select one of the options.
- No new sketch
-
Disables automatic sketch creation when creating a part.
- Sketch on x-y plane
-
Sets X-Y as the sketch plane when creating a part.
- Sketch on y-z plane
-
Sets Y-Z as the sketch plane when creating a part.
- Sketch on x-z plane
-
Sets X-Z as the sketch plane when creating a part.
Construction
Opaque surfaces sets opaque as the display default for surfaces.
Surfaces created before the option is set are translucent, but can be changed to opaque. Right-click a surface in the browser and select Translucent, or if desired, clear a check mark to restore surface appearance to the default setting.
Enable Construction Environment
Enables the commands to access the Construction Environment and the construction options in the import dialog boxes.
Auto-hide in-line work features
Automatically hides a work feature when it is consumed by another work feature. Select the check box to use Autohide. Clear the check box to disable Autohide.
Auto-consume work features and surface features
Sets preference for control of default browser behavior.
- Select the check box to consume surface features automatically and work features (such as stitch features consume input surface features and work planes consume input work points). The result is reduced browser clutter and better communication of feature dependencies.
The End Of Part marker cannot be rolled back between consumed features without sharing, such as between an extruded feature and its consumed sketch.
- Clear the check box to turn off automatic consumption of surface features and work features. It is useful if you create several workplanes, each offset from the previous workplane (such as creating sketches for lofted features). Automatic consumption can result in undesirable deep nesting of browser nodes.
To use the End Of Part marker to roll back features, and do not want to share work features and surface features, clear the check mark.Tip: When moving the End Of Part marker, you can abort the process by pressing the Escape key. A message will display when the cancellation is complete.
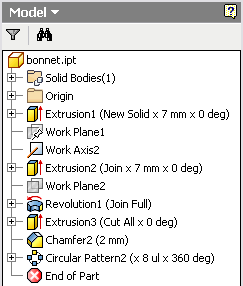
Display extended information after feature node name in browser
Displays detailed information about part features in the browser. Extended feature names are available in the Part, Sheet Metal Part, Assembly Modeling View, and Drawing environments.

3D grips
Sets the preference for 3D Grips options.
- Enable 3D grips
-
Select the check box to enable 3D Grips. Clear the check box to remove 3D Grips functionality entirely, including from the command from all context menus.
- Display grips on selection
-
Select the check box to display the grip when selecting a face or an edge of a part (in a part (.ipt) or (not available in Inventor LT) an assembly (.iam) file. The grip displays when the selection priority is set to faces and edges, and the face can be edited with 3D Grips. Clicking on a grip launches the 3D Grips command. Clear the check box to turn off the display of the grip.
- Dimensional constraints
-
Specifies how dimensional constraints respond when feature changes caused by 3D Grip editing are inconsistent with existing constraints.
Never relax prevents a feature from being grip-edited in a direction that has a defined linear or angular dimension.
Relax if no equation prevents a feature from being grip-edited in a direction defined by an equation-based linear or angular dimension. Dimensions without equations are not affected.
Always relax allows a feature to be grip-edited, regardless of whether a linear, angular, or equation-based dimension is applied.
Prompt is similar to Always relax, but shows a warning if grip-editing affects either dimensions or equation-based dimensions. When accepted, dimensions and equations are relaxed and both are updated as numerical values after grip-editing.
- Geometric constraints
-
Specifies how geometric constraints respond when feature changes caused by 3D Grip editing are inconsistent with existing constraints.
Never break prevents a feature from being grip-edited if a constraint exists.
Always break breaks one or more constraints, to enable a feature to be grip edited even when a constraint exists.
Prompt is similar to Always break, but shows a warning if grip-editing breaks one or more constraints.
Make/Derive/Shrinkwrap default
- Use color override from source components
-
Links color from the base component into the target part. If unchecked, the appearance is set to default appearance of the target part.
Import
- Import
- Imports Application Options settings from an .xml file. Click Import to display the Open dialog box. Navigate to the desired file, and then click Open.
- Use AutoCAD Related Settings
- Provides a feel similar to AutoCAD settings.
- Use Inventor Settings
- The default Application Options settings are installed.
Export
- Export
- Saves the current Application Options settings in an .xml file. Click Export to display the Save Copy As dialog box. Select a file location, enter a file name, and then click Save.
Note on default install locations for both Import and Export operations:
Inventor. Microsoft Windows 7 and Windows 8: Users\[login]\AppData\Local\Autodesk\Inventor [version]\Preferences.
Inventor LT. Microsoft Windows 7 and Windows 8: Users\[login]\AppData\Local\Autodesk\Inventor LT [version]\Preferences