Before uploading your assembly or part files to Configurator 360, prepare your model by following these steps.
- Access:
-
Ribbon:
Autodesk 360 tab
 Configurator 360 panel
 Upload to Configurator 360

For more information about guidelines for files to upload, see the Configurator 360 online help.
Before uploading your file to Configurator 360, complete the following:
- Identify a part (.ipt) or assembly (.iam) file to upload, making sure the model works in Inventor.
- Choose a part with only a few exposed parameters that are renamed or created in the parameters window. Parameters marked as key are also processed.
Choose file that:
- Has no external references (such as derived features).
- Does not contain complex Inventor capabilities.
- Includes one or more parameters.
- Configurator 360 reads parameters and displays an editable dialog box.
- Check the key check boxes that include all important parameters you want to include in your Configurator 360 user interface.
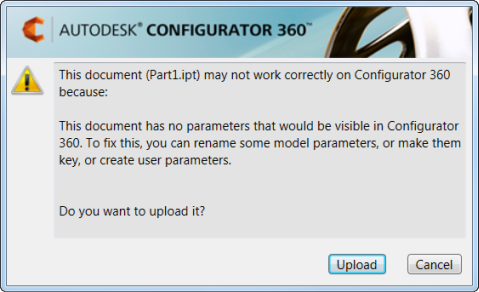
- Rename the model parameters (change the name from the d0-style) to be included in your Configurator 360 user interface. All renamed model parameters and user parameters will be included in the Configurator 360 user interface.
Note:- After your upload, the Configurator 360 client can view these parameters in the new application you have generated. You can also edit the list of visible parameters on the Configurator 360 website.
- If your file is not prepared correctly, the following error message displays:

- 3D solid bodies are displayed in the Configurator 360 Web browser of the recipient. When interaction stops, after a short delay, the rendered image update displays textures, materials, transparency, and non-solid/non-3D elements that are present in the Inventor model. Work geometry that is present in the Inventor model are not shown.