In this lesson you were introduced to a few of the basic techniques required to assign and accurately position texture maps on polygonal models using UV texture coordinates:
- UV coordinates are essential for applying and accurately positioning texture maps on polygonal and subdivision surfaces.
- UVs can be explicitly created for a surface mesh using a variety of UV mapping techniques. (Planar mapping, spherical mapping, cylindrical mapping, and Automatic mapping.)
- UVs are represented as 2D coordinates and are viewed and edited with respect to the 2D texture map using the UV Editor. The UV Editor provides many other tools for editing UVs.
- UVs are usually positioned to fit within the 0 to 1 UV coordinate space unless the texture map requirements are such that the map needs to repeat across the surface mesh.
- It is useful to display both the 3D scene view and the 2D UV Editor simultaneously when texture mapping so that a correlation between the 3D model and 2D UV coordinates can be made.
- You can visualize texture borders using Texture Borders.
- You can view the regions where UVs overlap each other in the UV Editor by selecting the UV shells and selecting View > Shaded.
This lesson used a simple polygonal model to introduce the fundamental concepts. When you work with more complex polygonal and subdivision surface models, you can also:
- layout overlapping UV shells that occur as a result of UV projection mapping to ensure they fit within the 0 to 1 texture space using Modify > Layout.
- maximize the use of texture space by forcing the UV borders to be mapped to the full area of the 0 to 1 UV texture range using Modify > Map Border.
- align UVs to one another or snap them to the grid in the 2D view
- untangle a UV mesh that contains overlapping UVs using Tools > Smooth.
- modify a group of selected UVs using Lattice and Smudge tools.
In general, you should begin texturing a model only after the model is fully complete. Otherwise, changes to the model may affect the associated UV texture coordinates which in turn will affect how the texture appears on the model.
In this lesson you matched the UVs to an existing texture image. Many texture artists create good UV layouts for their models prior to creating the actual 2D images for their texture maps. This is done only after the model is fully complete.
You can export a bitmap image of the 2D view of the UV Editor to use as a guide for painting a texture in your favorite image creation software. In the UV Editor, select Image > UV Snapshot to export the image.
If you want to learn more about a particular tool or feature that was used in this lesson, please refer to the Maya Help.
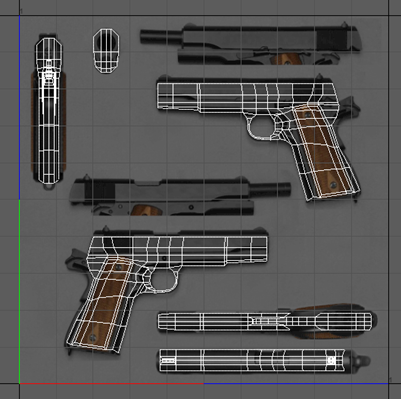
For additional practice, follow the UV mapping tutorial from the Maya Learning Channel. In the linked lesson, an unmapped gun is given proper UV coordinates and textures.