In this lesson, you will learn how to use the Quick Rig Tool to rig and skin a skeleton to a model. The Quick Rig Tool is helpful for making basic character rigs. As you'll learn in lesson 2, joints can be added onto an already completed rig. This means you can start with a quick rig, and then add joints for any additionally needed movement.
Open the scene
Open the scene file named QuickRig.mb.
This file can be found in the GettingStarted2020LessonData\CharSetup Directory.
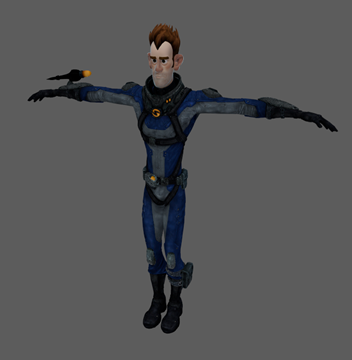
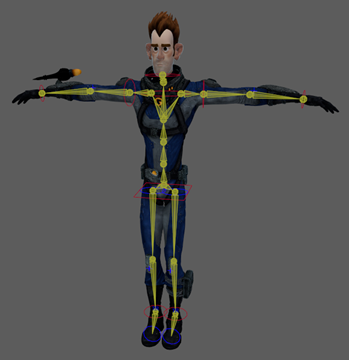
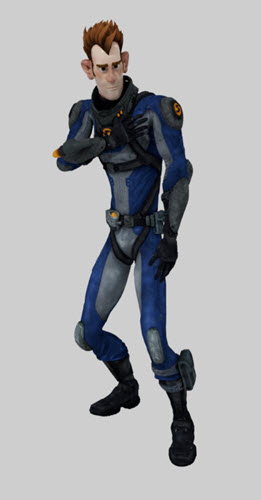
The model displayed in the scene, Sven, is lacking a skeleton. In the following lessons you will learn how to manually insert joints for maximum accuracy. But for now, this current lesson will explain how give this character model a rig that includes Inverse Kinematics and is still accurate in less time.
One-click rigging
The Quick Rig Tool has two primary options for rigging, One-Click and Step-By-Step.
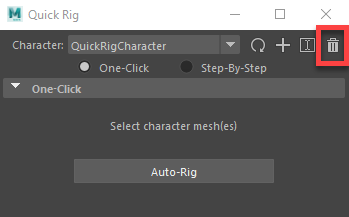
- In the
Rigging shelf, click
Quick Rig.

- Click the plus icon in the
Quick Rig window to create a new character.
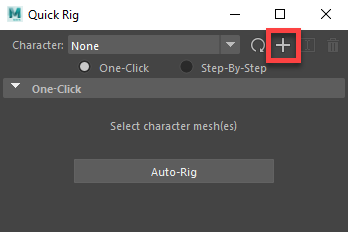
- Shift-select sven_body and sven_head, then click the
Auto-Rig button in the
Quick Rig Window.
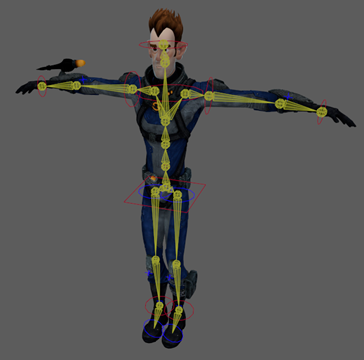
 Note: The model now has a skeleton, but if you take a look at where the joints are positioned, you'll see that they don't line up exactly. This is noticeable in the positioning of the elbow joint, which is too far towards the hand. The One-Click Auto-Rig option works best on models with as few additional features as possible. However, this can be easily fixed by using the step-by-step option.
 - Click on the trashcan icon in the
Quick Rig Window and then click OK to delete the current character (the model will remain).
Step-by-step rigging
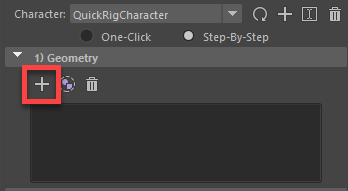
- Since the last character was deleted, click the plus icon again to make a new one.
- Click the Step-By-Step option in the
Quick Rig window.
Note: This will switch over to the Step-By-Step options. They might seem daunting, but using the tool is actually very simple. Notice how each category is numbered, showing the order to complete each step.
- Shift-select sven_body and sven_head, then select the smaller plus sign under the Geometry category.
- Under the Guides section, make sure the Embed Method is set to Imperfect Mesh and Resolution is set to 256.
Note: An imperfect mesh is one that is not sealed. Since the Sven model is made from two different meshes, there is a hole at his neck where the two meet. Even if a model is made of only one object, be sure to check for openings. The eyes and the mouth are two of the most common openings in meshes. Despite the name, having an imperfect mesh is not bad, just remember if it is imperfect when using the Quick Rig Tool.
- Select Create/Update in the Guides category.
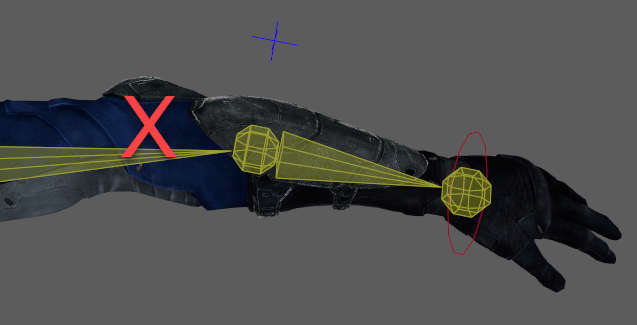
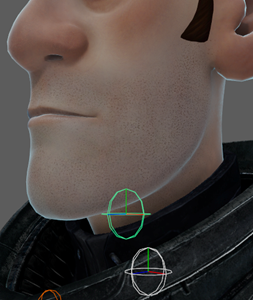
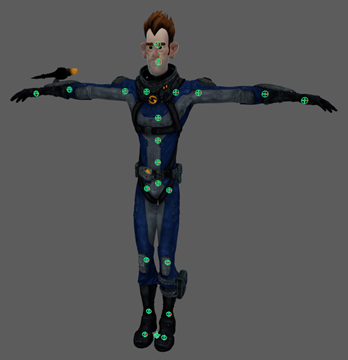 Note: A collection of guides appear over your model. These are showing where the joints will go. This is where you can adjust the guides to line them up correctly with your model.
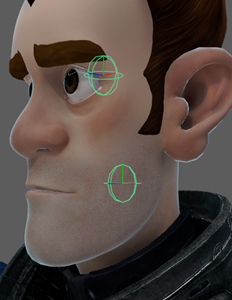
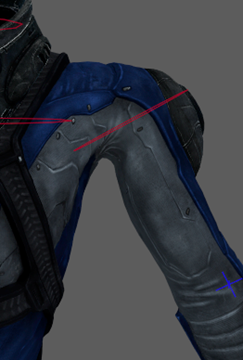
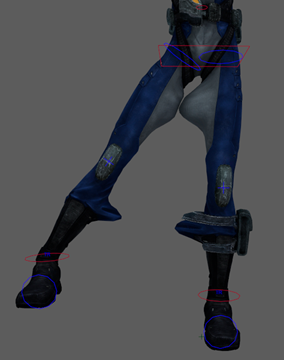
 - On the left side of the model (if you are facing his front, then your right), adjust the guides until they are lined up neatly. The guides that should need adjusting are the elbow, the wrist, the knees, the shoulders, and the two on his head and neck. Move the top one to the top of his neck, just below the jaw, and move the lower one to the bottom of his neck, just below the collar of his suit.
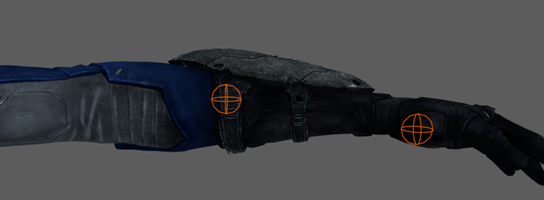
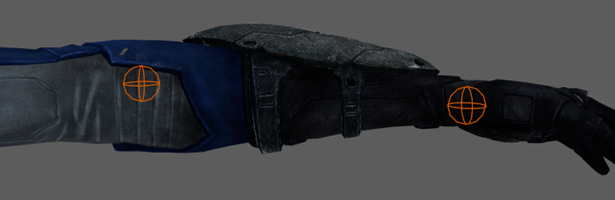
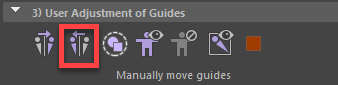
- Shift-select all the joints you've adjusted and under User Adjustment of Guides, select the
Mirror Right Guides Button. The Guides on the opposite side of the model now match.
- Under the Skeleton and Rig Generation, make sure you have T-Stance correction on, and Skeleton and Control Rig is selected.
Note: Quick Rig sets joints based on a T-Stance. T-Stance Correction is used when your model is set to an A-Stance instead. In this case, our model is already in T-Stance, but it helps to select the option regardless.
- Click Create/Update under the Skeleton and Rig Generation section to create your skeleton.
- Lastly, make sure the Binding Method under Skinning is set to GVB and then select Create/Update under the Skinning section.
You now have a properly rigged and bound skeleton, but the character rig isn't complete just yet.
Painting skin weights
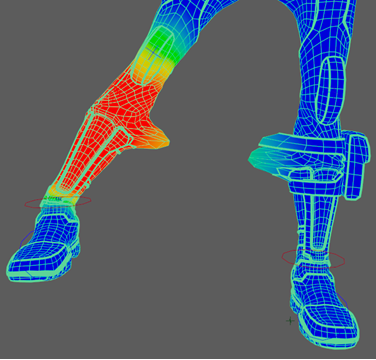
If you try moving some of your joints, you might see that they cause the model to morph in an undesired way. For example, lifting one of the legs to the side causes the sides of both legs to stretch. This is because the joints are affecting parts of the model that you do not want them to affect. This happens even when manually placing joints. In this case, the joints on the right leg are affecting the sides of the left leg, and vice versa. This can be fixed by adjusting the skin weight of these parts. Skin weight determines how much influence a joint has on a part of the model.
- Move the right leg to the side.
- Shift-Select sven_body and sven_head, then select
Skin > Paint Skin Weights >
 .
.
- Under Influences, select QuickRigCharacter_RightLeg.
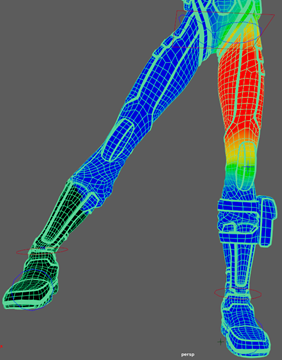
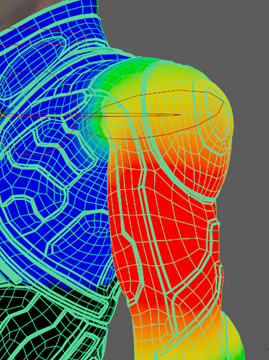
 Note: This shows which parts of the model the joint is influencing, with white being fully influenced, and black having no influence. You can also view this in color.
 - Use Color Ramp option in the Gradient Section.
- Make sure Mode is set to Paint, and Paint operation is set to Replace.
- Select the eyedropper next to Value and then select one of the dark blue parts of the leg. Your Value should be set to 0.0001. You can also set this manually.
- Drag over the left leg with the
Paint Skin Weights Tool until the side of the leg is entirely dark blue and no longer stretches.
 Note: Adjust the radius of the paint tool by holding B + drag.
 - Under Influences select QuickRigCharacter_RightUpLeg, and do the same for the upper part of the left leg.

- Repeat this for LeftLeg and LeftUpLeg.
- Select the right arm and move it down, noticing how it morphs unnaturally, forcing a gap between the underarm and torso.
- Use the
Paint Skin Weight Tool on QuickRigCharacterLeftArm, focusing on the armpit and the collar, until the shoulder looks natural.
 Note: You can use the smooth option under Paint Operation to add a more gradual shift between two colors.
 - Repeat this for RightArm.
- Continue to move the limbs of the model, including the head, looking for unnatural morphs and using the Paint Skin Weights Tool on them.
- Select sven_head, and QuickRigCharacterHead, change value to 1.0000, and click the Flood option.
 Note: This will ensure the entirety of the head's movements are controlled only by the head itself. Without it, the face will distort when turning and moving.
Reflection
Well done! You now have a model that is fully rigged, and ready for posing!
After completing this lesson you should now know how to:
- Use the Quick Rig Tool in One-Click mode
- Use Step-By-Step mode to ensure correct joint placement
- Adjust a joint's influence on the model by using the Paint Skin Weight Tool
For a video tutorial on this topic, check out Quick Rigging and Skinning a character for beginners from the Maya Learning Channel.