While texturing a flat object is fairly straightforward, texturing an object with curves can pose some unique problems. How do you paint a 2D texture on a curved surface? How do you deal with a texture warping over bumps and grooves? If you try to break apart the UV mesh as in Lesson 1, you can potentially end up with hundreds of small pieces.
To deal with these problems, artists typically use a workflow called unfolding. Unfolding a UV mesh refers to the process of cutting a seam in the UV mesh (a mesh made up of UVs similar to how a polygon mesh is made of vertices) and then unfolding along that seam. The process is similar to cutting a seam along a shirt and laying it flat on a table. By laying out the UVs this way, you can easily paint a texture on the 2D surface, which you can then wrap around the model.
In this lesson you learn how to:
- Divide a mesh into parts for texturing
- Create a planar mapping of UVs
- Pin a UV
- Unfold a mesh
- Use the Optimize Tool to fix problem areas
- Symmetrize UVs
- Stack UV shells to save space
- Use the Layout Tool to automatically arrange UV shells
- Apply a basic checker texture to find problem areas
- Snapshot a UV Map for painting textures
Open the scene
Open the scene file named Emma.mb.
This file can be found in the GettingStarted2020LessonData\UVMapping Directory.
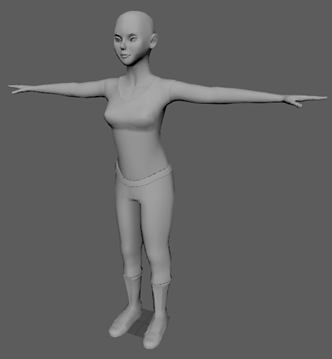
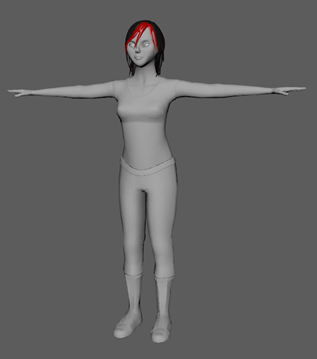
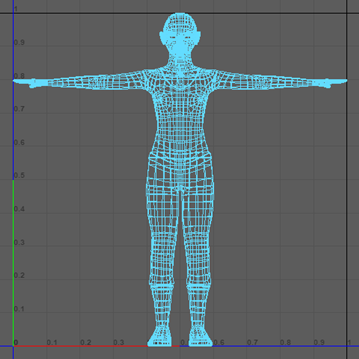
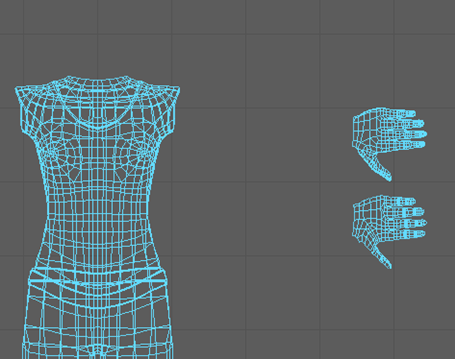
The model displayed in the scene, Emma, is untextured. Over the course of the lesson you will give her proper UV coordinates that will line up with the provided texture.
Select Emma and open theUV Editor (). The model has been split into hundreds of different UV shells (326 to be exact).
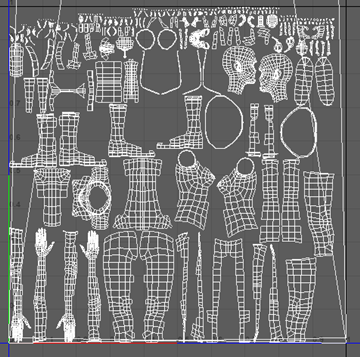
This is far too many. We need to reduce it to just a few. The easiest way to do that is by combining all the UV shells into a single one, and then splitting that up. This can be done with Planar Mapping.
Planar Mapping
- If you haven't already, select Emma and open the UV Editor ().
- In the
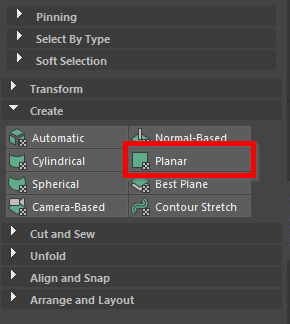
UV Toolkit, open the
Create section and Shift-click
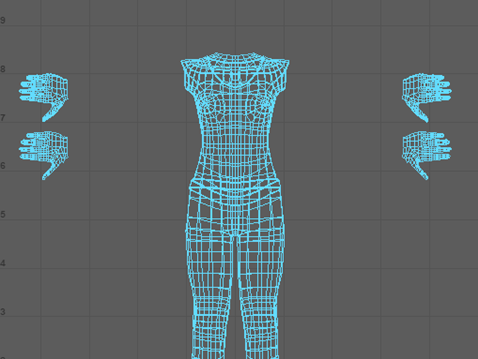
Planar. Set Project From to Z axis and press Project.
 Note: Make sure you still have Emma selected in object mode.
You've now combined all those UV shells into a single one. Now you can manually select where the seams in the model will be using the 3D Cut and Sew Tool.
Making the head into a UV shell
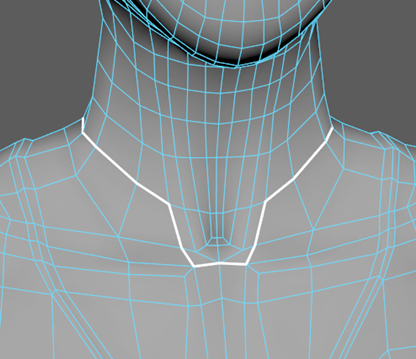
- In the main menu, select . This tool will allow you to create cuts in the UV shell of a model, which you can use for separating parts and creating seams.
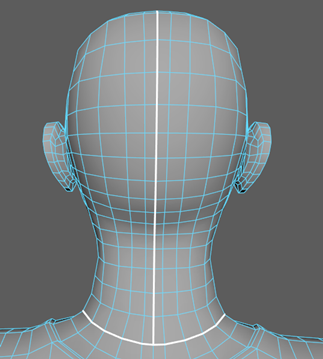
- Select the edges around the base of the neck, as seen in the image below (follow the edge loop for the back of the neck).
 Note: You can unselect and resew cuts in the model by holding Ctrl and dragging over the edges you want to resew.
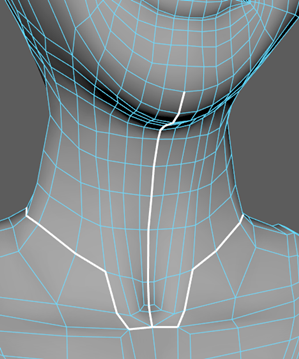
 - Now create another cut along the center of the neck moving up to the chin.
 Note: By holding Shift+drag, you can lock your selection to follow the selected edge's loop.
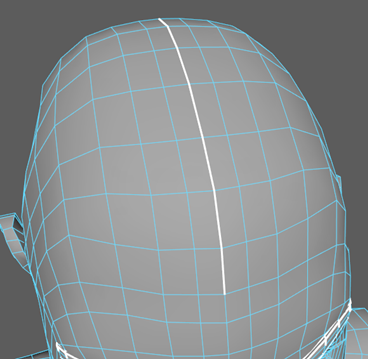
 - Create a cut along the center of the forehead, down to the back of the neck.
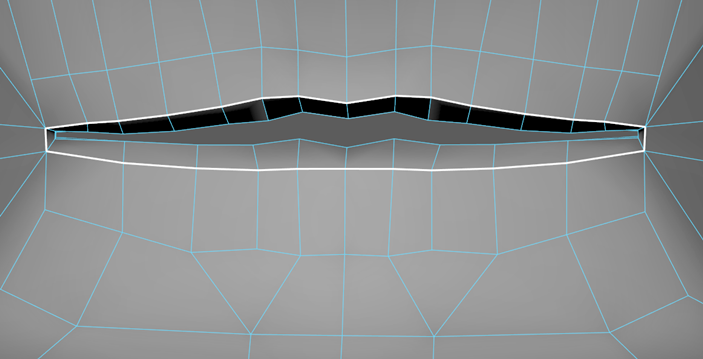
- Finally, cut the inside of the mouth, around the inner part of the lips.
- Now that you've finished making your cuts, in the UV Toolkit press UV Shell Selection. Select the head.
- In the
UV Toolkit, under the
Unfold section, press
Unfold.
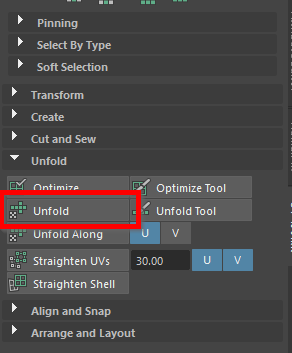
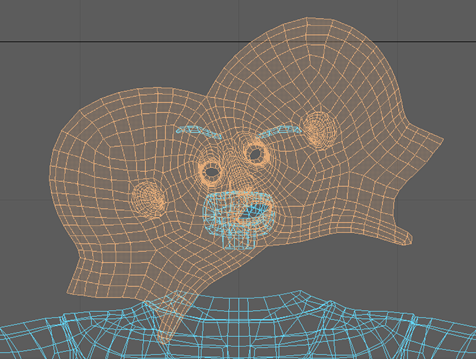 Note: The Unfold Tool will take a UV shell and flatten it so that no sides are overlapping. It is important to use the Cut and Sew Tool to make seams before unfolding a UV shell to avoid unwanted results.
 - Switch to
Edge Selection and select an edge along the center of the head UV shell, then press
Orient to Edges under
Arrange and Layout.

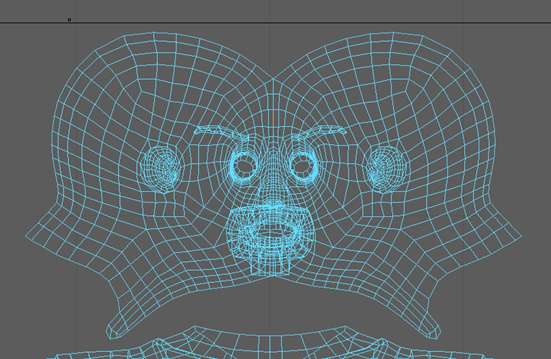
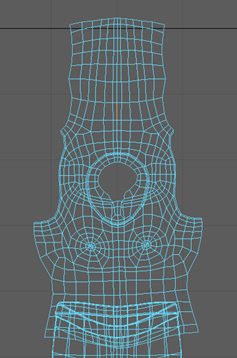
The face model now unfolds in a way that is easy to add textures to. Move the head shape and the remaining eyebrows and mouth out of the way to make room for you to work on the arms.
Making the arms into UV shells
- Set Symmetry to Object X. This will allow you to work on both arms at once.
- Select the 3D Cut and Sew Tool.
- Cut along the edges where the arm meets the shirt.
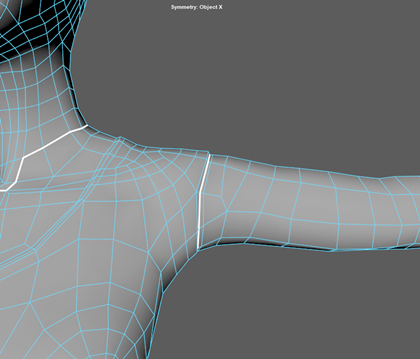
- Cut around the wrist.

- Cut a seam along the back of the arm, that goes through the elbow.
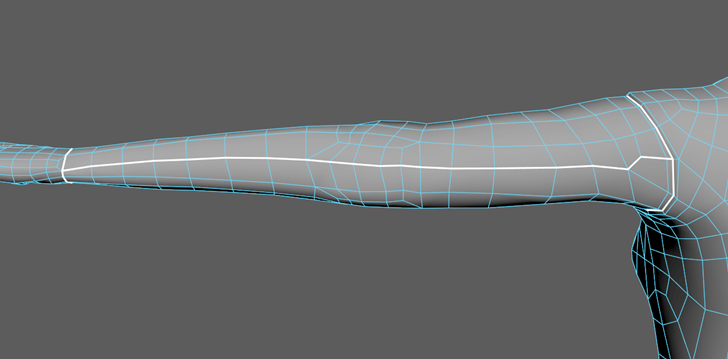
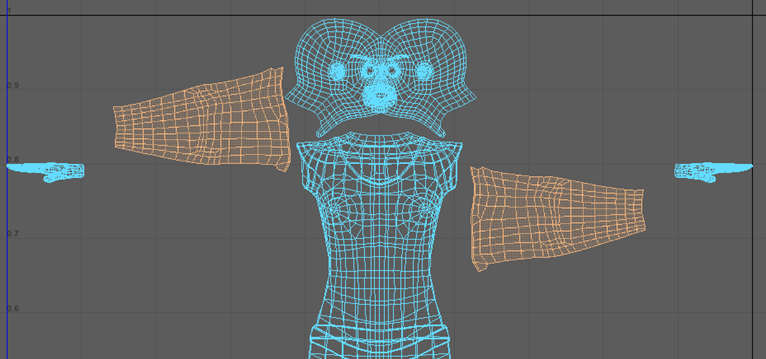
- Switch back to
UV Shell Selection and press Unfold.
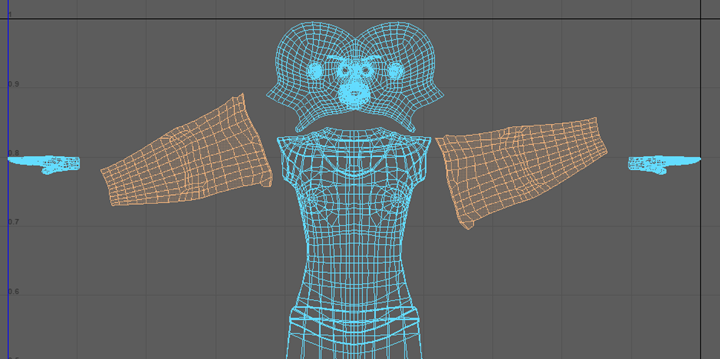
- In the
UV Toolkit, under
, use the
Rotate Tool to rotate the arm's 15 degrees, so that they're straight.
While these new UV shells are properly separated from the main torso and hands, they still need to be properly optimized.
Optimizing a UV shell
When creating UV shells, it is important to keep in mind the level of texture distortion that will occur on them. Optimizing is a way to minimize distortion without altering a UV shell too heavily.
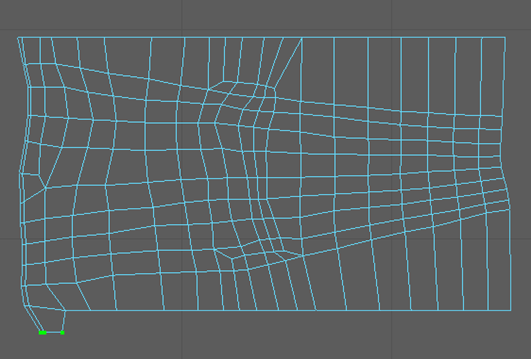
- Turn off symmetry.
- Switch to
UV selection and shift-select the top UVs on the arm, then under
Align and Snap, select
Align to Top.
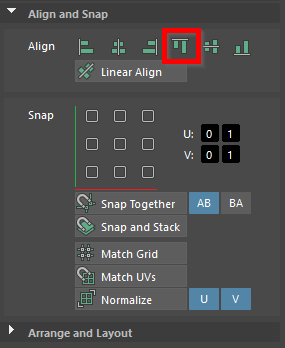
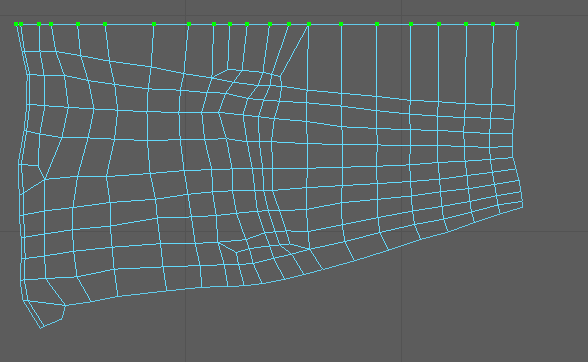
- Do the same for the bottom UVs, but use
Align to Bottom. Select the UVs on the left bump separately.
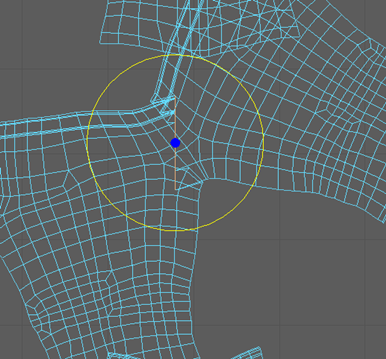
- Select the UVs along the top and bottom border and then pin them using the
Pin Tool under the
Pinning section.
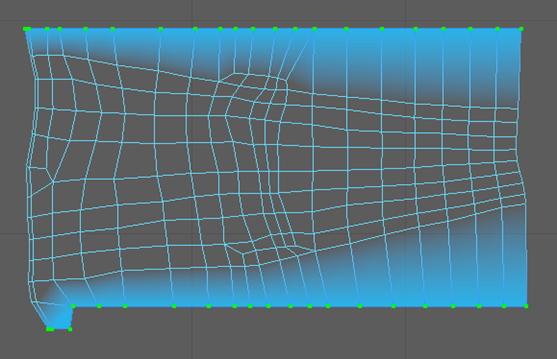
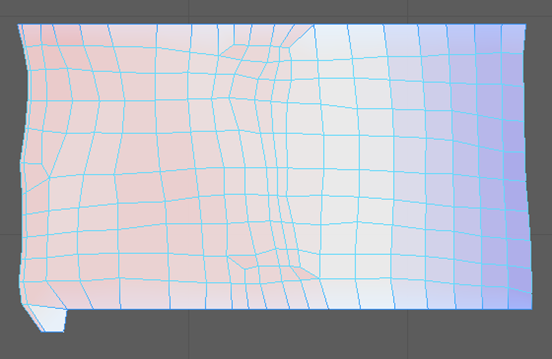
- You can see the level of distortion on a UV Shell by pressing the
UV Distortion Identify icon
 in the
UV Editor menu. Areas that are white have no distortion, areas that are blue are compressed, and areas that are red are stretched.
in the
UV Editor menu. Areas that are white have no distortion, areas that are blue are compressed, and areas that are red are stretched.
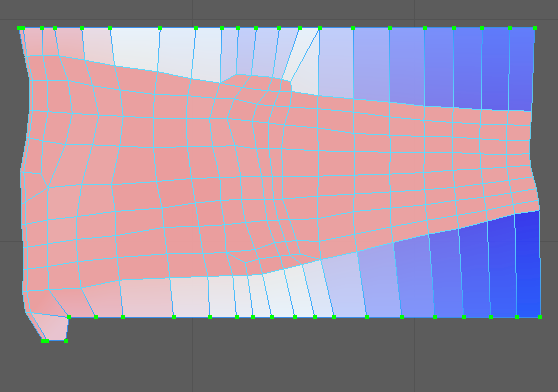
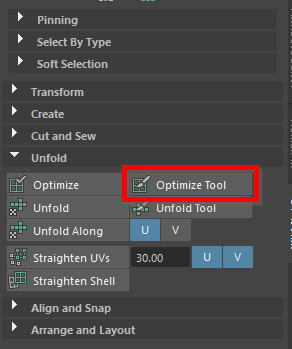
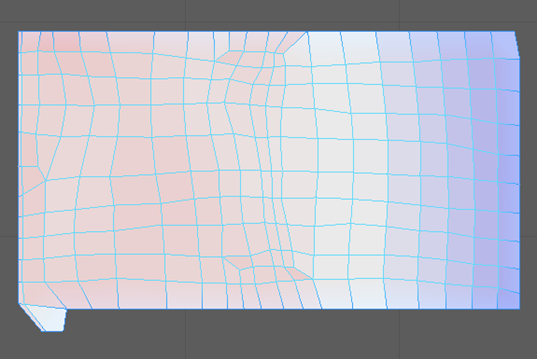
- Select the
Optimize tool from the
Unfold section and drag it over the arm.
- Align and pin the left and right sides of the arm like you did in step 2 to 4. This time use Align to the Left, and Align to the Right respectively.
- Use the
Optimize Tool on the arm again.
- Unpin all the UVs using the Unpin Tool in the Pinning section.
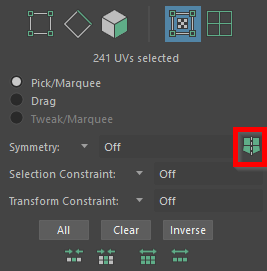
- Marquee select the arm and press
Symmetrize in the
UV Toolkit, then select an edge directly along the middle of the torso.
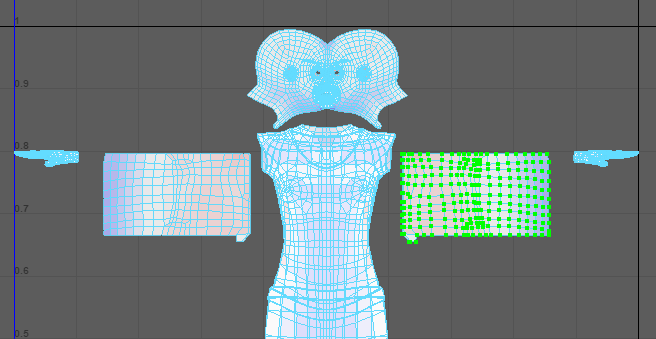
You now have two arm UV shells that are optimized. Move them to the side so they don't get in the way. Now it's time to make UV shells for the hands.
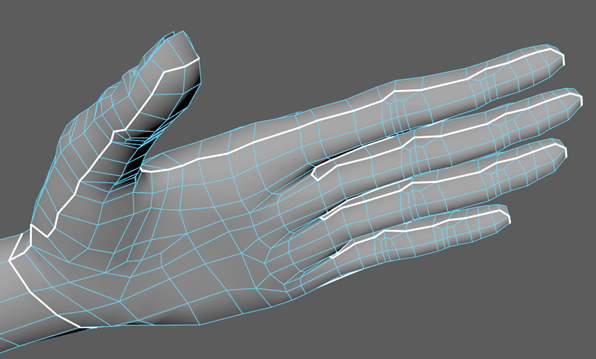
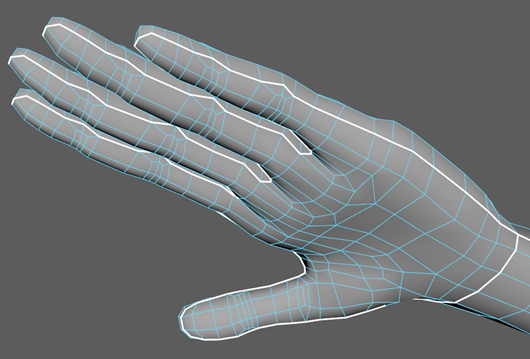
Making the hands into UV shells
- Turn symmetry back on (Object X).
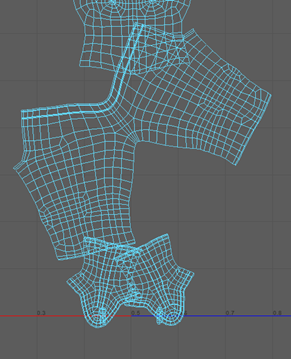
- Cut along the sides of the hands, as seen in the images below.
- Turn off symmetry.
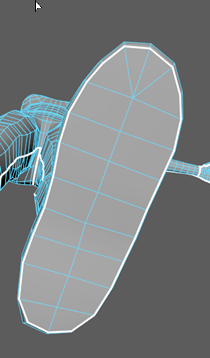
- Now that you've cut through the sides of the hand, select the top part with
UV Shell Selection and Shift+click
Planar under the
Create section. Change Project From to Y axis and click Project.
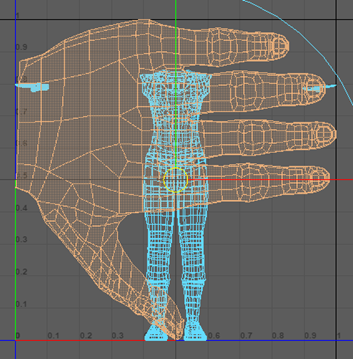
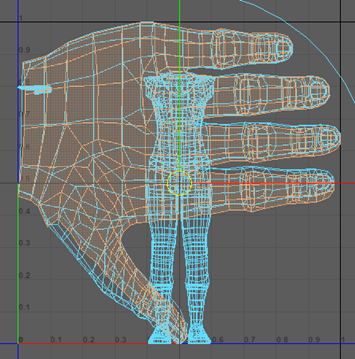
- Do the same for the lower half of the hand.
 e
e
- Scale these hands down to roughly their original size.
- Select both hands and press
Symmetrize in the
UV Toolkit, then select an edge directly along the middle of the body.
Well done, cutting along the sides of the hands was the hardest part. The rest of the cutting is quick and easy!
Cutting the remaining UV shells
The only UV shells we have to cut out now are the torso, the legs, the boots, and the soles. Most of the torso cutting was already done when we cut the head and arms.
- Turn on Symmetry (Object X).
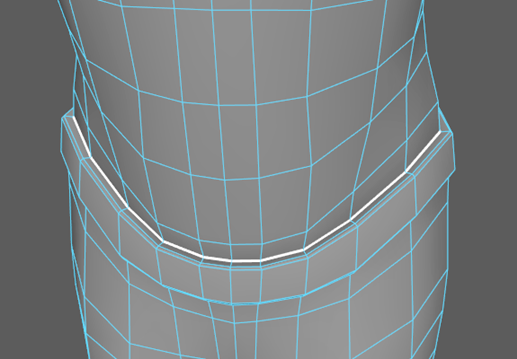
- Select
3D Cut and Stitch Tool and cut a circular seam around the waist, where the belt connects with the torso.
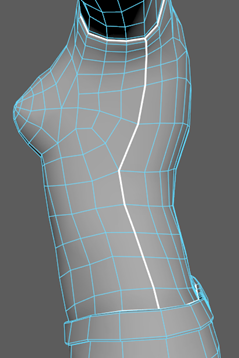
- Make two more cuts, one on each side of the torso, connecting the cut you just made around the waist to the underarms.
- Now make a cut along the center of the rear, stopping right between the legs.
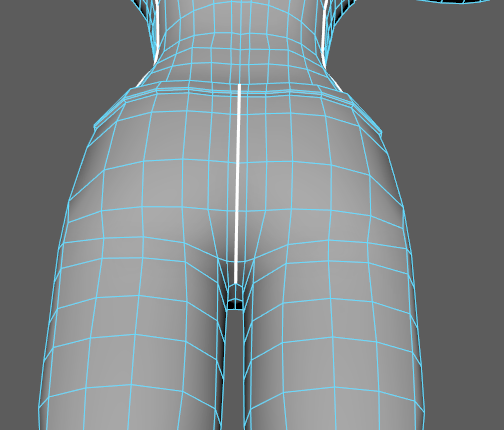
- Continue along the inner side of each leg, stopping where the boot and the pants meet.
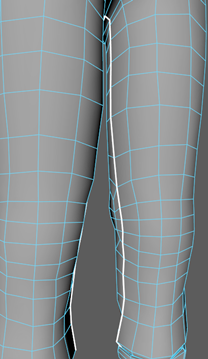
- Cut a circular seam around where the boots and the pants connect.

- Cut a line down the back of the boots down to the sole.

- Lastly, cut around the soles of the boots.
- Turn off Symmetry.
Phew, that was a lot of cutting! But that's all the cutting we have to do for this lesson. Now that the cutting is done, the rest of the lesson will be about properly arranging and cleaning up our UV shells.
Optimizing the remaining UV shells
- Switch to
UV Shell Selection and select the torso. Under the
Unfold section in the
UV Toolkit, select
Unfold. The torso will flatten to show both sides now.
- Select an edge along the middle of the torso and press
Orient to Edges under
Arrange and Layout.
- Use the
Unfold Tool on the pants, boots, and soles too. Do not use the
Orient to Edges Tool on them.
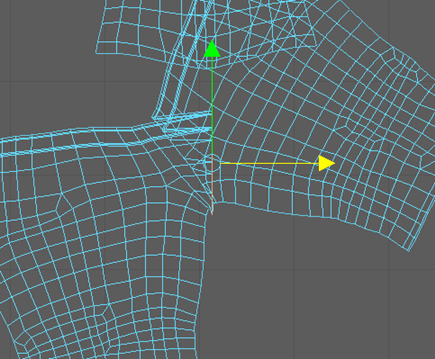
- Switch to
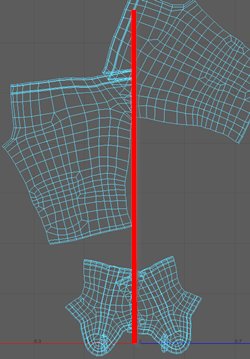
Edge Selection and select the edge of the pants UV shell that runs vertically through the middle. Use the
Rotate Tool to make it straight, then move it to the middle of the pants UV shell.
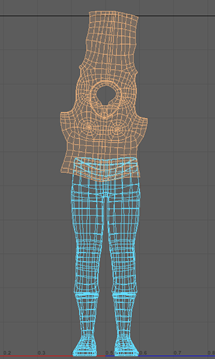
- Move the pant's UV shell to the center of the approximate center of the UV space.
- Under
in the
UV Toolkit, select
Symmetrize. Assign the line of symmetry to the edge that you rotated in step 4.
Note: This tool is similar to the Symmetrize function you used earlier. The biggest difference is that you can manually control what is mirrored by painting.
- Drag over the right pant leg until both sides match.
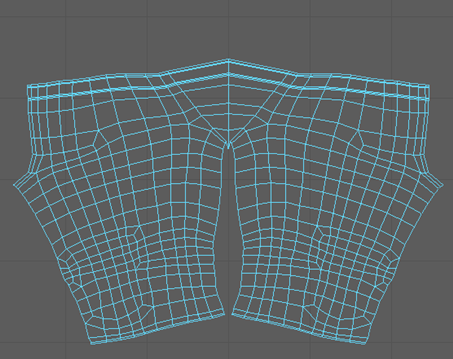
- Use the
Optimize Tool on just the crotch region of the pants.
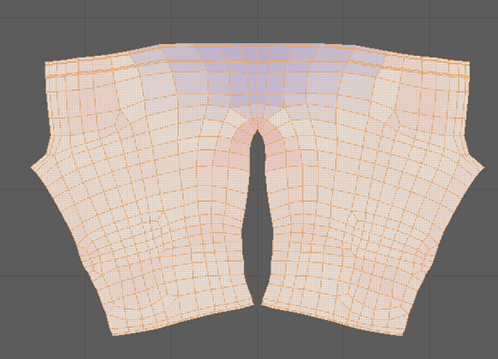
- Use the
Align Tool and
Pin Tool, just like you did for the arms, until the pants match the image below (remember to align the inner edges of the pants). Use the
Optimize Tool on the UV Shell.

- Don't forget to unpin the pinned UVs before continuing to the next step.
You now have all the UV shells you need. But there are still a few more things you can do to ensure you have high-quality UV mapping.
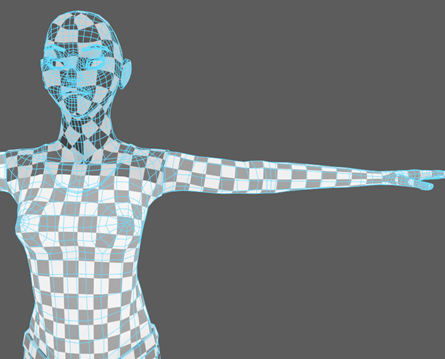
Before arranging the UV's, make sure to look for any areas of major deformation. This can be done by pressing the Checker Map button in the UV Editor. This assigns a default texture to the model. Use the perspective camera to look around the model for any areas where the checkered texture is stretched or warped in any significant way.
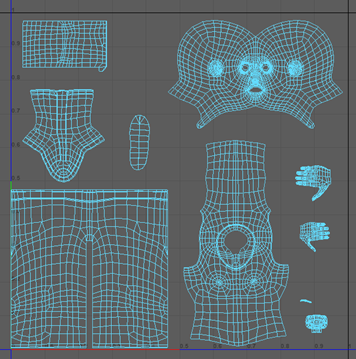
Arranging the UV map
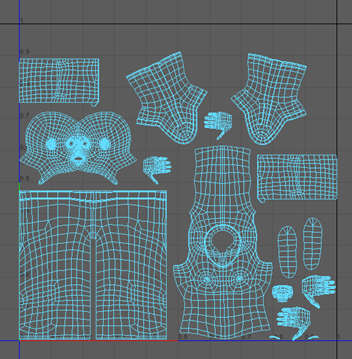
Now that the shells have all been properly cut and optimized, it is time organize them. In most cases, you should have all your UV shells in the single box between 0 and 1 for both the X and Y values in the UV Editor with no overlapping.
- Marquee-select all the UV shells.
- Shift-click
Layout under the
Arrange and Layout section. In the
Layout UVs Options window, set Shell Padding to 20 and press Layout UVs.
 Note: The Layout UVs Tool automatically fits all the UV shells into the proper area without overlapping them. Since you added Shell Padding, the Layout Tool gives a bit of space between each shell.
Almost done! The last thing you need to do is stack any redundant UV shells. Look for any parts of the model that look identical and could share the same texture. In this case, that would be the arms, boots, soles, eyebrows, and hands. You can merge these by using the Stack Tool.
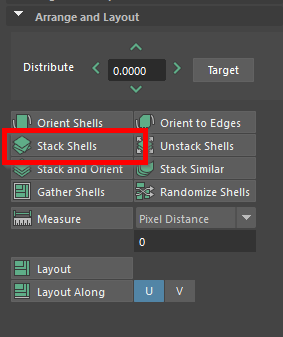
- Select one of the arm UV shells and press Flip under in the UV Toolkit.
- Now Shift-select the other arm's UV shell and press
Stack Shells under
Arrange and Layout.
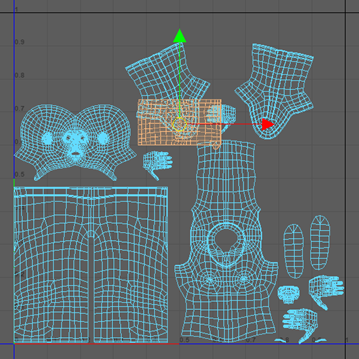 Note: There are still two separate UV arm shells, just overlapping. When you move them, make sure both are selected.
 - Repeat steps 1 and 2 for the boots, the soles, the eyebrows, and both sides of the hands.
 Note: If the shells don't line up exactly, then press Orient Shells under the Arrange and Layout section before stacking to set them to the same rotation.
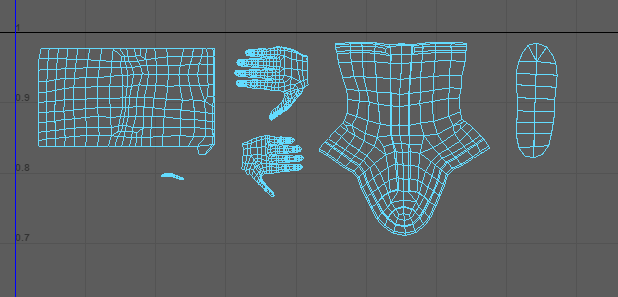
 - Move the new UV shells so that there is no overlapping with separate parts. Be sure to remain within the square of 0 to 1.
 Note: In this image the head UV shell has been scaled up. Increasing the scale of a UV shell will allow for that part to have greater detail when adding textures.
Using your UV map
Congratulations, you've just completed your UV map! You can make a copy for texturing by marquee-selecting all your UV shells and pressing the
Snapshot button
 in the
UV Editor menu. From there you can create a 2D image file.
in the
UV Editor menu. From there you can create a 2D image file.
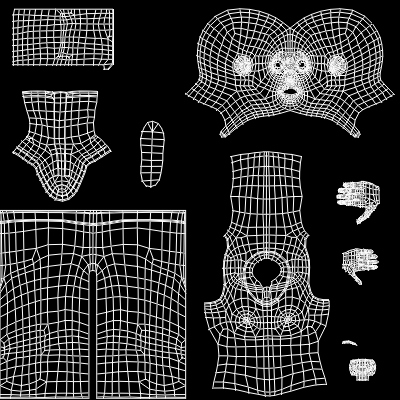
This will give you a layout of your current UV map which you can use as a template for painting on textures.
There is a texture image that has already been completed for you called emma_UV. This file can be found in the GettingStarted2020LessonData\UVMapping\sourceimages Directory.
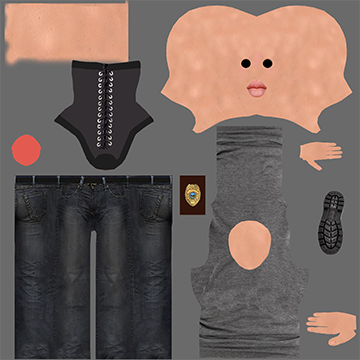
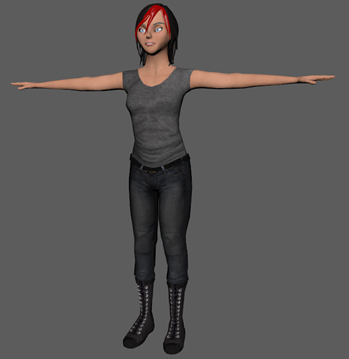
By following the steps that you learned in Lesson 1, you can use emma_UV on your current UV map to give Emma's model a proper texture. It is no different from how you loaded the texture for the Cracker Box. You will need to move, scale, and rotate your UV shells to match emma_UV. Don't forget to set the head_features_LYR layer as visible.
Beyond the lesson
In this lesson you learned how to unfold a UV mesh so that you can create a texture for a complex organic mesh. You should now be able to:
- Divide a mesh into parts for texturing using the 3D Cut and Stitch Tool
- Create a planar mapping of UVs
- Pin and unpin a UV
- Unfold a mesh using the Unfold Tool.
- Use the Optimize Tool to fix problem areas
- Symmetrize UVs with both the automatic and painting method.
- Stack UV shells to save space
- Use the Layout Tool to automatically arrange UV shells
- Apply a basic checker texture to find problem areas
- Snapshot a UV Map for painting textures
For a video tutorial on this topic, check out UV Mapping Game Assets: Character from the Maya Learning Channel.