You use Sven as the surface to be bound to the skeleton.
To bind the skeleton using smooth skinning
- Shift-select sven_body and sven_head.
- Ctrl-select the back_root joint.
The back_root joint is at the base of Sven’s spine. If you are not sure which joint it is, select it in the Outliner.
- Select
Skin > Bind Skin >
 .
.
-
In the
Bind Skin Options window, set
Max Influences to 3 and Bind method to Geodesic Voxel, then set then click
Bind Skin.
A Max Influences value of 3 specifies that three joints influence each skin point. By default, the joint closest to the point has the most influence. The second most influential joint is that joint’s parent or child joint, whichever is closest to the point. The third most influential joint is the nearest parent or child of the second joint. The influence drops with the distance from the joints. The amount of influence each joint has on any skin point is the skin weight.
The default skin weights create smooth deformations of the skin at elbows, knees, and elsewhere as the nearby joints rotate.
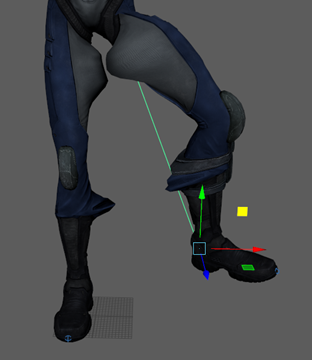
- Select and move any or all of the four IK handles to pose the arms and legs in various positions in order to get used to posing with the IK handles.
To select an IK handle, drag a selection box around a wrist or ankle joint. To move a handle, use the Move tool to drag the handle in the desired direction.
Note:You can also select the IK handles in the Outliner. The handles are indented under SvenSkeleton. Each is named for a leg or arm, for example, ikHandleLeftLeg. For more details on IK handles, see Skeletons and kinematics.
-
If you prefer to turn off the skin’s transparency so you can see the skin more clearly, turn off
Shading > X-Ray.
Do not be concerned that the skeleton pokes through the skin, as the skeleton is not displayed in a rendered image.
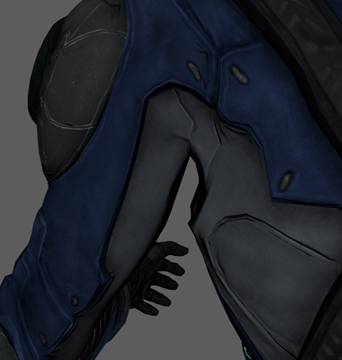
As you pose the arms and legs, examine the skin in the regions where joints bend. For many poses, the skin looks natural. For others, the skin folds, compresses, or bulges unnaturally. The pelvis, shoulders, and torso are common problem areas for various poses. For example, if you move one of the legs out, the sides of the legs stretches as in the following figure. This is because the legs joints have some influence over the opposite leg. As another example, the side of the torso compresses unnaturally when moving the arm.
There are two ways to improve the smooth skin deformations:
- Add an influence object to eliminate collapsing regions or to create muscle bulge.
- Edit skin weights—to remove minor lumps or indented regions. For example, you can fill out an undesirable concave region at the chest that appears when you move the arm to certain poses.
The following procedures explain the techniques.