To define an existing skeleton for HumanIK
- Open the file
HIKSkeleton.mb.
This file can be found in the GettingStarted2020LessonData\HumanIK directory that you set as your Maya project.
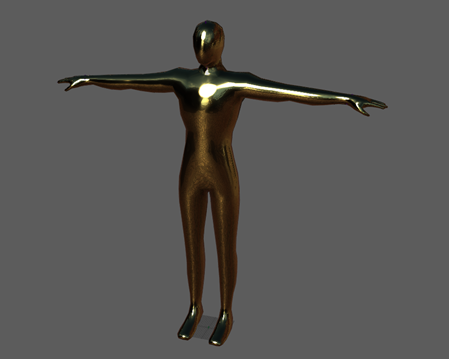
A character appears in the Maya scene.
- From the panel menu, select Shading > X-Ray Joints to see your character's skeleton.
- Select
Skeleton > HumanIK to open the
Character Controls window.
The window opens to its Start pane.
- Under the Create category, select Create Control Rig, then select Define in the window that appears.
This creates a new HumanIK character (named Character1 by default) and opens the HumanIK tool.
-
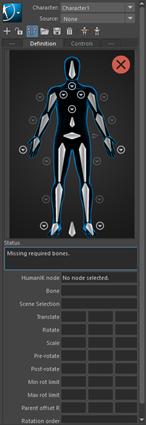
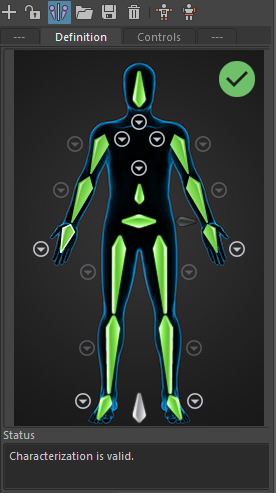
The Definition tab lets you map the structure of your skeleton. The Character view is that window showing a human figure. It contains cells that identify the main joints (nodes) in your character's skeleton: the ankles, knees, hips, spine base, shoulders, elbow, wrists, and head. There are fifteen required nodes you must map to ensure that Maya understands the structure of your character.
- Select
 > Rename Character and rename the character as
Humanoid. Click
OK.
> Rename Character and rename the character as
Humanoid. Click
OK.
 -click anywhere in the Character view and select
Name Match View from the menu that appears.
This view gives you an overview of your skeleton definition. Bones are listed in groups according to their related body part or IK effector. Note that the required nodes are grouped under the heading Base (required).
-click anywhere in the Character view and select
Name Match View from the menu that appears.
This view gives you an overview of your skeleton definition. Bones are listed in groups according to their related body part or IK effector. Note that the required nodes are grouped under the heading Base (required).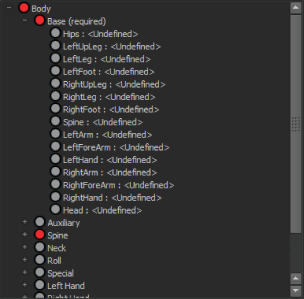
- Return to the Character view (-click anywhere in the Character view window and select
Character View from the menu that appears) and begin mapping Humanoid's structure using one of the following methods:
- Go from the Character view to your skeleton: Double-click a cell in the view (cells turn blue when picked), then click the corresponding bone in the scene.
For example, double-click the LeftUpLeg node in the Character view, then click the corresponding bone in the scene (Humanoid:LeftUpLeg).
The LeftUpLeg node turns green to indicate a valid mapping. Since Mirror Matching is on by default in the Definition tab toolbar, the RightUpLeg node is also automatically mapped based on the standard l_ and r_ bone naming for left and right sides of the character's body.
- Go from the skeleton to the
Definition tab: Select a bone then
-click the corresponding cell in the Character view and select
Assign Selected Bone.
For example, select the Humanoid:Hips joint, then
-click the
Hips node in the Character view.
Tip: You can also use the Outliner (Window > Outliner) to select your character's joints. Turn on Show > Objects > Joints in the Outliner before you make a selection.When you are finished, the mappings for Humanoid are as follows:Note: When mapping the hands, the HumanIK tool will show an error. This is intentional for the lesson, and is fixed in the next step.Base(Required) bone Humanoid character joint Hips Humanoid:Hips LeftUpLeg Humanoid:LeftUpLeg LeftLeg Humanoid:LeftLeg LeftFoot Humanoid:LeftFoot RightUpLeg Humanoid:RightUpLeg RightLeg Humanoid:RightLeg RightFoot Humanoid:RightFoot Spine Humanoid:Spine LeftArm Humanoid:LeftArm LeftForeArm Humanoid:LeftForeArm LeftHand Humanoid:LeftHand RightArm Humanoid:RightArm RightForeArm Humanoid:RightForeArm RightHand Humanoid:RightHand Head Humanoid:Head Note: For this character, you do not map a Reference object, however mapping a Reference object for your own characters is strongly recommended. For more information on mapping a Reference object, see Create > Locator in the Maya User Guide.
- Go from the Character view to your skeleton: Double-click a cell in the view (cells turn blue when picked), then click the corresponding bone in the scene.
- Return to the Character view (-click anywhere in the Name Match view and select
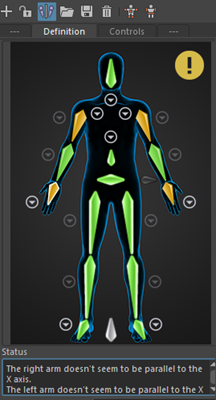
Character View) and notice the yellow validation status indicator.
This indicates there is a problem with the mapping. To create a valid skeleton definition, Humanoid needs to be in a T-stance, the default pose for character setup. This pose provides the HumanIK solver with crucial information about the proportions of your character's skeleton and its joint transforms. The T-stance has the following requirements:
- The character must face along the positive direction of the Z-axis.
- Both arms must be spread along the X-axis.
- The top of the character's head must be up, in the positive direction of the Y-axis, and it must face forward on the positive direction of the Z-axis.
- The character's hands are flat, palms facing the ground, with the thumbs parallel to the X-axis.
- The character's feet need to be perpendicular to the legs (with the toes pointing along the Z-axis). The feet must not be rotated around the Y-axis (meaning the toes of the left foot do not point inward toward the right leg or outward away from the right leg).
Humanoid appears to be in a T-stance, but as the validation status error message indicates, its arms are not parallel to the X-axis.
- Click Humanoid's LeftArm joint in the scene.
- Using the
Channel Box (Display > UI Elements > Channel Box/Layer Editor), adjust the following transform attributes for the
Humanoid:LeftArm object to match the following values:
- Rotate X: 1.158
- Rotate Y: -40.063
- Rotate Z: 177.96
In the Character Controls, the LeftHand and LeftArm cells are now green, indicating that Humanoid's left arm is now parallel to the X-axis.
- Click Humanoid's RightArm joint in the scene.
- Using the
Channel Box, adjust the following transform attributes for the
RightArm object:
- Rotate X: 0.825
- Rotate Y: -40.148
- Rotate Z: 177.947
In the Character Controls, the validation status indicator turns green, indicating that the skeleton definition is valid.
- (Optional) You can continue to map other optional joints, such as additional spine joints or roll bones by using the methods described above.
Note: Click the circular arrow buttons
 to switch views to a particular body part (neck, shoulders, spine, hands, feet) to better select optional joints.
The following optional nodes can be mapped:
Optional bone Humanoid character joint Spine1 Humanoid:Spine1 Spine2 Humanoid:Spine2 Neck Humanoid:Neck LeftUpLegRoll Humanoid:LeftUpLegRoll LeftLegRoll Humanoid:LeftLegRoll RightUpLegRoll Humanoid:RightUpLegRoll RightLegRoll Humanoid:RightLegRoll LeftArmRoll Humanoid:LeftArmRoll LeftForeArmRoll Humanoid:LeftForeArmRoll RightArmRoll Humanoid:RightArmRoll RightForeArmRoll Humanoid:RightForeArmRoll