In this lesson, you will be learning how to add three different types of lights to your scene. Lighting is a very important part of rendering. Lighting is capable of completely altering the mood of a scene, and can make or break a good design.
Open the Scene
Open the scene file named Lighting.mb.
This file can be found in the GettingStarted2020LessonData\Rendering Directory.
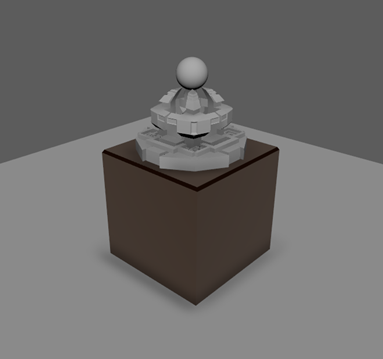
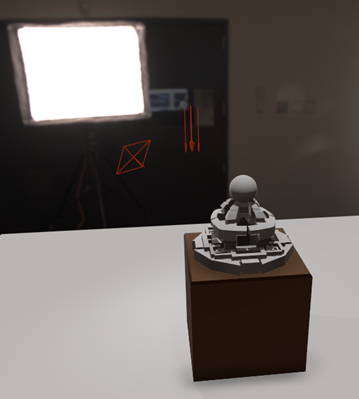
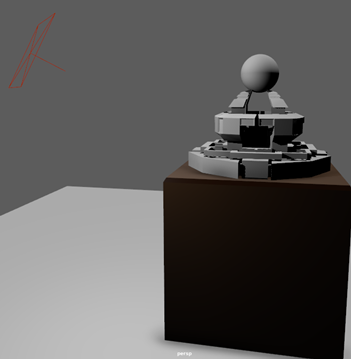
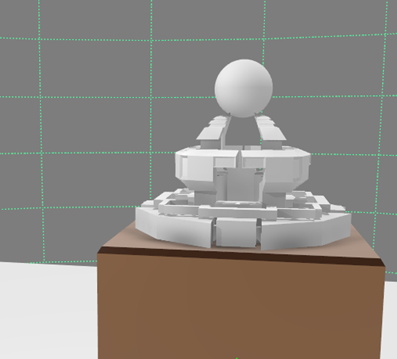
The scene shows a sculpture on a pedestal, with a ball resting atop it.
Before beginning, make sure that your view panel settings are properly set. You should have Textured, Shadows, Ambient Occlusion, and Anti-Aliasing all turned on. They can be toggled by pressing the following buttons in the View Panel Toolbar.

Rendering the scene
Try to see how the scene will look by rendering it. It is a good practice to regularly render your scene using low-intensity settings to get a preview of how it will look in the final render.
- Position the camera so that it is focused on the sculpture.
- In the Status Line, select the
Render Current Frame button.

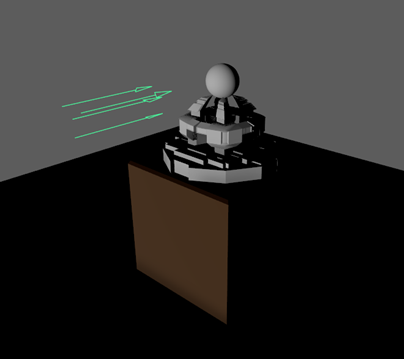
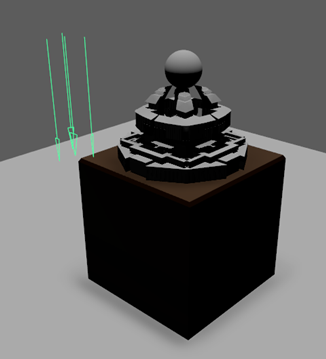
In Maya, three of the more useful lights to use are Directional, Area, and Skydome. To start, you'll be adding a directional and an area light to your scene.
- Turn on
Use All Lights in the View Panel Toolbar.
 Note: All the objects in the scene will turn black. This is because there are no lights in the scene, and the viewport lighting has been turned off. By toggling this setting, you can see the effect of any lights in your scene.
 - Switch to the Rendering Shelf if you are not already on it.
- Press the
Add Directional Light button. Move and scale the newly made directionalLight1 so that you can clearly see the object.

 Note: Directional Lights create a light that goes in a single direction, and covers the entire scene. Moving it, and changing the scale of the Directional Light object will not affect the light. Only rotations have an effect.
 -
Rotate the directional light so that it shines directly down on the sculpture.
- In the
Rendering Shelf, press the
Add Area Light button. In the
Attribute Editor, turn off
Normalize.
 Note: The light from an Area Light comes directly from the object itself. Moving and rotating the object will affect the light, and if Normalize is turned off, scaling will also affect how the light is displayed.
 - Position the Area Light so that it is slightly above the sculpture and shining down on one of its corners.
- Adjust the Intensity of both lights as desired.
Adding a skydome light
Skydome lights act as a circular light, surrounding the scene. It also has another added feature. Skydome lights can use Image Based Lighting to give your scene a background and specialized lighting.
- Switch to the Arnold shelf.
- Select the
Create Skydome Light button.

- In the
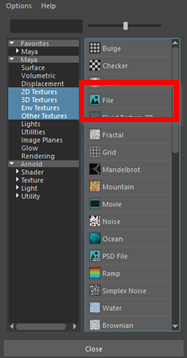
Attribute Editor, select the palette button to the right of the Color setting and select File.

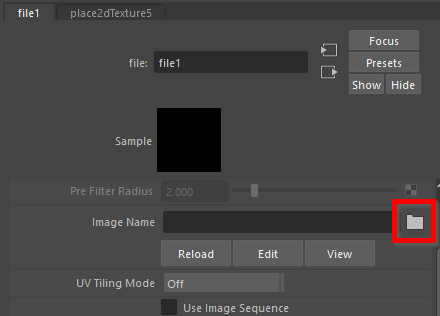
- Click the Browse button next to Image Name, and select studio.exr from the Rendering folder.

The skydome light now has an image assigned to it. Not only does this give your scene a background, but if you look closely, you'll see that the skydome now has lighting that matches the background. This will be more noticeable in the next lesson, once you add textures.