Facial animation is an integral component of character animation. The face of a character can be animated to impart a range of emotions and expressions. In Maya, expressions can be made with a rigged face, or by using the Shape Editor and sculpting tools. The advantage of using the Shape Editor is that you can set individual expressions and swap between them freely, or even combine them with varying strengths for each one.

- Use the Shape Editor to create targets
- Create expressions with the Pull Tool
- Alter the weight of each target to swap between and alter expressions
Open the scene
Open the scene file named ShapeEditor.mb.
This file can be found in the GettingStarted2020LessonData\CharSetup Directory.
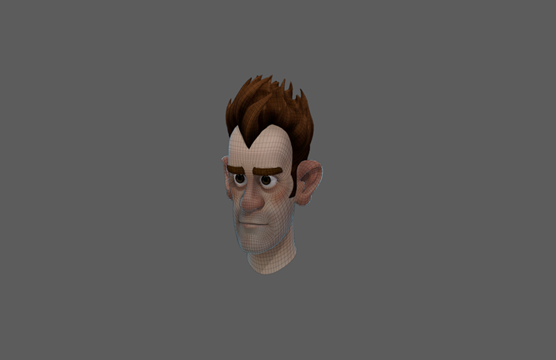
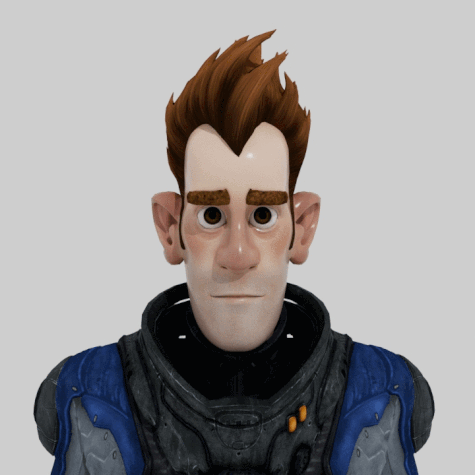
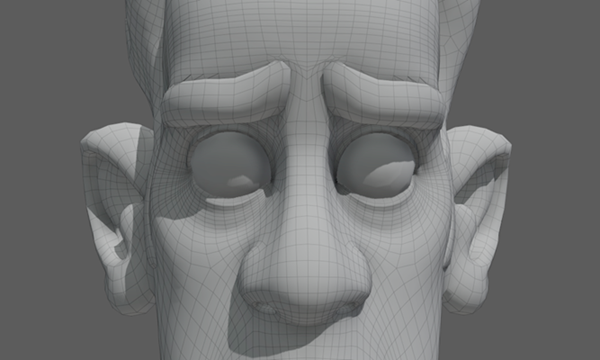
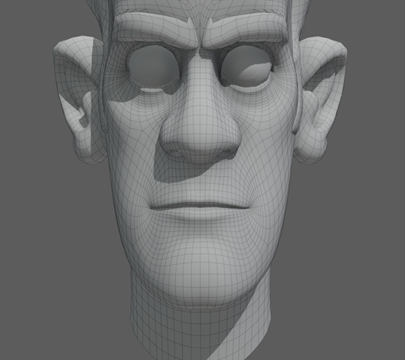
This scene shows only Sven's head. Sven's expression is currently neutral, but by using the shape editor you'll be able to make him effectively emote.
Shape editor
The Shape Editor acts as a manager for each sculpting edit you make to a model. It is capable of creating different targets, which act like layers. You can make an edit, and then adjust the weight of that transformation. Before making any sculpting edits to a shape, you should always make a new target.
- Switch to the
Sculpting shelf and select the
Shape Editor. This will open the
Shape Editor window.

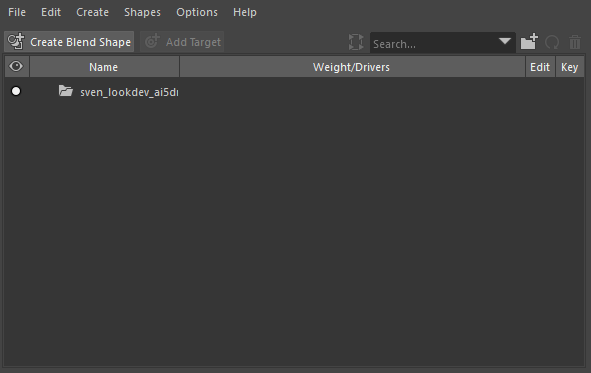
- Select sven_head from the Outliner and then click Create Blend Shape.
- Click Add Target.
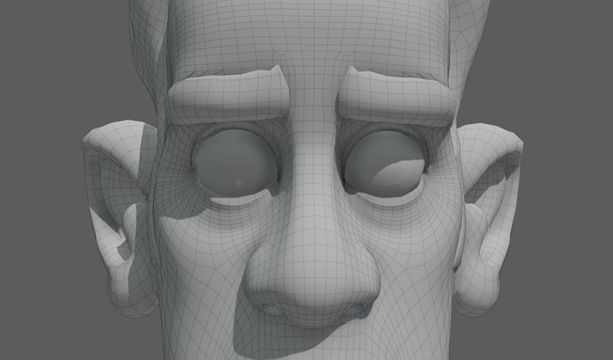
To see how a target works, try using one of the sculpting tools to make an edit to the model. Change the weight of the target to see how the edit is affected. By using the Shape Editor, you can switch between lots of variations in a model, such as expressions.
Making expressions
Now that you know how to make targets, it is time to begin sculpting.
- If you made any edits since making your first target, then delete the target and click Add Target again to create a new one.
- Double click the target's name and rename it worry_eyebrows.
- Set symmetry to Object X in the Status Line.

- If Maya is running slowly, turn on
Use Default Material in the View Panel Menu.

- Double-click the
Pull Tool from the sculpting shelf. Under the
Pull Tool settings, turn on Grab Silhouette.
 Note: For expressions, most sculpting edits are done using the pull tool.
 - Using the
Pull Tool, raise the inner parts of the eyebrows. Remember that you can adjust the tools radius by holding B + dragging.
- In the Shape Editor, click Add Target again. Name this one frown. Notice how the Edit option next to worry_eyebrows is now greyed out. By clicking the edit button in the Shape Editor, you can choose which existing target to edit.
- Using the
Pull Tool, pull the sides of the mouth down into a frown.
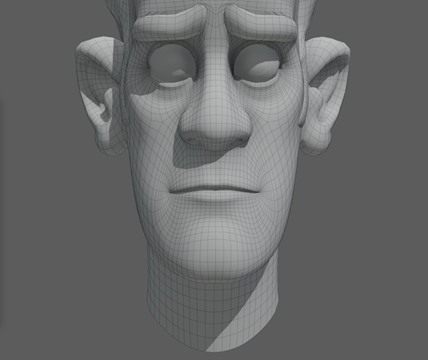

- Set both worry_eyebrows and frown's weight to 0. The face will reset to neutral.
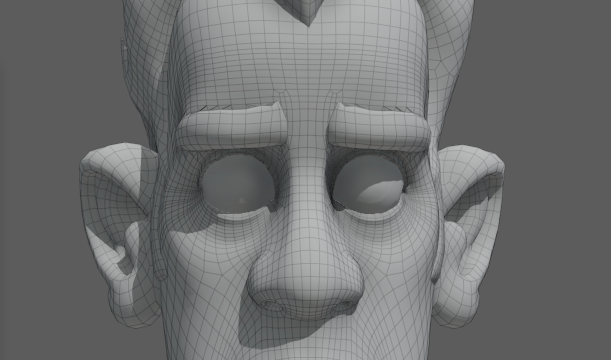
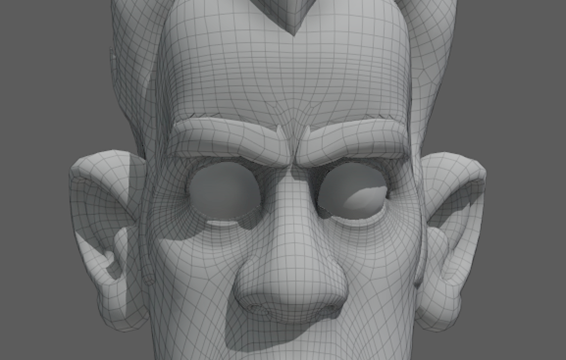
- Create another target and name it angry_eyebrows.
- Pull the eyebrows together and downwards.
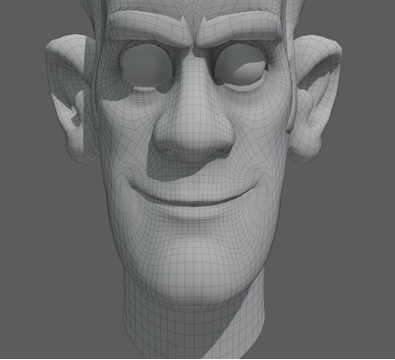
- Create another target and name it smile.
- Pull the sides of the mouth up into a smile.
 Note: You could also turn off symmetry to give him a smirk.
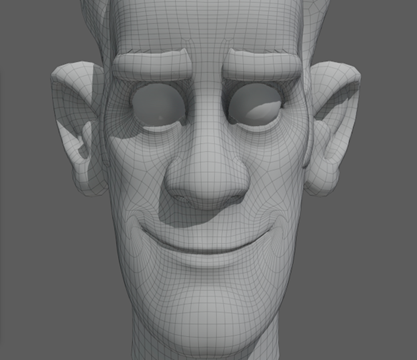
 - Now let's add one more expression. Set angry_eyebrows weight to 0 and create another target. Name it happy_eyebrows.
- Raise the eyebrows, focusing on the middle. Be careful not to move the eyelids too much.
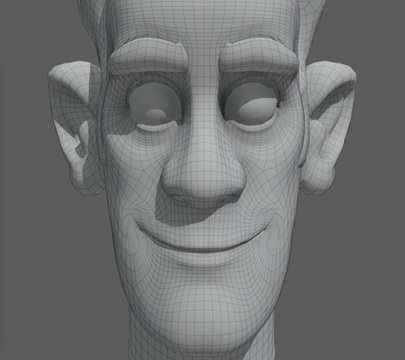
Congratulations! You now have a set of different expressions that you can freely switch between. You can even try combining a few. For example, angry_eyebrows and worry_eyebrows together give a stern appearance. In contrast, worry_eyebrows and happy_eyebrows gives a surprised look. You can also adjust the weight to do things like give Sven only a tiny smile.
Reflection
After completing this lesson, you should now know how to:
- Use the Shape Editor to create and switch between new targets
- Create different expressions by using the Pull Tool
- Switch between expressions using the target weight slider
You may have noticed that none of these expressions have Sven open his mouth. That is because Sven was not modelled with teeth, and because mouth movements work best with rigging. For large movements, use a rigged skeleton, and for small or simple movements, use the shape editor. Don't forget that you can always use both!
- Make more expressions with the Pull Tool
- Try combining different targets with different weights to make different expressions
- Use the key button in the Shape Editor to animate your expressions changing