
In the previous lesson, you gave the objects in your scene color. Now it's time to give your existing materials some enhanced detail.
Open the scene
If you completed lesson 2, you can use your edited scene for this lesson. Otherwise, you can open the scene file named advanced.mb.
This file can be found in the GettingStarted2020LessonData\Rendering Directory.
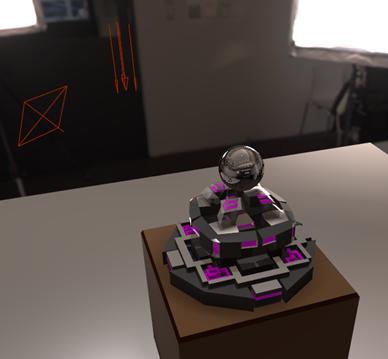
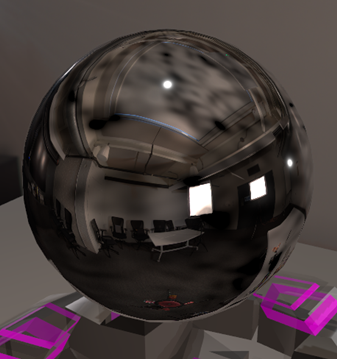
The scene contains a sculpture atop a pedestal, holding a ball. The scene is lit, and the models have color.
Opening Hypershade
- In the Status Line, select the
Hypershade window.

Adding surface imperfections
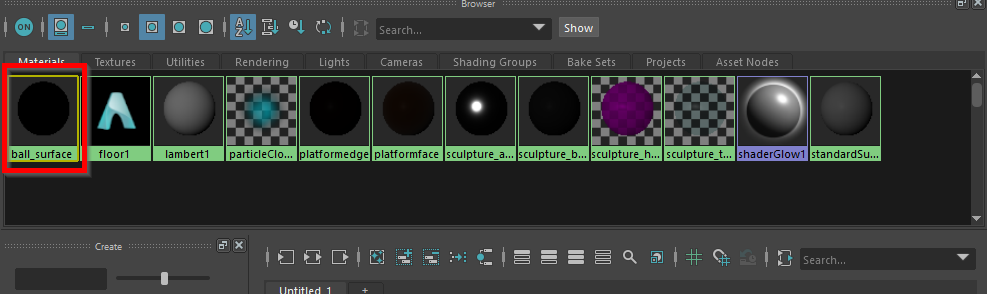
Few surfaces are as perfect as the ball held on the sculpture. There are a few different things you can do to add imperfections to the ball. To start, lets add some dirt to the ball.
- Select ball_surface in the
Hypershade window.
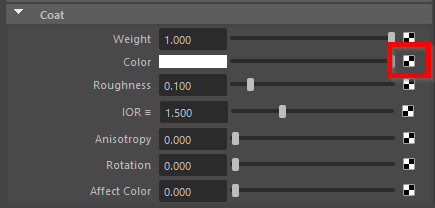
- Scroll down to Coat, and select the palette button to the right of the Color setting.
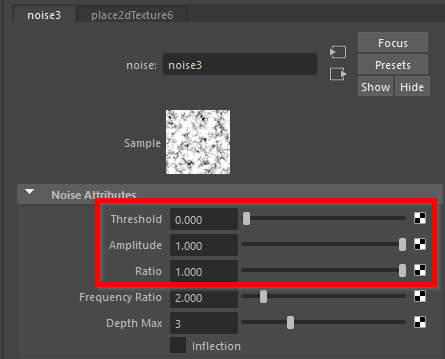
- Select Noise.
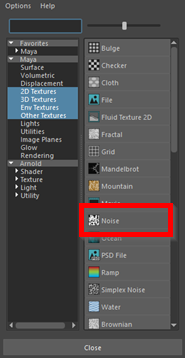
- Now set the Threshold to 0, and the Amplitude and Ratio to 1.
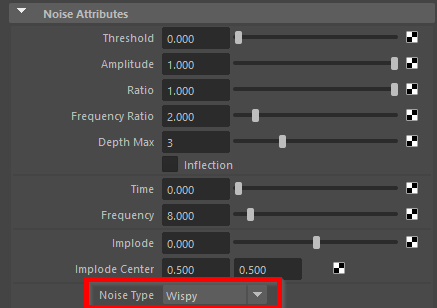
- Set Noise Type to Wispy.
- Optionally, do the same for sculpture_base.
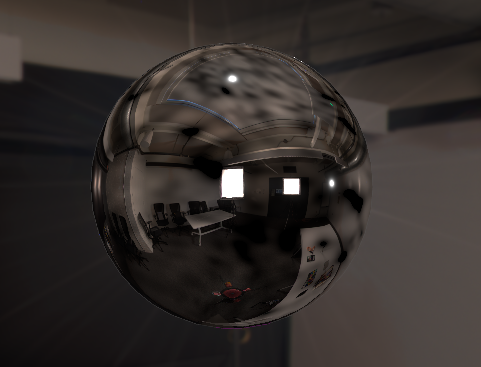
The surface of the ball now has irregular markings over its surface. We can also change the surface of the ball to make it appear bumpier.
- Select ball_surface in the Attribute Editor.
- Scroll down to Geometry, and select the palette button to the right of Bump Mapping.
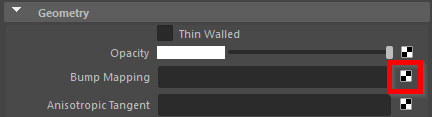
- Select Noise.
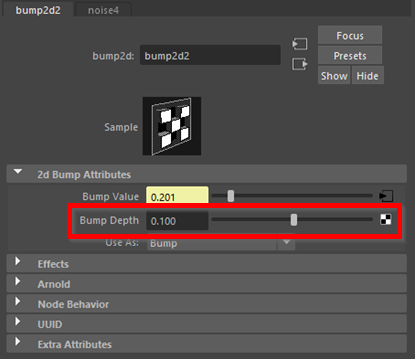
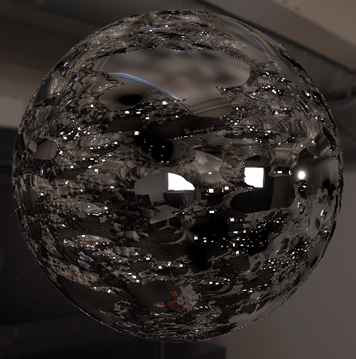 Note: This will appear very bumpy. We can always reduce the intensity of the setting by lowering the Bump Depth.
 - In the bump2d1 tab that just appeared in the Attribute Editor, set Bump Depth to 0.1.
- Optionally, you can also apply a bump map to sculpture_base by repeating these steps for that material.
Using the Work Area.
The Hypershade has some pretty impressive techniques that can be done with the Work Area. The Work Area functions similarly to the Node Editor, giving you access to all the individual things that go into creating the appearance of a material. For this lesson, we'll be looking at two of the simpler things you can do with the Work Area. To start, you will be toggling the visibility of the ball's bump mapping.
- In the
Hypershade window, there is a tab called the
Work Area.
 Note: It's good practice to keep this tab clean, to make finding desired material nodes easy.
 - Select the
Clear Graph button.

- In the Materials list, select ball_surface, and then press the
Add Selected Nodes To Graph button.

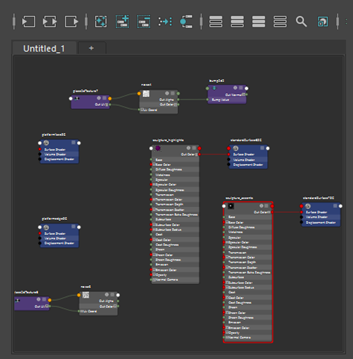
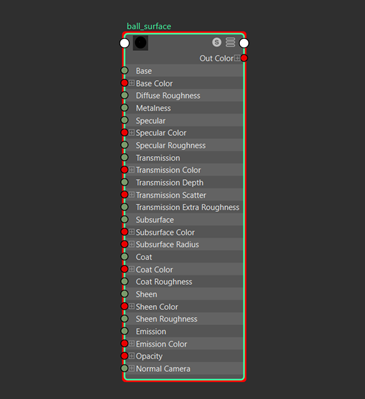 Note: This is a Node. It shows the inputs and outputs of your material. However, right now we can't see any of the other nodes that are connected to ball_surface.
 - Select the
Show Input and Output Connections button.

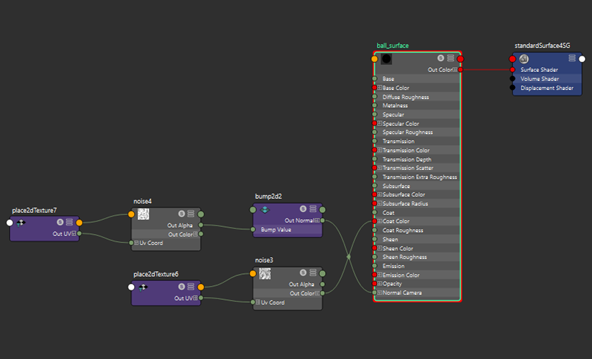 Note: That's better! Now you can see all the nodes connected to ball_surface. See how the noise you choose feeds into the bump map node, which then connects to ball_surface? This is where you can cause nodes to affect, or stop affecting other parts of different nodes. This is how you can toggle the influence of the bump mapping.
 - Drag the line connecting the bump map node's Out Normal value to Normal Camera on the ball_surface node. Look at the Ball in the perspective view.
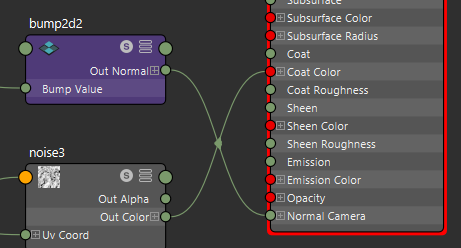
By disconnecting and reconnecting the line between those two attributes, you can toggle the effect on and off. This is a good for a quick comparison.
Another cool feature of the Work Area is the ability to use textures as bump maps.
- Select ball_surface, and press the palette button to the right of Base Color.
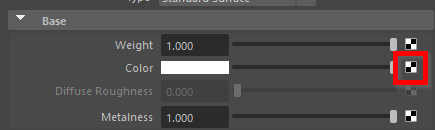
- Select File.
- Press the browse button in the new
Attribute Editor tab and assign the texture as the sphereeye.jpg file located in the GettingStarted2020LessonData\Rendering Directory.
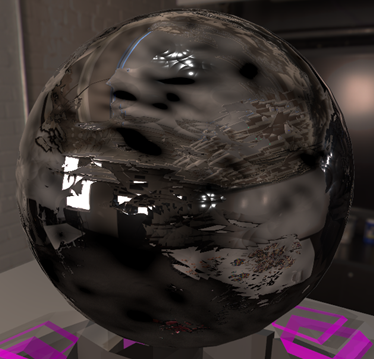
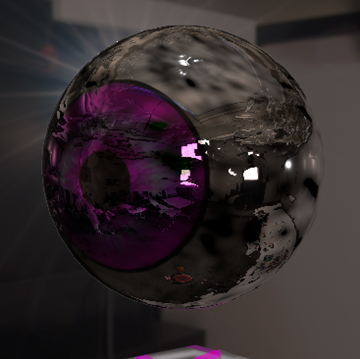 Note: The texture appears, its quite hard to see with all the other things affecting the sphere. However, it is possible to give the texture some definition by using the Work Area.
 - In the Work Area, select ball_surface and press Show Input and Output Connections.
- It will be connected to ball_surface's Base Color attribute.
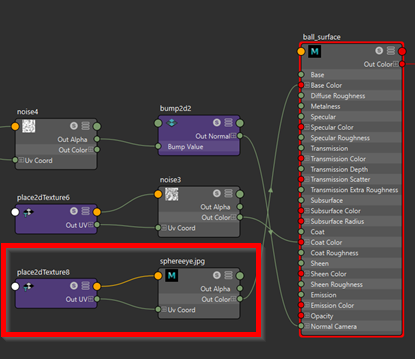
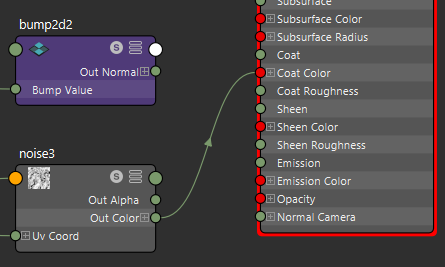
- Drag on the green circle to the right of Out Alpha, and drag it over to Bump Value on the bump map node.
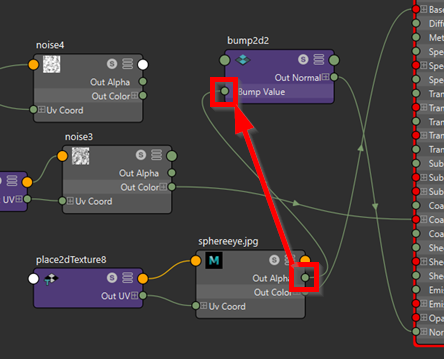
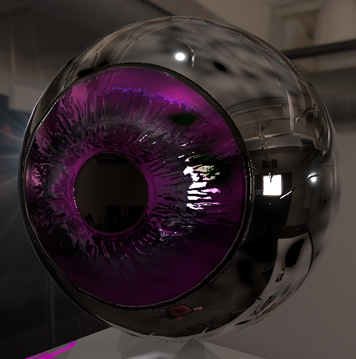
The bump mapping now matches the texture, giving the eye added definition. Whenever you want to give your texture some added definition, this is a great way to do it.
Render settings
- Click the
Render Settings button in the Status Line.
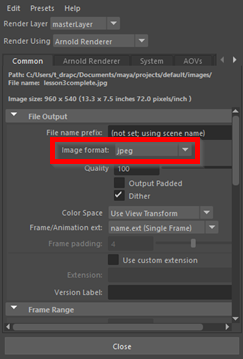
 Note: In the new Render Settings window, you'll be given lots of options. For this lesson, we'll stick to making a single, high-quality .jpeg format render.
 - Under Image format, switch the format to jpeg.
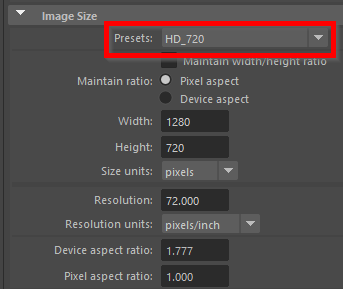
- Scroll down to Image Size and under Presets, select HD_720.
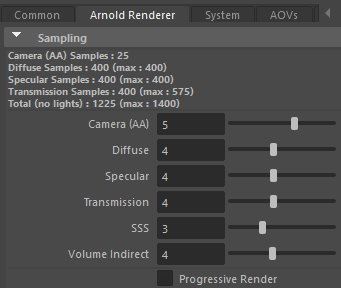
- Switch to the
Arnold Renderer tab and then under Sampling, change the settings to match the following:
Camera (AA) - 5, Diffuse - 4, Specular - 4, Transmission - 4, SSS - 3, Volume Indirect 4.
These settings are a good starting point whenever you want to make your final render. Keep in mind that rendering with these settings will take a very long time, multiple hours long. Even with dedicated systems for rendering, animated movie studios take hours to render a single frame.
Beyond The Lessons
After these past three lessons, you should now know how to:
- Render a scene using the Render Current Frame button
- Add directional and area lighting to a scene
- Create a Skydome light and give it a background
- Give objects materials with different attributes and colors
- Use noise to create random patterns in both material coats and bump maps
- Use the Work Area to toggle bump map visibility
- Match a bump map to a texture with the Work Area
- Adjust render settings for high-quality renders
For a video tutorial on this topic, check out Lighting and shading your rocket from the Maya Learning Channel.