When you create a HumanIK skeleton using Maya's
Skeleton Generator, a valid skeleton definition is already built-in. This means you don't have to map the character joints to define the character structure.
To create a skeleton using the Skeleton Generator
- Open a new Maya scene by selecting File > New Scene.
- Select Skeleton > HumanIK to open the Character Controls window.
- From the
Start page, click
Create Skeleton in the
Create section of the
Start pane.
A new HumanIK character (called Character1 by default) with a valid skeleton definition is loaded into the scene and the Skeleton, Definition, and Controls tabs appear in the Character Controls window.
- Click the
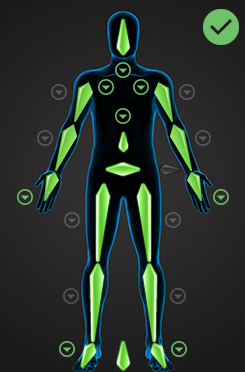
Definition tab.
Note that the validation status indicator is green, which means the skeleton definition is valid.
- Zoom out until you can see your character. It has been loaded in a T-stance, which is the default pose for character setup.