
In this lesson, you'll learn how to:
- Create 3D primitive objects
- Move, Rotate, and Scale objects
- View objects from different angles
- View objects in wireframe or shaded mode
- Change the shape of objects by moving vertices, edges, and faces
- Assign materials to objects
- Light a scene
- Render a final beauty image
Before the lesson
- To make sure that Maya appears and operates as it does in the lessons, set Maya to default preferences.
- Learn the correct names for each section of the Maya Interface.
Moving the camera
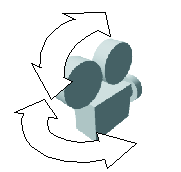 Tumble - Hold the Alt (Windows) or Option (Mac) key + left-click drag the mouse to rotate the camera around a point of interest.
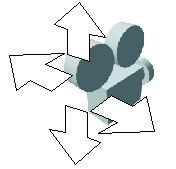 Track -
Hold the Alt (Windows) or Option (Mac) middle-click drag the mouse to pan the camera up, down, or sideways relative to the camera's perspective.
Note: On a 2-button mouse, you can hold Command + left-click drag the mouse to mimic the middle mouse button.
Track -
Hold the Alt (Windows) or Option (Mac) middle-click drag the mouse to pan the camera up, down, or sideways relative to the camera's perspective.
Note: On a 2-button mouse, you can hold Command + left-click drag the mouse to mimic the middle mouse button. Dolly -
Hold the Alt (Windows) or Option (Mac) key + right-click drag the mouse to move the camera in and out.
Dolly -
Hold the Alt (Windows) or Option (Mac) key + right-click drag the mouse to move the camera in and out.
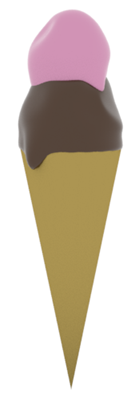
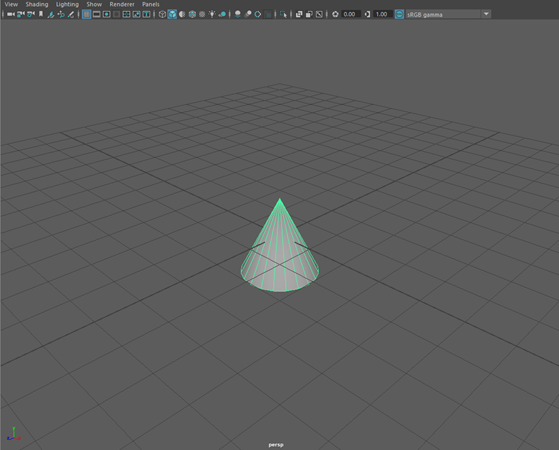
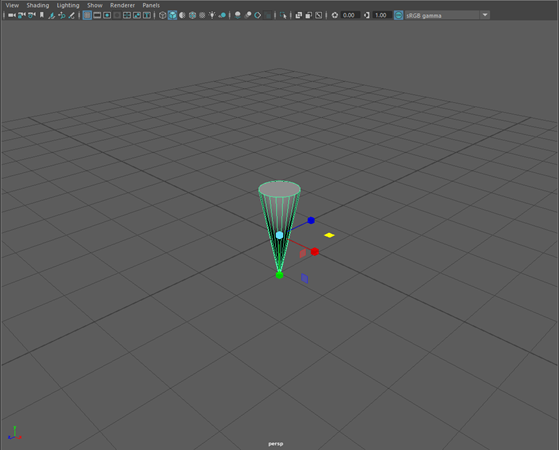
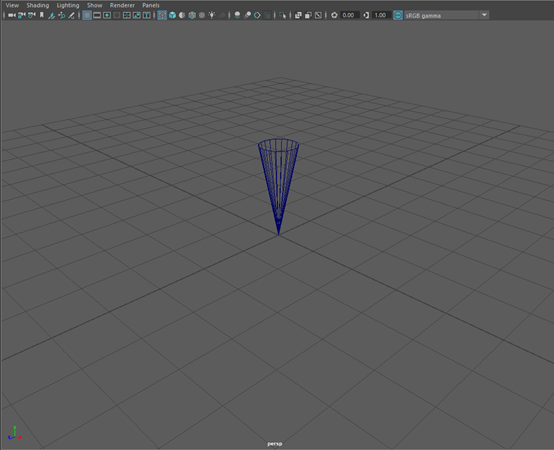
Making the cone
- Switch to the Poly Modeling shelf.
- Click the
Polygon Cone button on the
Poly Modeling shelf.

- Select the
Rotate Tool from the
Toolbox (Hotkey:
E) and rotate the cone upside down. Do this by either:
- Dragging the red or blue handle to manually rotate the cone around an axis. You can hold J while dragging to snap to 15 degree increments, making a precise 180 degree rotation easy. Snapping also works for scaling and moving.
- Opening the
Attribute Editor or
Channel Box in the upper-right corner (
 ), selecting "pCone1", and changing the
Rotate X or
Rotate Z rotate attribute to 180.
), selecting "pCone1", and changing the
Rotate X or
Rotate Z rotate attribute to 180.


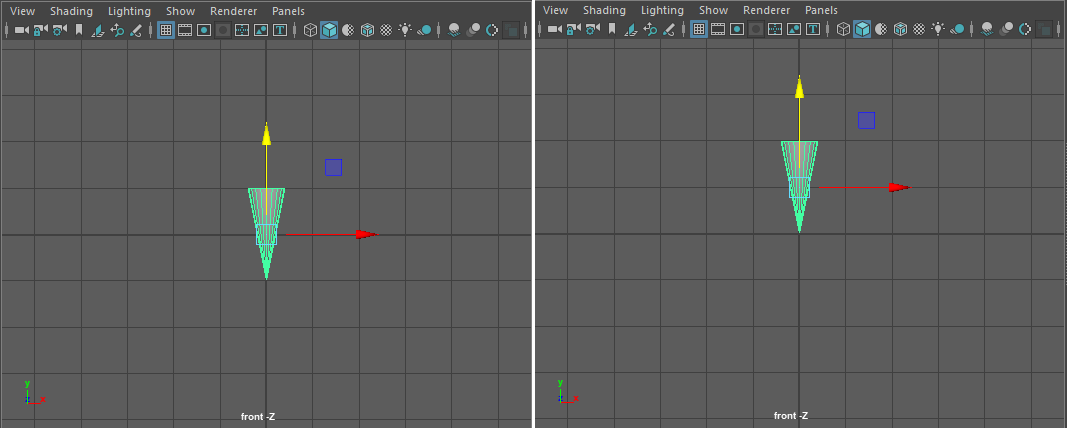
- Select the
Scale Tool on the
Toolbox (Hotkey:
R) and scale the cone along the Y-axis (by dragging the green manipulator) until it resembles an ice cream cone.

- In the
Tool Box, select
Four View (Hotkey:
Spacebar).
This displays all four default cameras at the same time: top, persp, front, and side. You can find the camera names at the bottom of each Viewport panel.

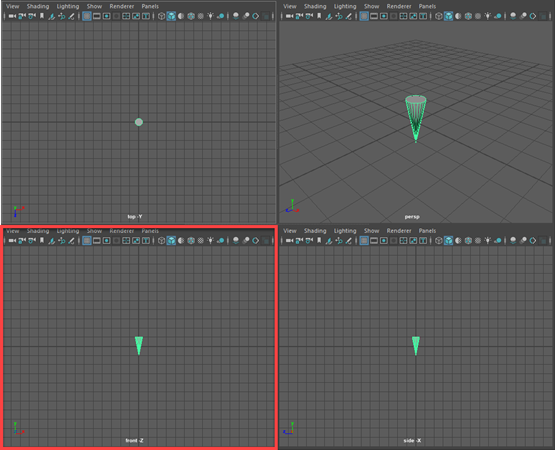
- Select the
Move Tool (Hotkey:
W) move the cone in the "front -Z" panel so that it's standing on the grid.

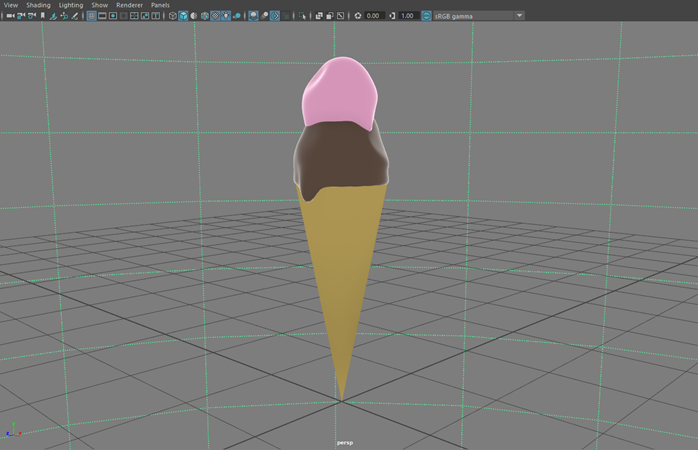
 Note: Four View gives you a front, side, and top view, alongside the perspective view. Objects can only be moved in two dimensions on the non-perspective views, making them useful for precise editing.
 - Place your cursor in the "persp" view, then hit Spacebar again to enlarge it.
- With pCone1 selected, go to the
Attribute Editor (visible on the far right vertical column in the image below) and change its name from "pCone1" to "Cone".
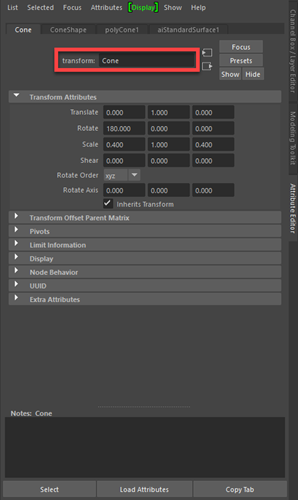 Note: Naming objects is very important when making scenes with lots of different objects. You can see the names of, and individually select all your objects in the Outliner.
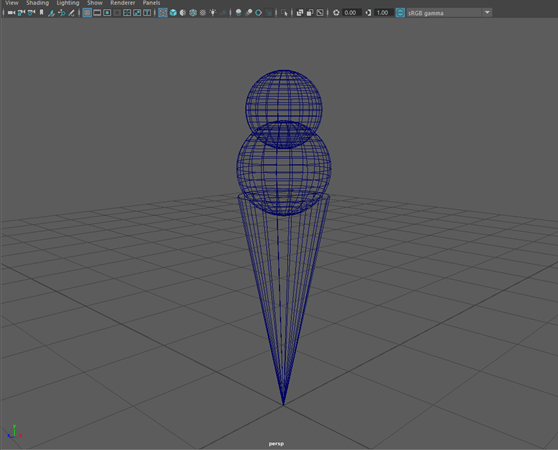
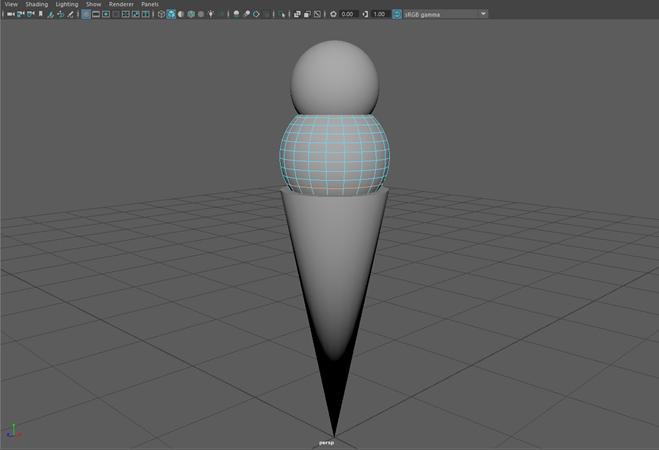
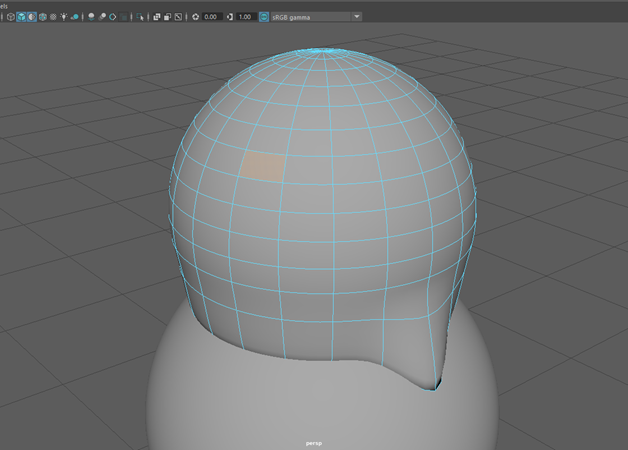
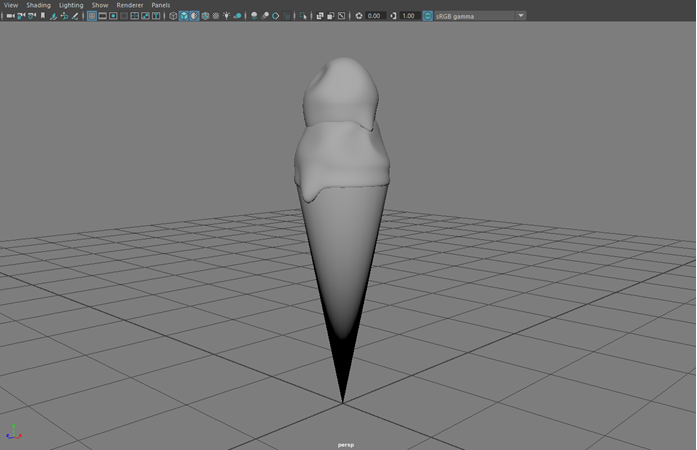
Making the ice cream scoops
- From the View Panel menu, select
(Hotkey:
4). All objects now display as wireframes. This is useful for seeing through objects.
- Select the
Polygon Sphere button on the
Poly Modeling shelf.

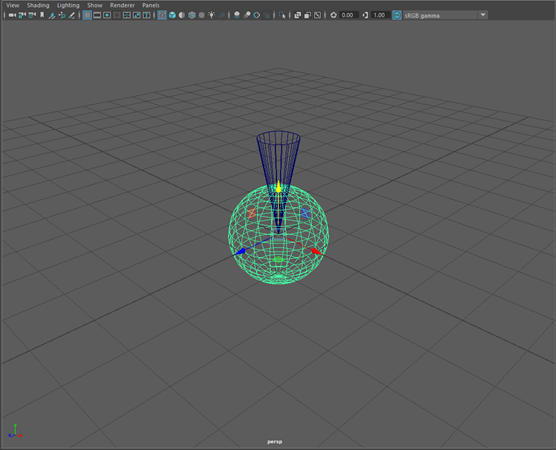
- Move (Hotkey: W) and scale (Hotkey: R) the sphere so that it fits in the cone.
Remember to use the camera tools (Tumble, Track, and Dolly) to view the cone from different angles and make sure everything is lined up.
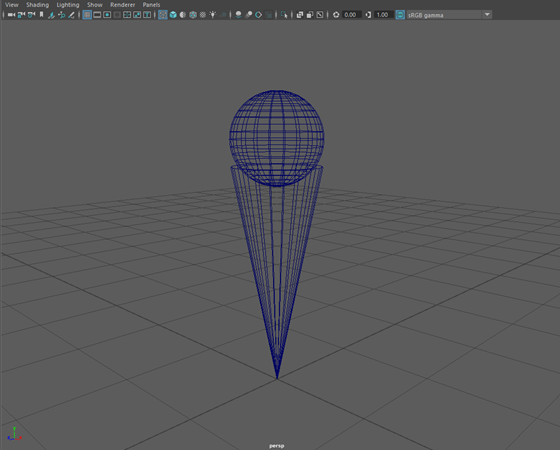
- Now you need to make a second scoop. You could use the sphere button again, or you can simply clone the original sphere by holding Shift while moving it up.
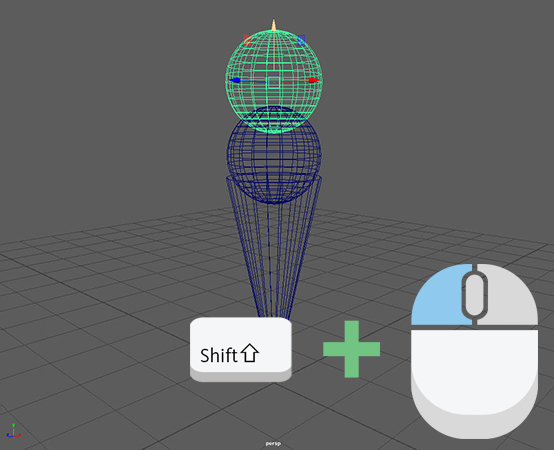
- Move (Hotkey: W) and scale (Hotkey: R) this sphere to look like a smaller second scoop above the first scoop.
- Change back to shaded display by going to the
View Panel menu and selecting
(Hotkey:
5).
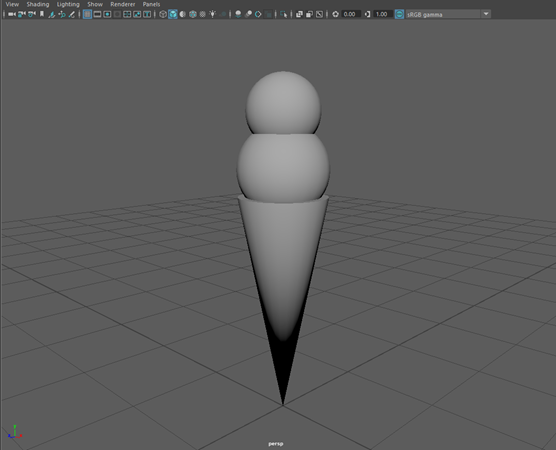
- In the Attribute Editor, change the name of the scoops from "pSphere1" and "pSphere2" to "Scoop1" and "Scoop2".
Adding detail
To add a bottom-bulge
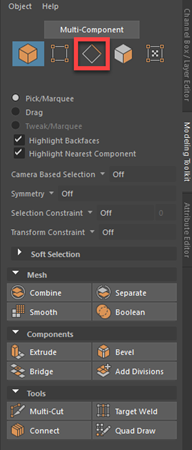
- Open the
Modeling Toolkit via the upper-right corner (
 ) .
) .
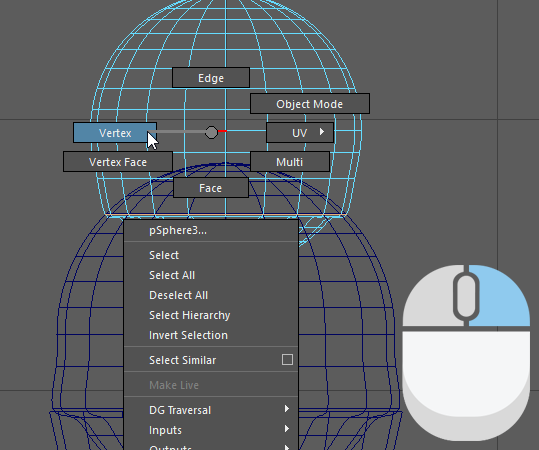
- At the top of the toolkit, under Multi-Component, you'll find Object Selection, Vertex Selection, Edge Selection, Face Selection, and UV Selection.
- Select
Edge Selection.
Note: You can also change selection modes by holding the right mouse button over the scoop and dragging the cursor to Edge.
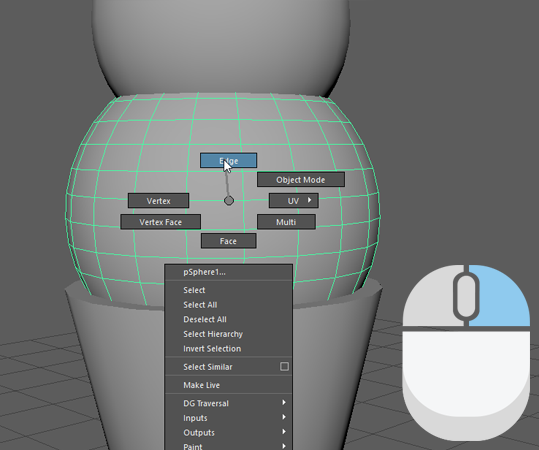
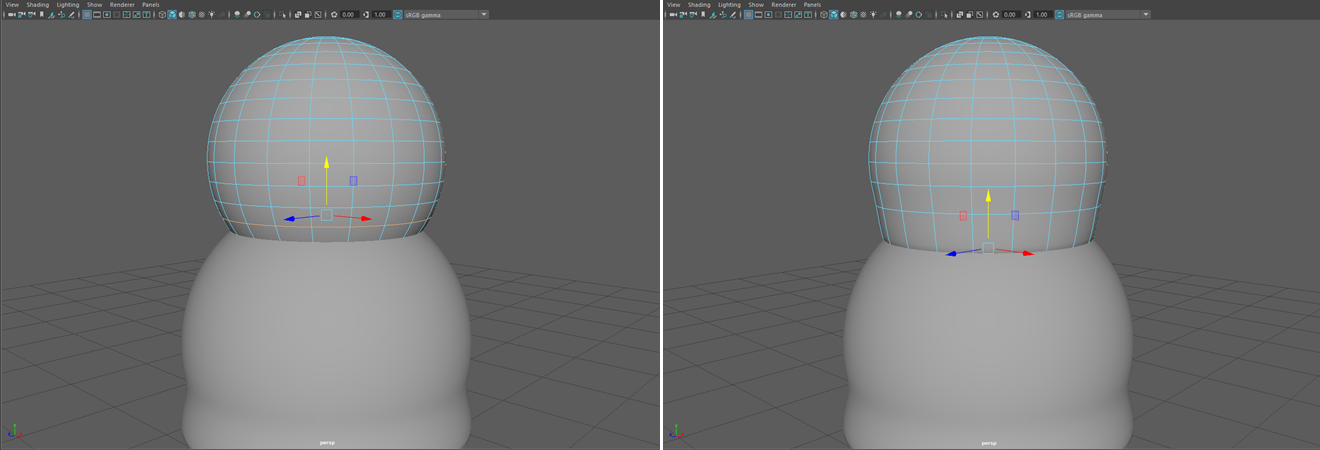
- Select the edge loop above the rim of the cone on the scoop. Instead of selecting each edge one at a time, you can double-click one edge to automatically select all edges in the loop at once.
- Use the
Scale Tool (Hotkey: R) to increase the size of the edge loop until it matches the size of the cone's rim.
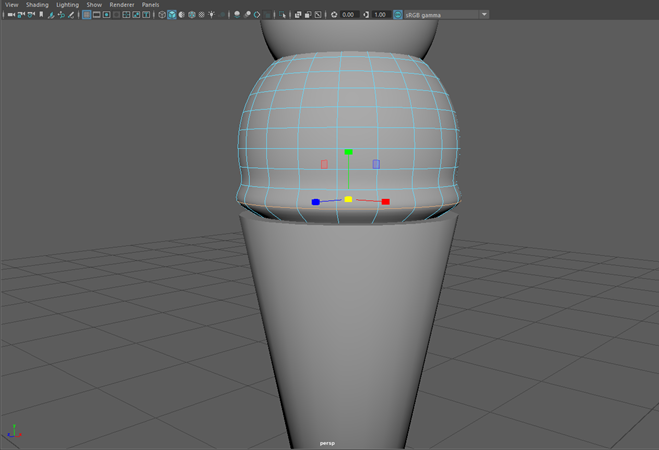
- You may notice that the scaled edge loop looks very sharp. To smooth it out, press
3 to view the sphere in
Smooth Mesh mode. Do the same for the top scoop.
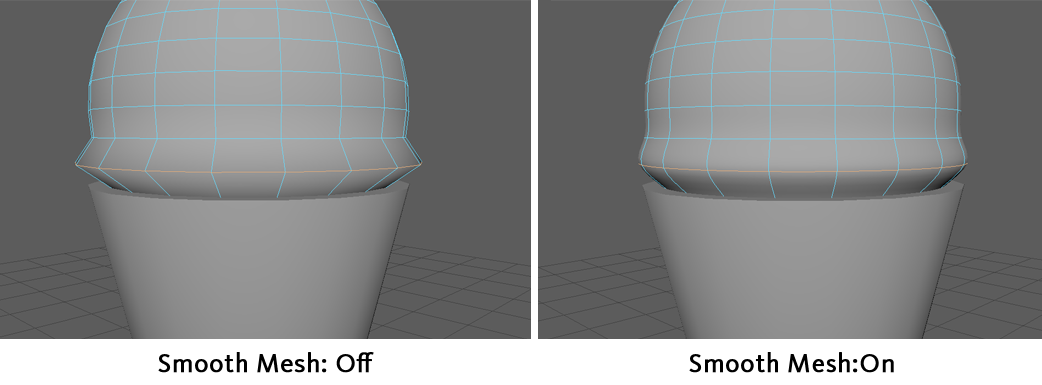 Note: To revert back to the original unsmoothed display, select a scoop and press 1.
 - Use the
Move Tool (Hotkey: W) to lower the edge so that it connects to the cone's rim.
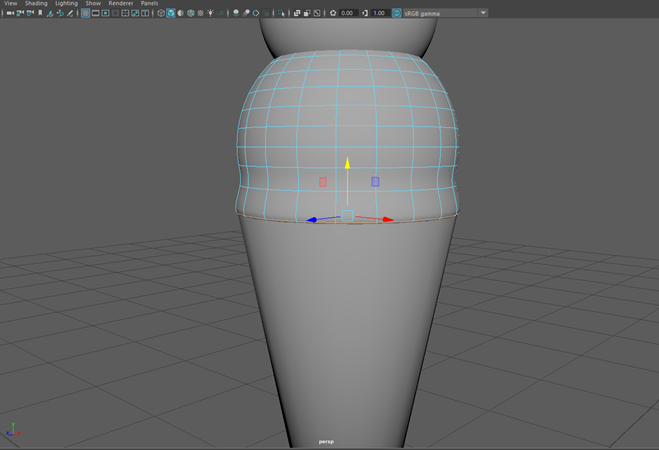
- Now select the lowest visible edge of the second scoop and move it down to connect with the first scoop.
To make a droplet
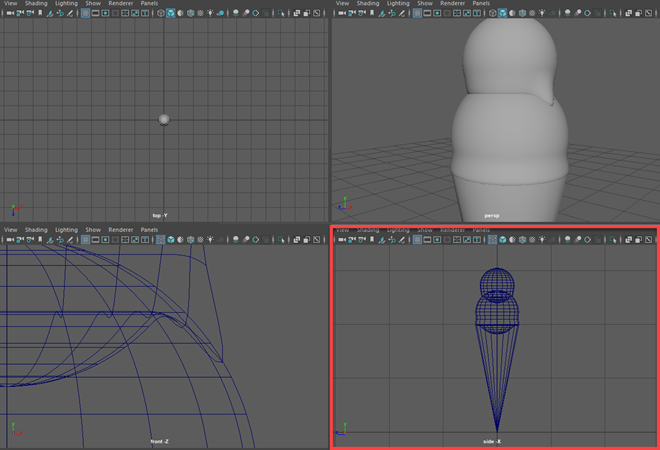
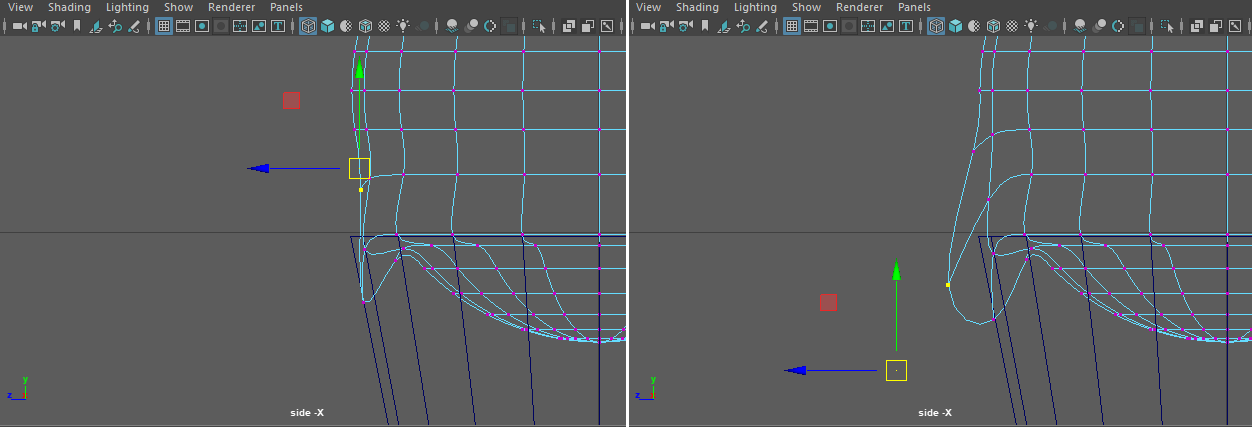
- Go to Four View (Hotkey: Spacebar).
- In the front -Z panel, activate wireframe mode ( or hotkey
4).
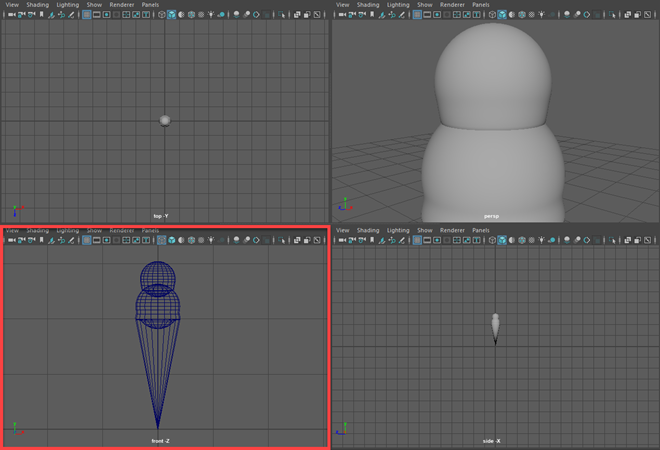 Note: While it is possible to make a droplet using the perspective view, lining up the droplet with the curve of the first scoop is much easier in the front or side view.
 - Change your from edge to vertex selection mode, either via the
Modeling Toolkit or by holding the right mouse button over the scoop.

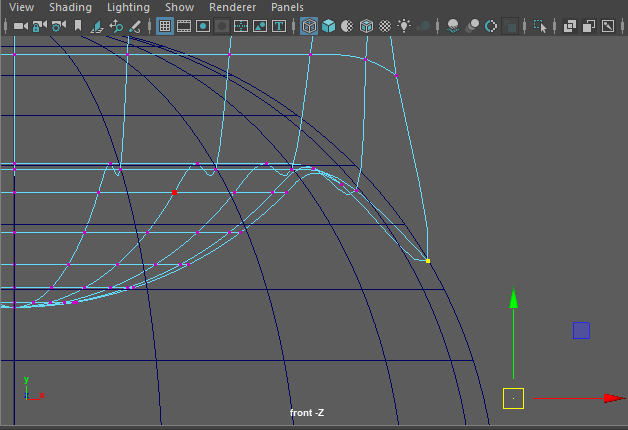
- In the front -Z panel, select either the farthest right or farthest left vertex on the ring of edges you just pulled down on the second scoop.
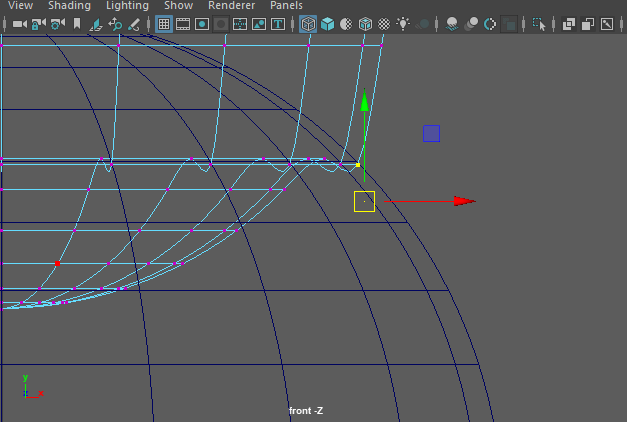
- Using the
Move Tool (Hotkey: W), pull the vertex down and along the curve of the first scoop so that it resembles a droplet.
- Now switch to the side -X panel in
Four View and change the shading in that panel to wireframe too.
- In the side -X panel, select either the farthest left or farthest right vertex on the bottom scoop's edges (along the edge ring you moved close to the cone's rim).
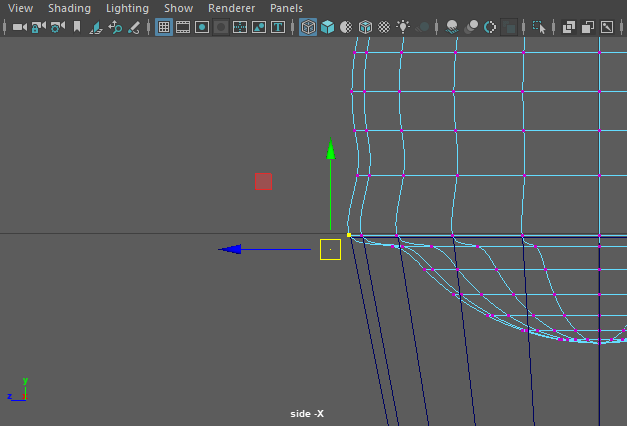
- Use the
Move Tool to drag this vertex down and along the edge of the cone.
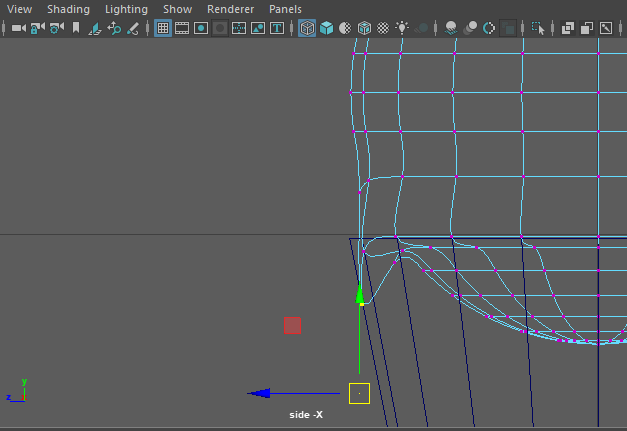
- Select the vertex above that and drag it down and away from the cone until the two vertices resemble a droplet (Use the perspective window to make sure you are selecting the vertex that is directly above the one you just moved, and not the one to the side).
 Note: You may need to make adjustments to the first vertex as you are moving the second in order for it to resemble a droplet. If it looks jagged, make sure Smooth Mesh is on (Hotkey: 3).
In order to give your scoops a more realistic appearance, you'll need to adjust their mesh so they aren't perfect spheres (imperfection is the digital perfection, after all). You'll use Soft Select to do this, which gives you the ability to transform multiple components at once over a gradually softening area of effect.
To add some realism to the scoops
- In the
Modeling Toolkit, change to
Face Selection mode and select a face on either scoop.

- Turn on
Soft Select by pressing
B. The mesh will change to a gradient of color indicating
Soft Select is on.
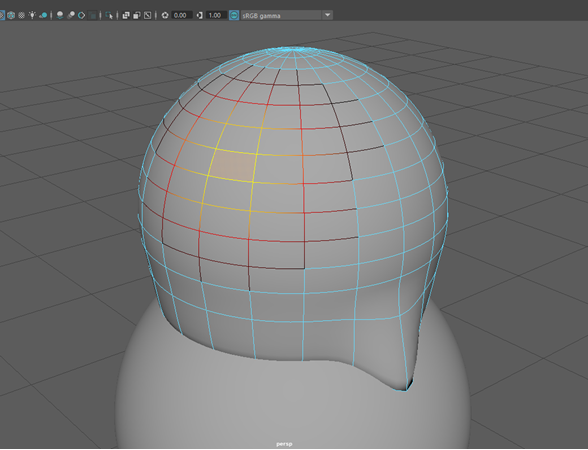 Note: Yellow areas will be fully affected by any move/rotate/scale operations, while dark areas will barely be affected at all. You can adjust the Soft Select radius by holding B + click-dragging. If your radius is too big (i.e. your entire scoop turns yellow), you can start from 0 by holding B + middle-dragging.
 - Use the
Move Tool (Hotkey: W) to push the face inward, creating a dent.
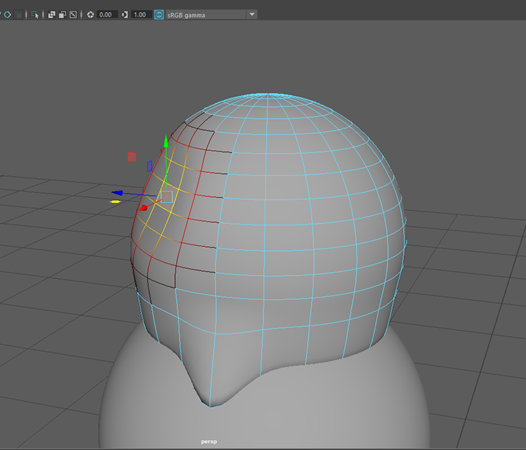
- Create some more dents using other faces until you are satisfied with the result.
- Double-check the droplets to make sure they still stick to the scoops / cone.
Adding color
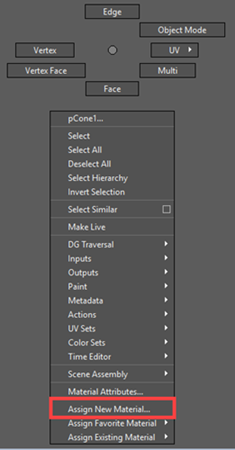
To assign a material to the cone
- Hold the right mouse button over the cone and right-drag to
Assign New Material...
from the marking menu.
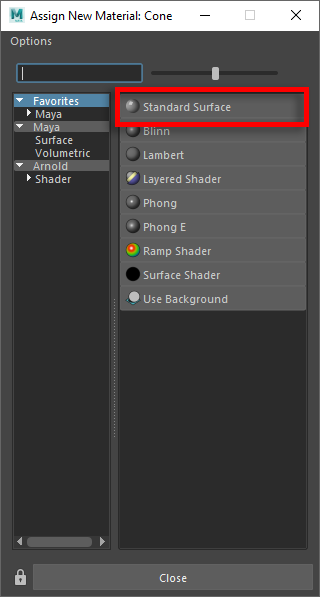
- In the
Assign New Material window, select
StandardSurface.
- In the
Attribute Editor, click the white color field in the Base color section and change it to a light brown / yellow.
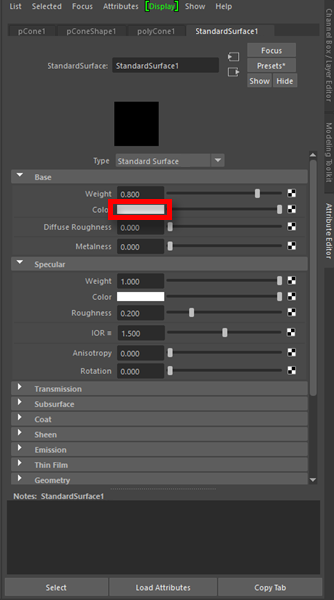
- Under
Specular, set
Weight to 0 to make it less shiny.
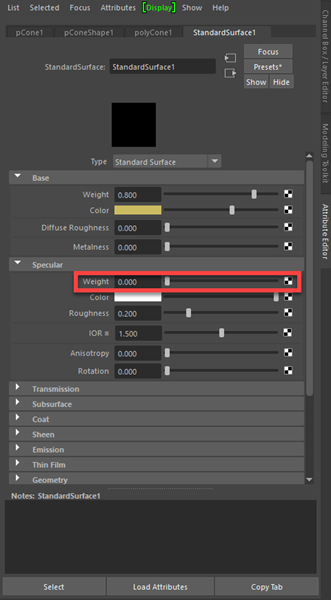
- Rename the material in the standardSurface field, "cone_MAT".
Now you'll repeat the process for the scoops, except with shinier materials.
To assign materials to the scoops
- Hold the right mouse button over the first scoop and select Assign New Material... from the marking menu.
- Select StandardSurface.
- In the Attribute Editor, change the base color to whichever flavor you would like your ice cream to be.
- This time, do not set specular weight to 0 for the ice cream.
- Rename the material, "scoop1_MAT".
- Repeat these steps for the second scoop.
Note: If you want the second scoop to be the same flavor, you can hold the right mouse button over it and select to reuse the same material instead of assigning a new one.
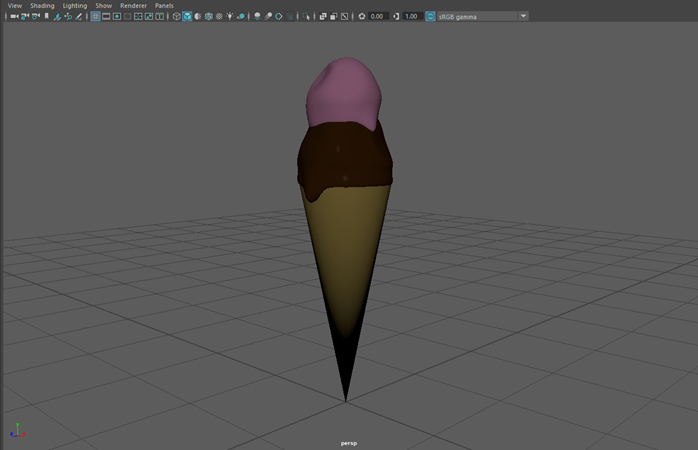
You may notice that even though we left the Specular values alone, the scoops don't look any shinier than the cone. This is because we haven't created any lights for the ice cream to reflect yet.
Lighting
To light and render your scene
- Switch to the
Arnold shelf.
Note: If you do not see the Arnold shelf, then it is possible you unselected Arnold during your Maya installation. You can obtain the latest Arnold for Maya installer by visiting the Arnold for Maya Download Area.
- Select
Create SkyDome Light.


This creates a dome of even lighting around your object.
- To view the scene with lighting, turn on
Use all lights in the Viewport panel. You can also turn on
Textures,
Shadows,
Screen space ambient occlusion, and
Multisample Anti-Aliasing for even higher quality results.

- Now to render the final image, click the
Render The Current Frame button on the
Status Line.

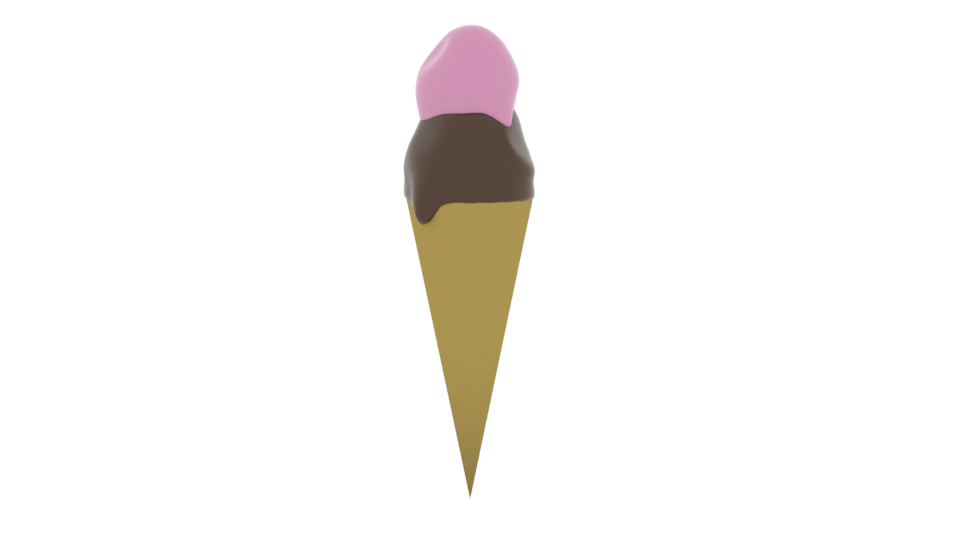 Note: If the lighting appears too bright or too dark, you can select the skydome and adjust its Intensity setting in the Attribute Editor.
 - To save your image, go to
in the
Render View window.
We recommend saving in .jpg or .png format with the Color Managed Image - View Transform Embedded option enabled (right-hand side of the Save Image file window).
Summary
- After completing this lesson, you now know how to:
- Create 3D primitive objects using the Poly Modeling shelf
- Move, Rotate, and Scale objects
- Change the view panels using spacebar or the Tool Bar
- Change to Wireframe Mode using 4, and Shaded Mode using 5
- Select and edit individual components using the Modeling Toolkit or the right-click marking menu
- Use the Soft Select tool by pressing B and adjusting the range by holding B + dragging the mouse
- Assign materials
- Add light to a scene by using the Arnold shelf
- Render images by using the Render the Current Frame button on the Status Line
For additional practice, you can try:
- Creating ice cream toppings out of primitive shapes
- Adding more drips or scoops to your ice cream or modifying the cone's shape
- Model ice cream in different states (splattered on the ground, in a bowl)
- For more Maya tutorials, see the
Intro to Maya series on the
Maya Learning Channel on
