To override materials and shaders on a per layer basis: method 1
- In the Render Layer editor, select a layer.
- Select Windows > Rendering Editors > Hypershade.
- Select a material from
Hypershade, or create a new material, and assign by right-clicking and choosing
Assign Material Override from the marking menu.
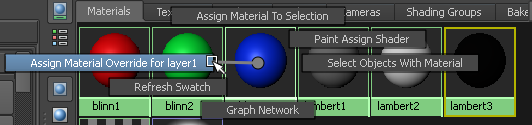
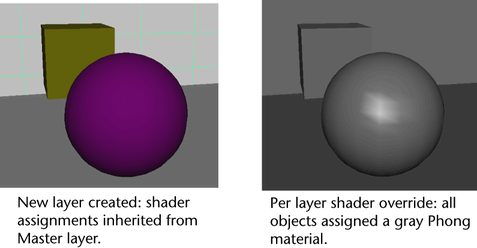
This creates a material and assignment that will override all shader assignments to objects on the current layer.
To override materials and shaders on a per layer basis: method 2
- You can also override materials and shaders on a per layer basis by right-clicking on a layer in the
Render Layer editor and selecting
Overrides > Create New Material Override or
Assign Existing Material Override from the menu that appears.
You do not need to have a layer selected to use the context-sensitive menu; right-clicking an unselected layer still allows you to override its materials.
To override materials and shaders on a per layer basis: method 3
- Select a material from
Hypershade, or create a new material. To assign this material to the layer, select the layer and middle-drag the material swatch over the object.
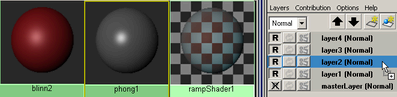
To remove a material override
- Right-click on the layer, and select Overrides > Remove Material Override from the menu that appears.
To override layer attributes (render flags) on a per layer basis
- In the Render Layer editor, select a layer.
- Open the
Attribute editor by right-clicking on a layer and choosing
Attributes from the menu that appears.
The Member Overrides section of the layer attributes appears.
- Click a render check box (for example, turn off Motion Blur, turn off Cast Shadows, or assign a shading group to all objects in that layer).
To override render settings, including the renderer, on a per layer basis
- In the Render Layer editor, select a layer.
- Open the
Render Settings; for example, by clicking the controls (render settings) icon
 on a layer, or select
Windows > Rendering Editors > Render Settings.
on a layer, or select
Windows > Rendering Editors > Render Settings.
- Right-click on a setting name and choose
Create Layer Override
from the menu that appears.
The settings you can override on a per-layer basis include: Render Using, Edge Anti-Aliasing, Size Units, and Resolution Units.
When a render setting override is applied, the clapboard icon on the layer appears in color (red)
 .
.
To remove a render flag override
- Right-click on the layer, and select Overrides > Remove Render Flag Overrides from the menu that appears.
To remove a render setting override
- Right-click on the layer, and select
Overrides > Remove Render Setting Overrides from the menu that appears.
Note: You cannot create overrides on the Master layer: any change you make to render settings on the Master layer propagates to all layers that derive from it.