Use the Rotated Datum item to create a datum by rotating an existing datum around one of its axes by a specified angle.
To create a rotated datum:
- Click Alignments & Datums tab > Datums panel > Rotated.
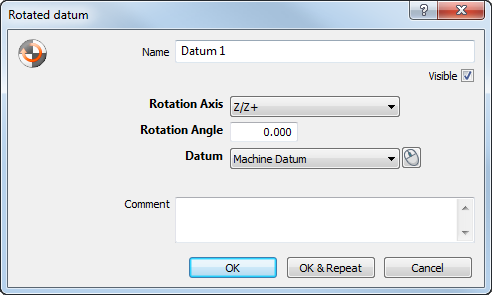
- Enter a Name for the item. The name is used in the inspection sequence, in the Report and Info tabs, and when referencing the item in other items.
- To display the datum in the CAD view, select the Visible check box.
- Select the Rotation Axis for the datum.
- Enter the Rotation Angle for the datum.
- In the Datum list, select the datum you want to rotate.
- Enter any extra information about the item in the Comment box.
- Click OK to add the item to the inspection sequence.
 to
to