To create a new project drawing
- While in a collaboration project, in the Project Manager Tree view, right click on the folder node where you want to add a new drawing (for example, P&ID Drawings).
- Click New Drawing.
- In the File name field, enter a name.
- Click OK.
The drawing is added to your local workspace.
- To allow other project members to see your drawing, do the following:
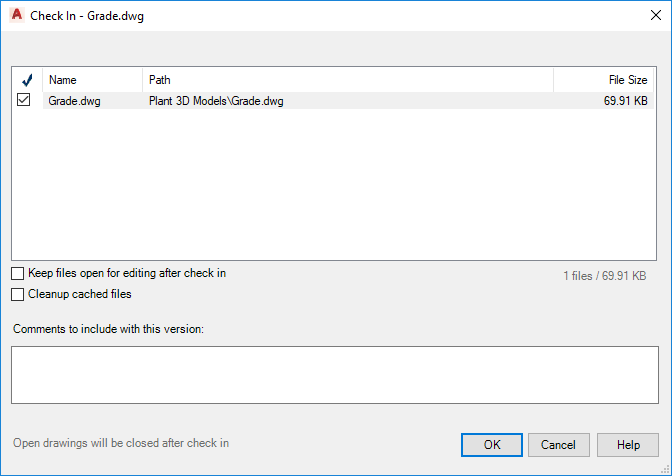
- Save the drawing (depends on the Collaboration Options) or check in the drawing.
- In the Check In dialog box, select Keep files open for editing after check in.
- Click OK.
The drawing is visible on the BIM 360 Team site and checked out to you.
To download a project drawing
- In the Project Manager tree view, right-click on a parent node like a folder or P&ID Drawings and click Check Out.
- Select the drawing in the Check Out dialog box, click the arrow next to the Check Out button and choose "download" and click OK.
To check out project drawings in a folder or in a project
- In the Project Manager tree view, right-click on the folder/Project Node and click Check Out.
- Select the drawing(s) you want from within the folder and click OK.
- Click OK.
Note: You can add a comment to the selected drawing(s) when you check out by clicking the Check Out Comment button
 , typing a comment then clicking OK.
To check out a project drawing
- Double click on the drawing node in the Project Manager.
- The drawing is automatically checked out for you to edit, as long as the default check out option “When drawing is opened” is selected in the Options dialog box.
- Alternatively,
- In the Project Manager tree view, right-click on a drawing and click Check Out.
The drawing is checked out immediately without a dialog box.
- In the Project Manager tree view, right-click on a drawing and click Check Out.
To force undo checkout of a project drawing
- As a BIM 360 Team admin level user, right-click a file that has been checked out by another user.
- Click Force Undo Check Out.
An informational dialog box is displayed, showing the username of the person who has the drawing checked out.
- Click Next.
The Undo Checkout dialog box is displayed.
- Click Undo Checkout (Changes will be lost) or Undo Checkout (Changes will be lost) and Open Drawing.
To check in a project drawing
-
When you close the drawing, it is automatically checked in, as long as the check in option is either “when drawing is saved” or “when drawing is closed” in the Options dialog box.
- Alternatively, in the Project Manager tree view, right-click on a drawing node. Click Check In.
- Click OK.
To check in all checked out drawings in a folder or project
- In the Project Manager tree view, right-click on the folder or Project node and click Check In.
The Check In dialog box displays.
- Select the options you want to use and type a comment for this version of the file if necessary.
- Click OK.
To undo the check out of a project drawing
-
In the Project Manager tree view, right-click on the drawing node and click Undo Check Out.
Note: This option overwrites changes made to the file in the local folder and cancels the checkout.You are prompted to undo checkout and close or undo checkout and reopen the drawing.
To remove a drawing from the project
- In the Project Manager tree view, right-click the drawing you want to remove. Click Remove Drawing.
- To confirm the removal, in the Remove Drawings From Project message, select Remove the Drawing from this Project.
The drawing is removed from the project tree and it is uploaded the Project Recycle Bin in your project on BIM 360 Team. The filename is appended with a suffix with the following format:
filename_username_yymmdd_hhmmss .extension- username = your Windows Username
- yymmdd = Date
- hhmmss = Time
Note: To retrieve the deleted drawing, click Open Project Recycle Bin.