Learn how to add beams, and walls. You also learn how to select and filter elements so that you can delete any unneeded columns.
- Return to the Plan view.
- In the Menu Bar, click Geometry >
 (Beams) or in the Structural Design toolbar, click (Beams).
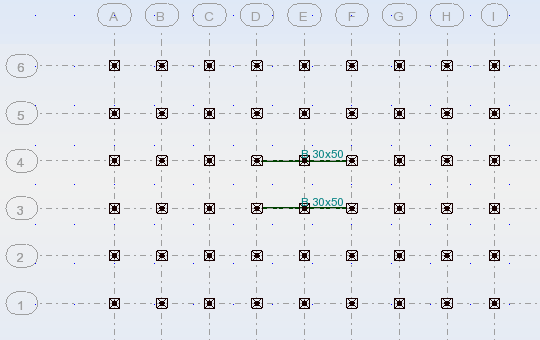
 - In the Beam dialog box, select the Section type RC beam and the Section B 30x50
- Draw the Beams from 3D to 3F and 4D to 4F as shown below.
- In the Menu Bar, click Geometry >
 (Walls) or in the Structural Design toolbar, click (Walls).
 - In the Wall dialog box, set the Thickness to TH12_CONCR, the Height to 4, and the Orientation to Down. Draw the walls shown below.
- Close the Walls dialog box. You will now remove any unneeded columns.
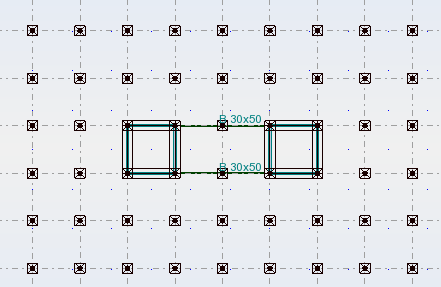
- Select the walls and columns in the center of the building, but not the beams.
- Switch to the 3D view.
- In the Selection toolbar, click
 (Bar Selection).
Note: The Selection toolbar (shown below) is typically docked directly below the Standard toolbar. Some tools are only available when elements are selected.
(Bar Selection).
Note: The Selection toolbar (shown below) is typically docked directly below the Standard toolbar. Some tools are only available when elements are selected.
- In the Selection dialog box, expand the Bar drop-down list and select Panel. Then select None. This removes all of the panels (walls) from the selection set without removing the columns as shown below.

- Close the dialog box and click (or press <Delete>).
- In the Deleting a structure fragment dialog box, select No, delete only the selected bars (you do not want to delete the connecting beams) and then click Apply.
- Save the project.