This example demonstrates how to create a wall material takeoff schedule with images, but you could use the same procedure to create a material takeoff for other element types.
- Draw walls in the model.
- Click Manage tab
 Manage Project panel
 (Manage Images).
 - Click Add, and add related wall rendering images to the model.
- Click Manage tabSettings panel
 (Project Parameters).
 - Add an Instance project parameter:
- Name: Rendering Image
- Type of Parameter: Image
- Group parameter under: Graphics
- Categories: select Materials
- Select a wall instance, and click
 (Edit Type).
 - In the Type Properties dialog, for Structure, click Edit.
- Select Structure, click the Material field, and click the browse button.
- In the Material Browser dialog, click
 (Custom Parameters) in the bottom-left corner of the dialog.
 - In the Material Parameters dialog, associate the wall material with the material rendering image, by assigning the image to the Rendering Image project parameter.
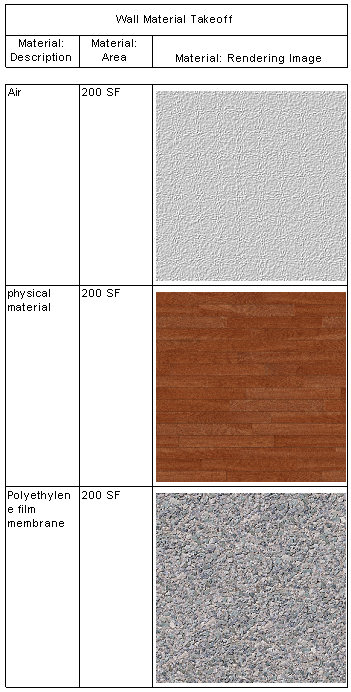
- Create a Wall Material Takeoff schedule and include the field Material: Rendering Image.
- Create a sheet view, and place the Wall Material takeoff schedule on the sheet. The Wall Material Takeoff schedule viewport displays with the images on the sheet.