In this exercise, you will assign pay item codes to a variety of AutoCAD objects, including lines, blocks, and closed polyline areas.
You will use the AutoCAD Quick Select and Select Similar commands to select similar objects. You can use these commands to assign a pay item code to many objects at the same time.
This exercise continues from Exercise 1: Loading and Navigating a Pay Item List.
Assign a pay item code to linear objects
- Open
Quantities-2.dwg, which is located in the
tutorials drawings folder.
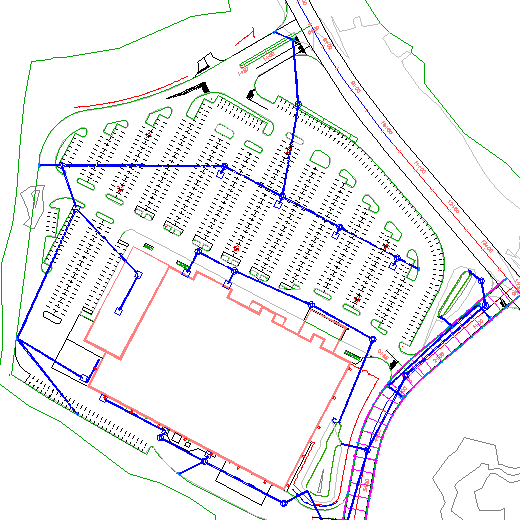
This drawing contains a commercial site, which consists of a building footprint, a parking lot, and access roads.
- On the command line, enter QSELECT.
- Click OK to acknowledge that objects were not selected.
- In the
Quick Select dialog box, specify the following parameters:
- Apply To: Entire Drawing
- Object Type: Line
- Properties: Layer
- Operator: = Equals
- Value: PKNG-STRP-AISLES
- How To Apply: Include In New Selection Set
- Append to Current Selection Set: Selected
- Click OK.
- Press Enter to return to the Quick Select dialog box.
- Repeat Steps 2 through 4 to select the lines on the
PKNG-STRP-STALLS layer.
In the drawing, all parking lot stall lines are selected.
- Click
tab
 panel Find.
- In the
QTO Manager vista, click
 .
Tip:
.
Tip:You can also right-click the pay item and click Assign Pay Item.
- In the
 Favorites category, select
Pay Item ID63401-0300.
Favorites category, select
Pay Item ID63401-0300.
- Press Enter.
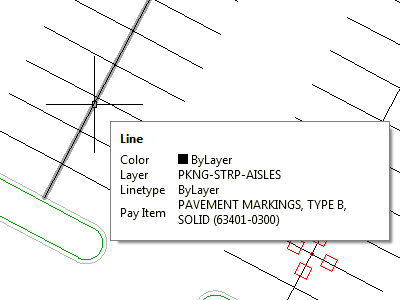
- Hover the cursor over one of the parking lot lines.
The tooltip displays the pay item description and ID that has been assigned to that object.
Assign a pay item to AutoCAD blocks
- In the drawing, select one of the blocks that represent parking lot lamps.
- Right-click. Click
Select Similar.
All the lamp blocks are selected.
- Click
.
- In the
Favorites category, select
Pay Item ID63612-0300.
- Press Enter.
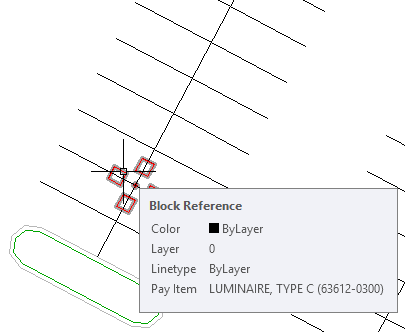
- Hover the cursor over one of the blocks.
The tooltip displays the description and ID of each pay item that has been assigned to that block.
Assign multiple pay item codes to a closed area
- In the
QTO Manager vista, click
 .
.
- In the
Favorites category, select the following pay items:
- 62401-0400
- 62511-2000
- 62525-0000
Tip:To select multiple items, hold the Ctrl key down and then click the items.
- Press Enter.
- On the command line, enter
O.
This action activates object selection mode, in which you select the outline of a closed object, as opposed to a point inside the object. Because some of the parking lot islands are subdivided by pipes, you can use object selection mode to assign the pay item codes to the entire object, not only to the closed area that you select.
Tip:For faster performance, zoom in to a closed polygon before you select it.
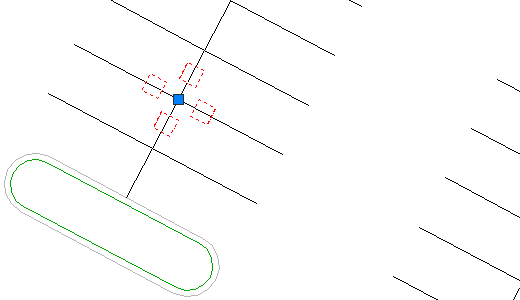
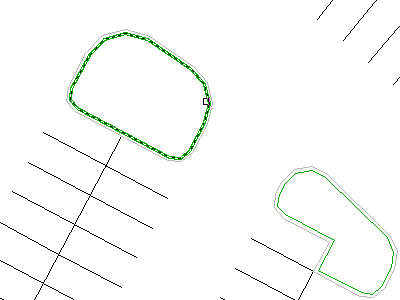
- In the drawing, click the green border in a parking lot island.
A solid hatch pattern is displayed in the parking lot island. This indicates that the pay items have been applied to the area.
- Select several other islands.
- Press Enter to end the command.
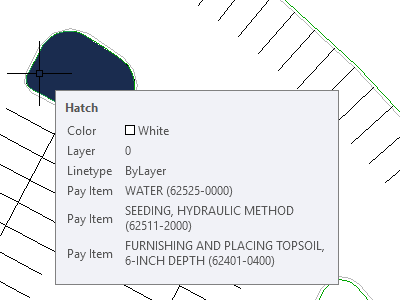
- Hover the cursor over one of the parking lot islands.
The tooltip displays the description and ID of each pay item that has been assigned to that area.
To continue this tutorial, go to Exercise 3: Assigning Pay Item Codes to Pipe Network Parts.