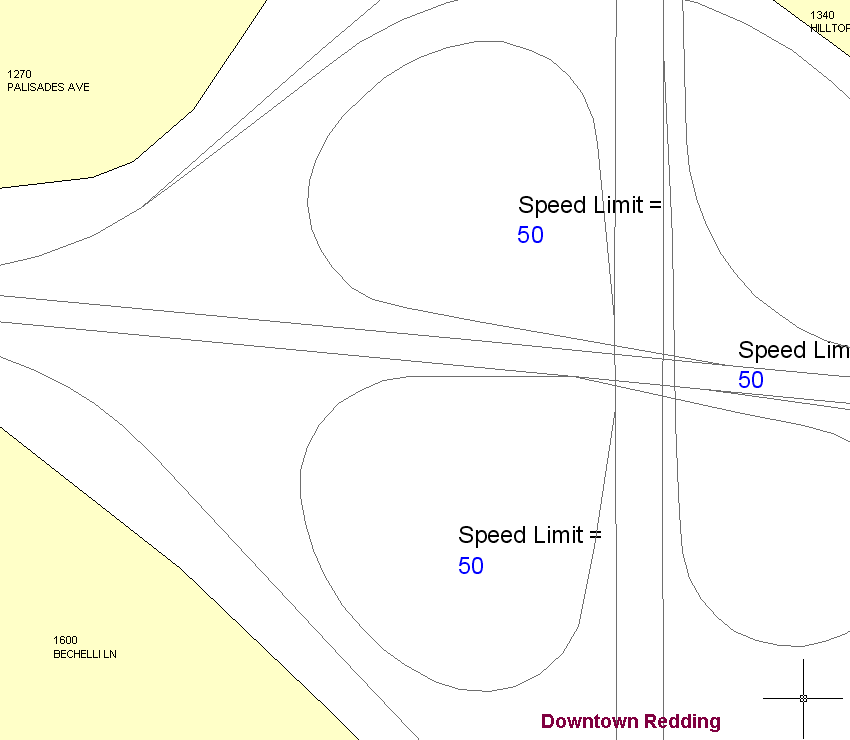
In this exercise, you specify the contents of the text layer. To change the text, edit the text instance and change the contents or styling.
This exercise uses the map you edited in Exercise 2: Style the text layer.
To add text to the layer
- In the Display Manager, right-click the Downtown Redding layer. Click Create
 Create New Annotation.
Each annotation is one "text instance." You can add multiple text instances to a text layer. When you connect to the text layer later, all the text instances are inserted into your map.
- Click in the map, in the white space just below the cloverleaf in the center of town.

Click where you want the text anchored.
- Do the following:
- In the text field, enter "Downtown Redding"
Do not copy and paste the text. Type it directly into the dialog box.
- Select through all the text you typed.
You can apply your changes to all or part of the text. If you do not select text, nothing is applied. For example, if you select just the word "Downtown," you can make it a different color, size, and style from the word "Redding."
- In the Style panel of the Text Editor ribbon tab, change the text size to 160.
Type 160 into the Text Height field and press Tab.
- Set the font to Calibri.
- Click outside the text layer instance.

The text is not associated with any object or feature.
- In the text field, enter "Downtown Redding"
- Click Text Layer tab
 Edit Set panel
 Check In.
Since the text layer is a data store, check in the changes you made so they become available in other maps.
If you change any text instance on this text layer (the contents or the formatting), check it in again. Checking in the data updates the data store with the latest edits.
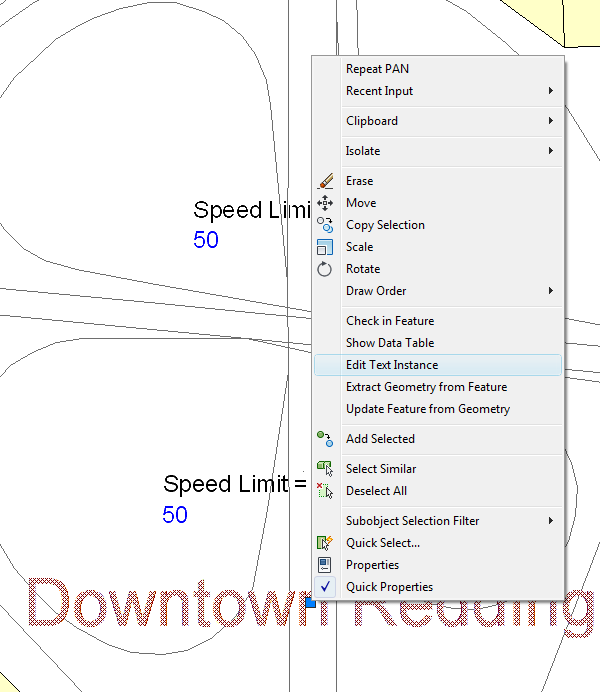
- To change the contents of the text layer, select it in the map.
- Right-click the text and click Edit Text Instance.

Click the “Downtown Redding” text instance, right click, and click Edit Text Instance.
- Change the contents of this text instance to "Redding" and click outside the text instance.
- Click Check In again to update the text layer data store.
- Save the map.
To continue this tutorial, go to Exercise 4: Use the text layer in another map.