Smart Placement Tool

The Smart Placement tool provides you with an intuitive way to place objects precisely when working in the Level Viewport or editing your scene in VR. This multi-faceted tool lets you snap an object to a surface, align an object, and auto-parent objects. A smart grid lets you measure distances easily, and displays measurements to nearby objects.
The Smart Placement and Smart Surrounding plugins load automatically when you launch your project. Both of these plugins must be loaded to use the Smart Placement tool.
Tip: If you experience crashes when using the Smart Placement Tool, ensure that the Smart Surrounding plugin is loaded.
From the main menu, select Smart Placement > Smart Placement Config from the main tool bar to adjust the Placement settings in the window that appears.
Important: The Placement settings are disabled by default. You must enable the options manually.
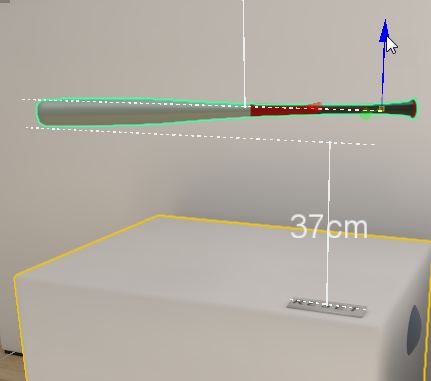
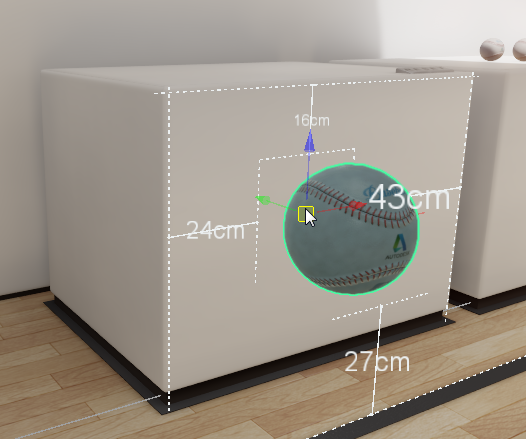
When enabled, dragging any object shows measurements to nearby objects.
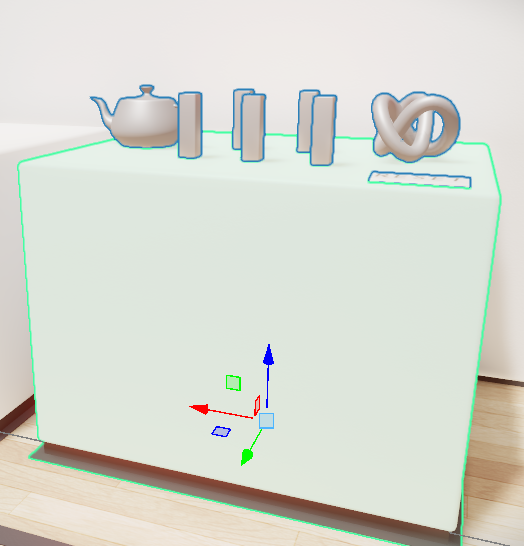
Auto-parents child object(s) that are placed on top of a parent object.
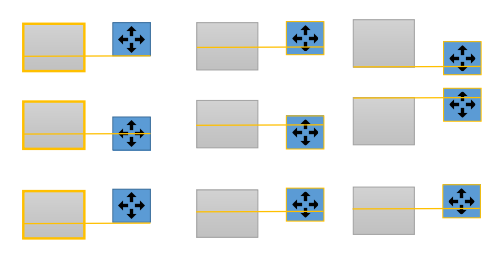
In the following example, several objects are placed on top of a white plinth. When auto-parenting is enabled, the objects placed on top of the plinth (children) are auto-parented to the plinth (parent). All auto-parented objects are outlined in blue and move with the parent.
When enabled, dragging an object's root snaps it to neighboring surfaces.
When enabled, the smart grid displays snap guides as you drag an object relative to neighboring surfaces. Red, yellow, green, or blue visual guides appear relative to the neighboring surface to show snapping options based on your object's location:
- Red planes:
- Aligns to the nearest face of an object if moving inside the object bounding box

- Aligns edges or center of the bounding boxes if moving outside the object
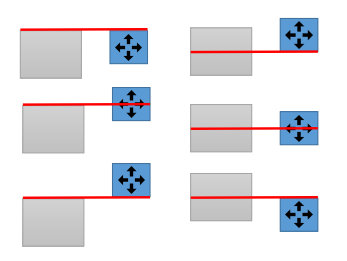
- Yellow planes:
- Divides faces into thirds and lets you snap to those points
- Snap to an object's bounding box The following images show examples of alignments to a third of the bounding boxes:
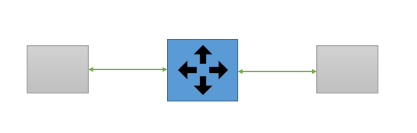
- Green guides:
- Snap to an equal distance in between two objects
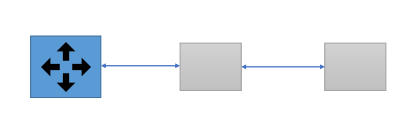
- Blue guides:
- Snap to an equal distance from an object as its distance to the object on its other side
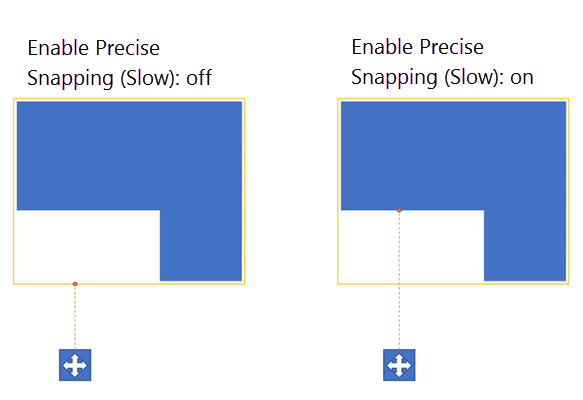
When enabled, snapping locations are computed based on the shape of the neighboring object. The follow example shows that more precise snapping is achieved, even with an irregularly shaped neighboring object.