Issues are used by teams to identify and communicate areas of concern or improvement with a model. You can create an issue in either Navisworks or BIM 360, and synchronize the issue data between the 2 programs, to enable effective collaboration across your team.
Sign in to BIM 360
If you aren't already signed in, when you click options on the Coordination tab, or try to open a model from BIM 360 via Desktop Connector, you will be asked to sign in to your Autodesk account using your Autodesk ID. This automatically gives you access to your BIM 360 projects, providing you are a project member.
Open BIM 360 Models
Desktop Connector
- Click the Application button
 Open Open.
- In Windows Explorer, navigate to Desktop Connector for BIM 360.
Note: We recommend that you update to the latest version of Desktop Connector.
- Select your BIM 360 account and click Open.
- Select your project and click Open.
- Navigate to the Project Files folder to locate your model, and click Open.
Note: Only .nwd models are currently supported.
Model Coordination
- Click the Coordination tab Coordination panel Open Models.
- Select your BIM 360 account from the drop-down list.
- Click on your project, and the select a coordination space from the drop-down list.
- Use the search box to locate your models or view, and click Open all.
Note: Only .nwd models are currently supported.
View Issues
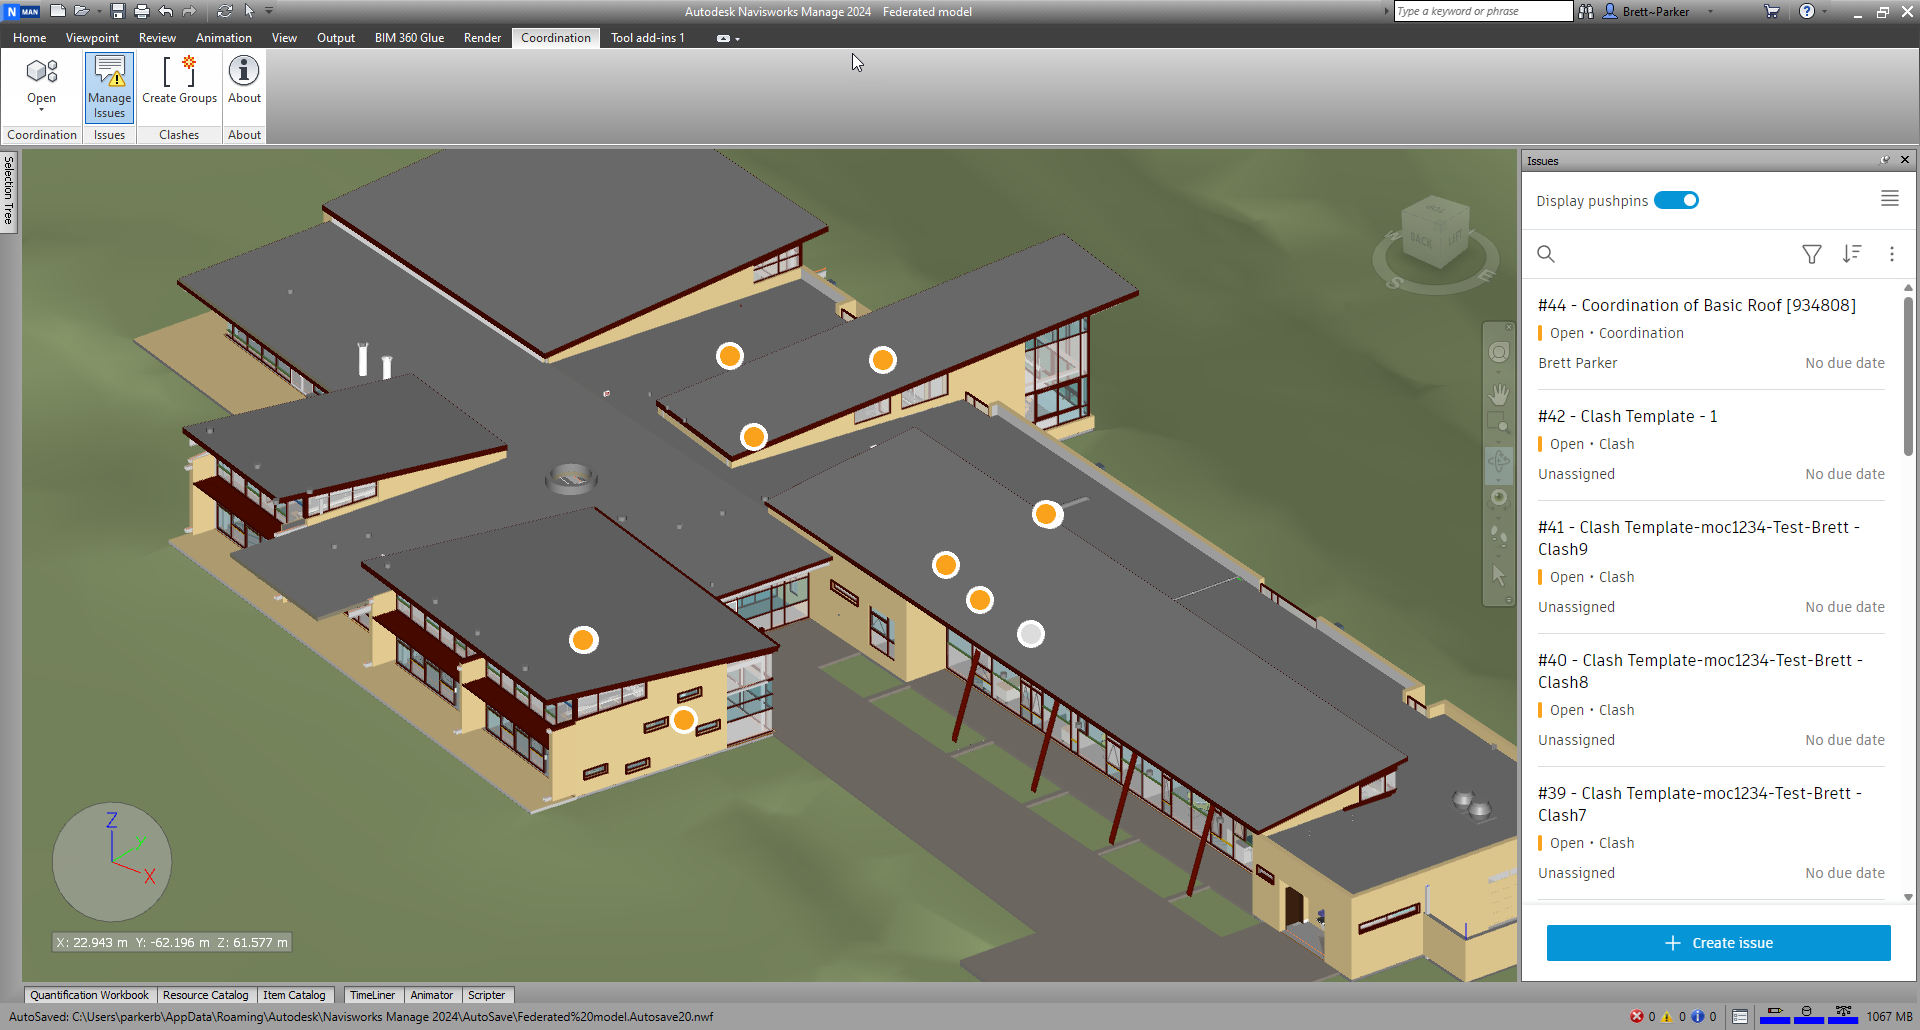
- Click the Coordination tab Issues panel Manage Issues to open the BIM 360 Issues panel.
Issues are displayed on the model as push pins, and listed in the panel.
Tip: Click Refresh in the panel to load any changes to issue data, and sync between BIM 360 and Navisworks. - To apply a filter to display a subset of issues, use the Filter drop-down list in the panel to select one or more filter criteria.
Tip: You can filter issues by type, status, location, assignee, due date, root cause, issue creator, and creation date.
- To sort how the list of issues is ordered, use the Sort drop-down list.
Tip: You can sort issues by title (A-Z or Z-A), status (Draft to Closed, or Closed to Draft), ID (Ascending or Descending), and due date (Old to New or New to Old).
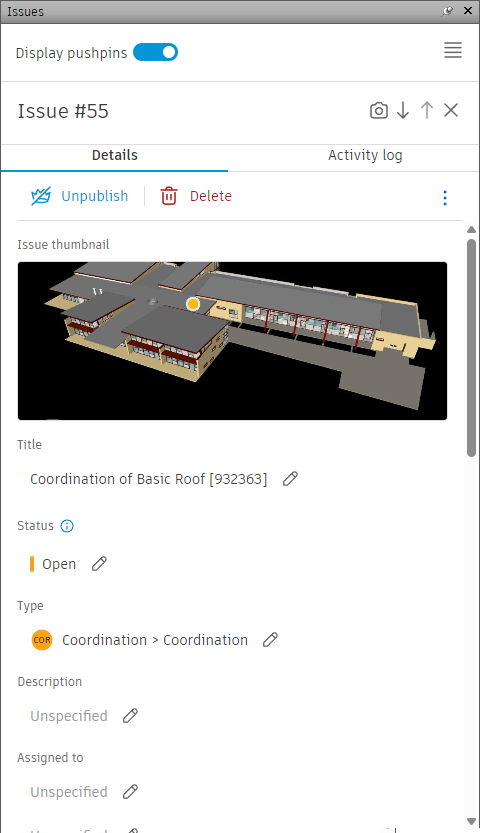
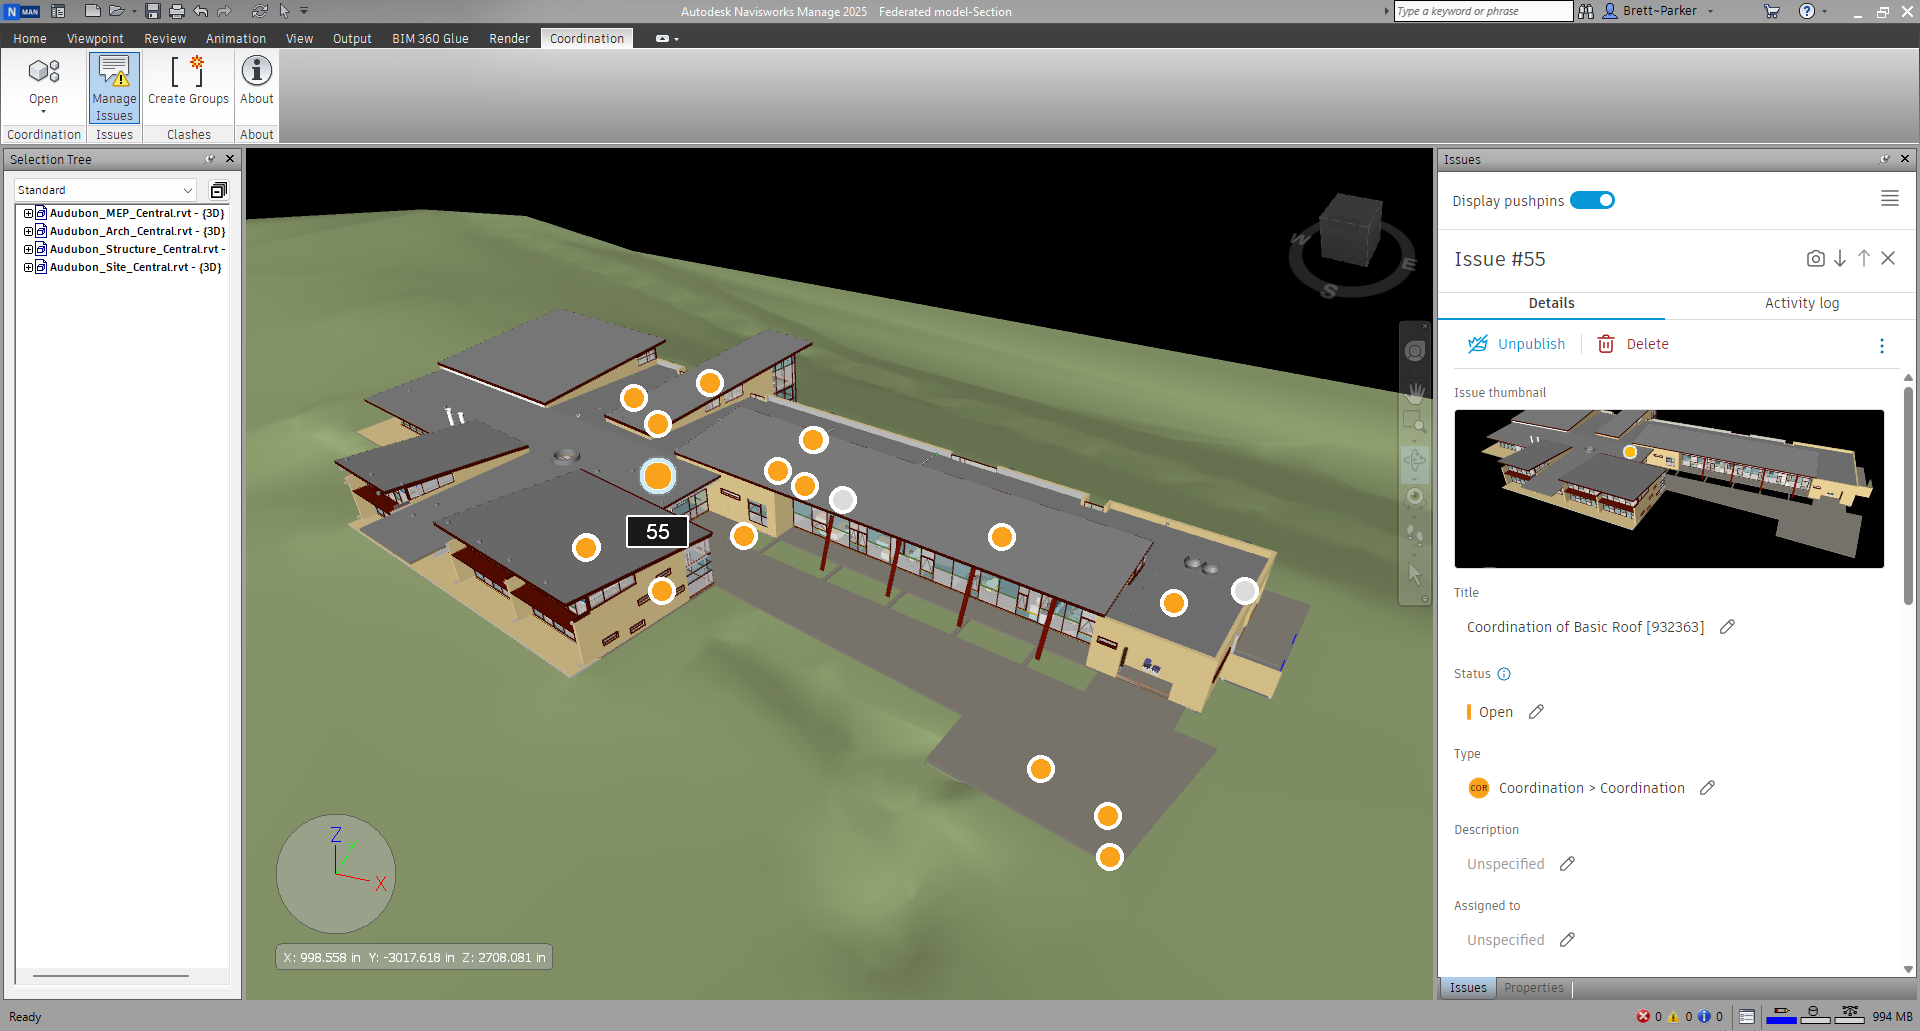
- Select an issue from the panel, or click a push pin on the model.
The view zooms in to the issue on the model, and the panel displays issue details, attachments, and activity.
 Model courtesy of DesignGroup and the National Audubon Society
Respond to or Edit Issues
- In the BIM 360 Issues panel, open an issue as described above.
- Use the Status drop-down to change an issue's status.
Note: Only issue creators, owners and BIM 360 project administrators can set an issue to Closed.
- Use the Details tab to edit various issue details including the assignee and due date.
- Drag documents and photos to the Attachments tab to attach them to an issue.
- Use the Activity tab to enter comments about the issue.
Note: Use @ to mention a project member in a comment.
- Click Refresh on the panel to sync the issue edits between BIM 360 and Navisworks.
- Click the arrow to return to the issue list.
 can be used to navigate between issues without the need to close individual issues.
Create Issues
- In the BIM 360 Issues panel, click Create Issue.
- Click a location on the model to place the issue push pin.
- Specify the issue type, status, and enter a title.
Tip: By default, the status of a newly created issue is set to Open. You can set the issue status to Draft before saving it, and then set it to Open when you are ready to assign the issue. Only issue creators, owners, and BIM 360 project administrators can see issues with a Draft status.
- You can optionally specify an assignee, select a due date, location, location details, owner, root cause, add a description, and select a cost impact. Other fields may be displayed depending on the issue type selected.
Note: You can assign issues to users, roles, or companies. Assignees will receive an email notification with a link to the issue. Locations are added to projects by BIM 360 project administrators. See the BIM 360 help to learn more.
- Click Create.
The new issue is displayed in the panel. Click to open it and view the details:
 Model courtesy of DesignGroup and the National Audubon Society
- Click Refresh on the panel to sync the new issue between Navisworks and BIM 360.
The new issue can be viewed and edited in BIM 360:
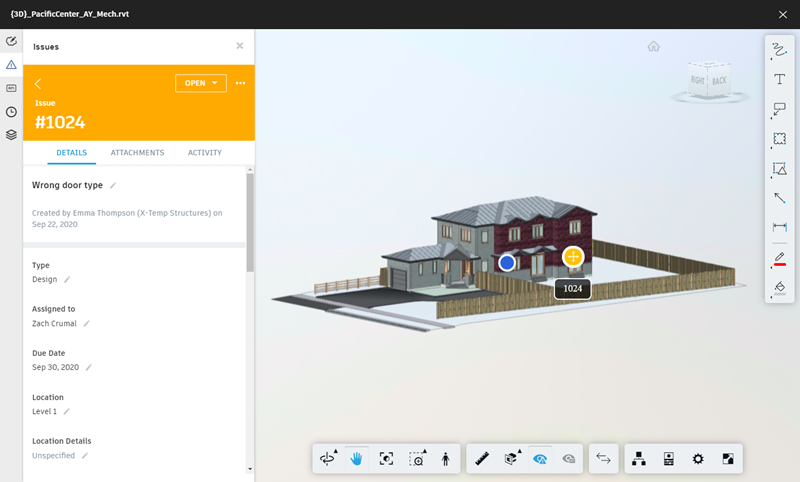
Any changes made in BIM 360 will be reflected back in Navisworks.
Export Issues
You can export a complete list of model issues as a CSV for offline review.
- In the BIM 360 Issues panel, click
 CSV Report.
- Specify where you want to save the file, and click Save.