Use the Radial finishing page to create a 2D radial pattern within a boundary which is then projected onto the model. This pattern is then machined.
Center point — Enter values to define the origin of the radial pattern. Because the pattern is centered at the origin of the active face plane, it may need moving before it is projected onto the work surface.
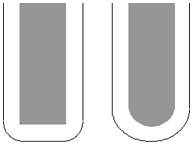
Radius Start and Radius End — Enter values to control the dimensions of the pattern and the direction of the first pass.
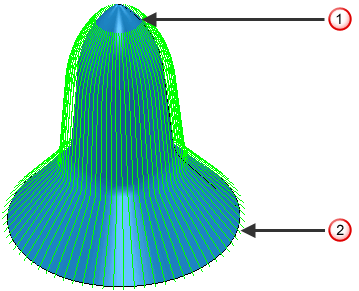
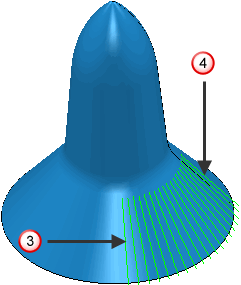
This toolpath has a Radius Start of 10 and a Radius End of 100.
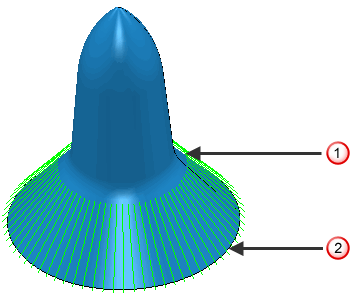
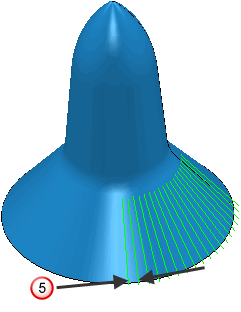
This toolpath has a Radius Start of 27 and a Radius End of 100.
 — Radius Start
 — Radius End
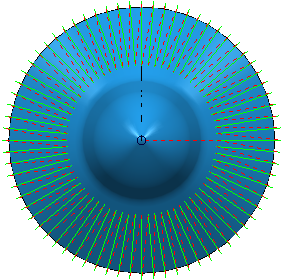
Angle Start and Angle End —Enter values to determine over what portion of a full circle the toolpath is generated, and whether the tool travels in a clockwise or counter-clockwise direction. You can also enter a Stepover value.
This toolpath has an Angle Start of 0 and an Angle End of 360.
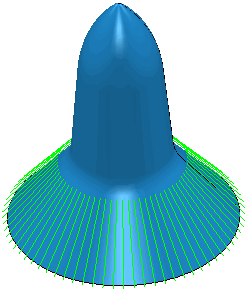
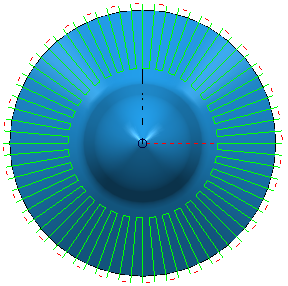
This toolpath has an Angle Start of 0 and an Angle End of 90.
 — Angle Start
 — Angle End
When the start angle is greater than the end angle the tool travels clockwise.
When the start angle is less than the end angle the tool travels counter-clockwise.
If you want to machine an area counter-clockwise starting at 350 and ending at 10 you need to think about the values you enter. If you enter a Start angle of 350 and an End angle of 10 then PartMaker will travel clockwise and machine the opposite of what you want. So you must enter a Start angle of 350 and an End angle of 370 to get the desired result.
Stepover — Enter the distance between successive machining passes. This is the maximum distance between passes.
 — Stepover
Tolerance — Enter a value to determine how accurately the toolpath follows the contours of the model.
Ordering — Select the order in which PartMaker machines the segments.
- One way
- Two way joined
Thickness — Enter the amount of material to be left on the stock within tolerance. Thickness is applied as an offset to the tool in all directions: