In this exercise, you create a flat roof using the footprint of the exterior walls and a sloped roof with an overhang at the entry.
|
Before you begin, download the GSG_05_add_roof.rvt file. Download this zip file (if you have not already downloaded the exercise files for the tutorials.)
Objectives
- Add roof lines with a slope and an overhang defined.
- Add a flat roof.
- Attach interior walls to the roof.
 Watch the video
Draw the Roof
- Open project GSG_05_add_roof.rvt.
- Open the 02 - Lower Parapet floor plan.
- Click Architecture tab
 Roof drop-down
 (Roof by Footprint).
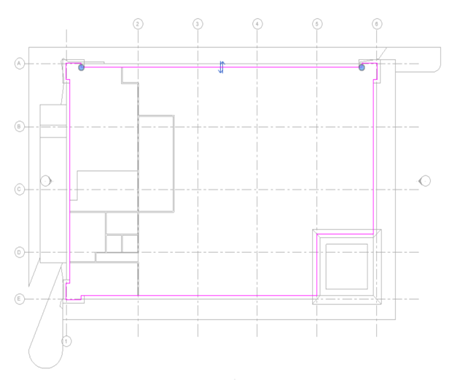
- Create a sloped roof with an overhang:
- On the Draw panel, click
 (Pick Walls).
- On the Options Bar, for Overhang, enter 600, and select Defines slope.
- In the drawing area, highlight an entry wall. When a dashed line is displayed on the exterior of the wall, press Tab to select the chain of walls, and click to place the roof lines.
- On the Properties palette, set the Base Level to 03 - Upper Parapet.
- On the Mode panel, click
 (Finish) to place the roof.
- On the Draw panel, click
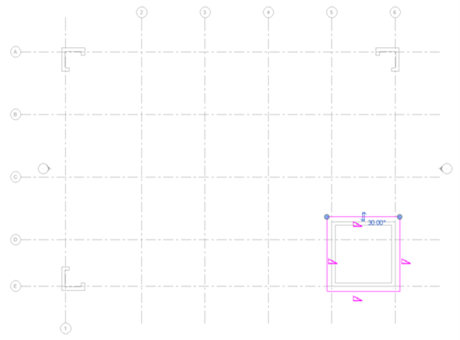
- Draw a flat roof:
- On the Properties palette, set the Underlay value to 01 - Store Floor.
- Click Architecture tabRoof drop-down (Roof by Footprint).
- On the Draw panel, click
(Pick Walls).
- On the Options Bar, set overhang to 0 and clear Defines slope.
- On the Properties palette, set Base Offset from Level to -750.
- In the drawing area, do the following:
- Highlight an exterior wall.
- Press Tab to select the chain of walls.
- Click to place the roof lines.
- On the Mode panel, click
(Finish).
Attach Walls to the Roof
- On the Quick Access Toolbar, click
 (Default 3D View).
Notice that the interior walls extend through the roof.

- Position the cursor over an interior wall and click to select the wall.
- Right-click and choose Select all instancesVisible in view to select all interior walls.
- Click Modify | Walls tabModify Wall panel
 (Attach Top/Base).
- Click to select the flat roof.
Notice that the walls no longer extend through the roof.
