About the Camera Editor Advanced Tab
Scene > Camera Editor > Advanced
Advanced camera properties, such as projection, distortion map, and collision detection are found in this tab.
Projection
This section provides the following options:
Skew Factor
Defines how much VRED skews the view.
Orthographic Size
Adapts the size of an orthographic camera.
Use Manual Frustum
Activates or deactivates the custom frustum settings.
Sides (L, R, B, T)
Defines the camera projection through a frustum, based on the sides Left, Right, Bottom, and Top.
Use Manual Projection Matrix
Overrides the Projection Mode of camera and activates Projection Matrix.
Projection Matrix
Create a custom projection matrix. When enabled, in Camera Settings > General, Projection Mode is automatically changed to Custom Matrix.
Apply
Updates the Render Window to the values entered.
Distortion Map
This section provides the following options:
Enable
Activates or deactivates the distortion map.
Left and Right Eye Distortion Map
Allows the use of a distortion texture at pixel level. The texture describes the course of the normalized XY-image coordinates. The input texture is an EXR-image. The red channel describes the course of the X-image coordinate. The green channel describes the course of the Y-image coordinate. The origin (0,0) is at the bottom left corner.
Collision Detection
Supports the operator on presentations to prevent camera intersections with objects.
Use Collision Detection
Enables/disables a feature that recognized when the camera collides with objects.
Slide
Enables the camera to glide over the surface. when a collision occurs.
Distance
Defines the distance between the camera and an object in mm, when the camera detects a collision.
Nodes
Adds the current selection from the Scene Graph to the list of objects considered on collision detection, when Add Node is used. Remove Node deletes the selected entry/object from the list.
Triangle Based / Bounding Box Based
Determines the selection algorithm (Triangle or Bounding Box) used for collision detection.
Build Scene
Creates the scene, by using the pre-calculation of the above settings. Any change to the settings require re-calculating the scene.
From/At/Up
This sections provides the following options:
From
Sets the 3D coordinates for the camera position.
At
Sets the coordinates for the center of interest.
Up
Sets the coordinates for the up vector to define which direction is up in the scene.
Apply
Updates the transformation of the selected camera to the entered values.
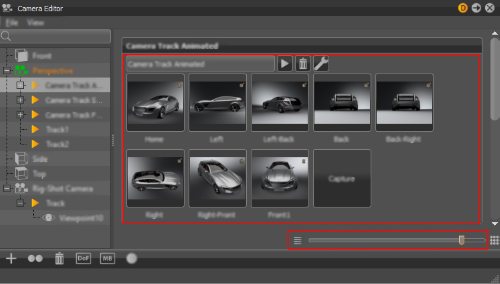
Camera Track Animated and Track
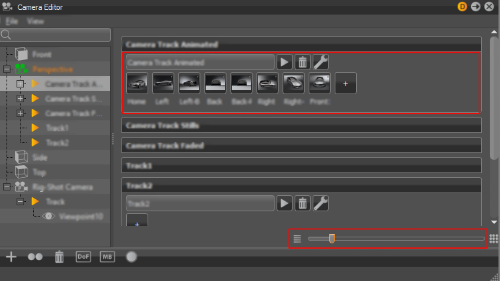
Either of these sections, Camera Track Animated or Track, and their options are only visible when a Track is selected in the Camera Tree. If the selected Track is animated, then the Camera Track Animated section appears, along with others, including Track. If the Track is not animated, only the Track section appears.
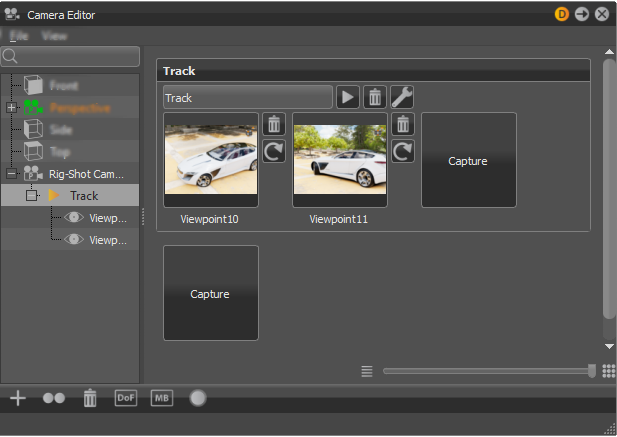
Viewpoints and settings for animation interpolation are stored within the Track section. Every camera has its own track. Double-click a track to collapse or expand it.
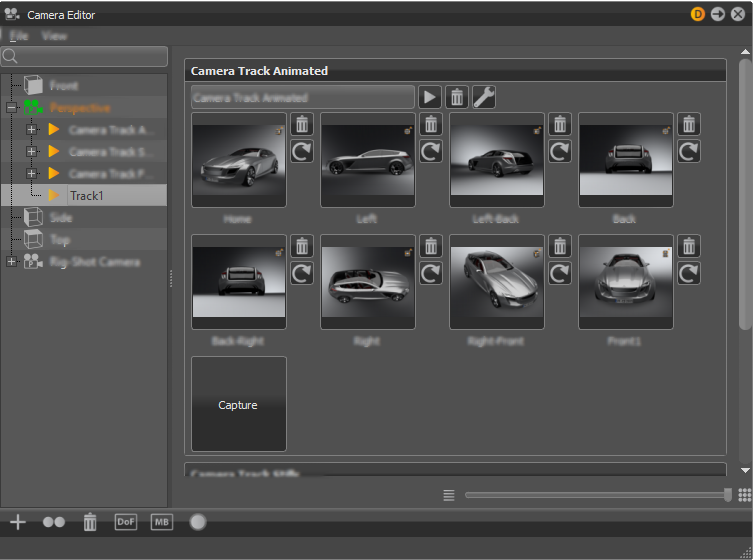
Click Capture to create a viewpoint. The current position and orientation of the active camera are stored. If no camera track exists at the point of viewpoint creation, it is generated automatically. Each thumbnail image represents a different viewpoint.
To create more viewpoints, use the Capture button, which attaches the capture to the current track. You can also use +, from the Icon Bar, to create a track.
To rename a camera track or viewpoint, click its name and enter a new value.
Click a viewpoint to go to it. Drag the thumbnails to rearrange the existing viewpoints. Right-click on a viewpoint to open its context menu to adjust animation settings and create a shortcut key for the viewpoint.
Context Menu From Viewpoints
This section provides the following options:
Recapture
Overwrites the viewpoint with the current position and orientation from the Render Window’s camera. Another way to recapture a viewpoint is to use  .
.
Delete
Removes the current viewpoint from the Camera Editor. Another way to delete a viewpoint is to use  .
.
Animation Properties
Opens the Animation Properties dialog to set the animation behavior of the camera when a viewpoint is selected.
Name
Enables you to rename the viewpoint.
Fade-In Time
Sets when the fade starts for the current viewpoint, fading it from a complete black screen to the colored image. A value from 0.00 disables the feature.
Animation Duration
Sets how long the camera is animated, moving from its current position to the viewpoint position. A duration value of 0.00 seconds gives a hard cut. The viewpoint duration doesn’t affect the track duration.
Pause Time
Time the animation waits before the camera moves to the viewpoint position.
Overwrite track settings
Makes the viewpoint use its own animation settings, created in this Animation Properties dialog, when enabled. These settings only have an effect on the final animation. When disabled, the viewpoint uses the Global Camera Track animation settings.
Hotkey
Defines a hotkey for the current viewpoint.
Buttons beside the viewpoint thumbnails
These buttons are hidden on lower zoom levels.
Delete
Removes the viewpoint from the Camera Editor.
Recapture
Overwrites the viewpoint with the current position and orientation from the Render Window’s camera.
Buttons beside the track title
Play
 Plays (and stops on replay) the current camera track within the Render Window.
Delete
Removes the track and its related viewpoints from the Camera Editor.
Camera Track Settings
 Opens the Camera Track Settings dialog to set replay behavior for the camera track.
Name
Enables you to rename the camera track.
Fade-In Time
Defines the time used for the moment of fading. On replay, a viewpoint will start with fading from a complete black screen to the colored image. A value from 0.00 disables feature.
Animation Duration
Sets how long it takes for the camera to move from one viewpoint to another. A duration value of 0.00 corresponds to a hard cut, meaning there is no animation between different viewpoints.
Pause Time
Defines how long the animation waits after it arrives at a viewpoint before it goes on to the next.
Slider
At the bottom of the Camera Track, is a slider. Use it to zooms in and out of the preview thumbnails.