Working with a Camera
In VRED, using cameras includes creating, viewing, and editing them. Sometimes, you might even mirror a camera.
Using Cameras
Let's start with creating a camera. Once created, you might not see anything, so the next step is to make it visible. After that, you can transform and edit it. The following sections will explore each of these and more.
How to Create a Camera
Since there are a few camera choices, let's select the type of camera you want to create.
In the Menu Bar, click Scene > Create Camera.
Select the type of camera you want to create.
Camera - Creates a camera with a perspective view, which is similar to the view of human eyes. Through a perspective view, objects further away seem smaller than objects right in front. Original parallel lines appear centric to a single point a long distance off. This view is the default for file output (see Render Settings).
Camera and Aim - Creates a separate node for the camera and the aim. Each node is selectable and can be transformed in the Render Window. The aim node controls where the camera points. The aim point is the rotational pivot of the aim node. Navigation modes, such as Fly and Orientation, do not align with aim cameras and are disabled. Navigation has certain influences on the aim node. While panning, the aim moves with the camera. Dollying toward the pivot keeps the aim in position, except when the camera moves over the aim, then it moves forward with it.
Camera, Aim and Up - Creates a separate node for the camera, aim, and up. Each node is selectable and can be transformed in the Render Window. The camera calculates its orientation from the aim and up nodes. The camera points to the aim node and its top is oriented towards the up node. The up vector of the camera is determined by the pivot of the up node. Two-Axis navigation reverts to Trackball mode for an Aim and Up camera.
Orthographic Camera - Creates a camera with an orthographic view, which is a view where all objects have the same size irrespective of distance. Each object’s actual height and width is shown and parallel lines remain parallel.
Note:To see a representation of the camera in the viewport, you will need to make it visible. See the section that follows.
How to Display a Camera
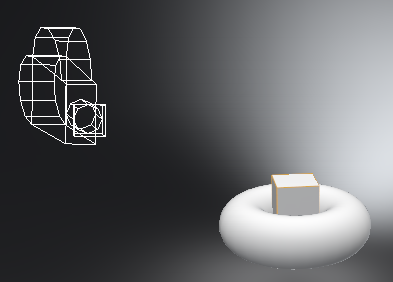
Once you've created a camera, the next step is to make it visible because once it's displayed, you can move it into position. You can show or hide all representations of cameras. When a camera node is selected in the Scene Graph, a highlighted representation appears in the Viewport.
When a camera is not selected, it appears white.
When you hover over it, it takes on the Preselection Color preference color.
When selected, it takes on the Wireframe Color preference color.
 Note:
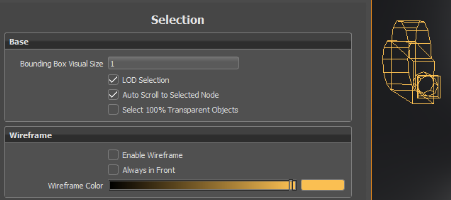
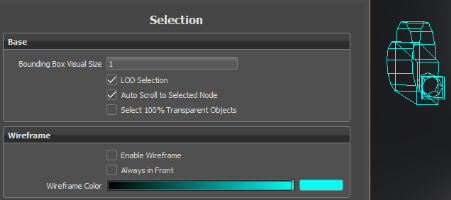
Note:To change either the Preselection Color or the Wireframe Color, in the Menu Bar, select Edit > Preferences > Selection.
In the Menu Bar, click View > Show Cameras.
This option is saved in the VRED project file. When importing scenes from previous versions, it is disabled by default. Active camera representations of the current Viewport are not drawn and orthographic default cameras are turned off by default. Cameras do not have bounding box representation.
How to Edit a Camera
There are two ways to edit a camera. To manipulate a camera with normal scene navigation, use the Transform tool. For exact placement, use the Camera Editor.
How to Place a Camera Using the Camera Editor
In the Menu Bar, click Scene > Camera Editor.
On the left side of the Camera Editor, select the camera you want to edit.
Make changes to the camera.
Note:Cameras are also selectable and can be translated and rotated with the transform tool.
How to Place a Camera Using the Transform Tool
- In the Menu Bar, click Transform.
- In the Scene Graph (click
 ), select the camera you want to edit.
 - Shift-click and drag the Transform manipulator to position the camera.
How to Mirror a Camera
You can mirror any type of camera to display the same viewing angle from the opposite side of a scene.
- In the Camera Editor, right-click the camera to open the context menu.
- Select Edit > Mirror X, Y, or Z.
Mirroring a camera does not affect animations or camera tracks.