Use this command to create Highway Boundaries, shoulders, and passing lanes.
- Choose default settings, style, layers, point group, and description keys.
-
Click

 .
.
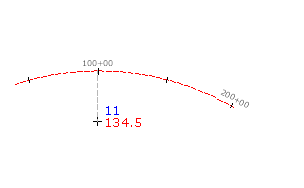
- Select an alignment. Note: If the selected alignment has associated profiles, the Select a Profile dialog box is displayed. You can select a profile from the list and the levels for the points you create will be set from that profile. If there is no profile section for a chainage on the alignment, or if you select <none>, the point level will be set according to the Points Creation settings in the Create Points dialog box.
- Enter the chainage number from which you want to offset a point. Do not include the chainage plus (+) sign.
- Enter the offset. If you have selected a profile, the offset value for the profile displays as the default.
- If prompted, enter the name, description, and level for the point. Note: If you want the point description to be taken from the object, specify Automatic - Object in the Prompt For Descriptions section of the Points Creation settings. The alignment name and chainage display in the Raw Description column in the Point Editor.
- Press Enter to end the command.
Note: Many factors affect how the point is displayed. For more information, see About Controlling the Appearance of Points in a Drawing.