Use the Manage External Dependencies dialog to inspect and resolve file dependency issues with your 3ds Max assets.
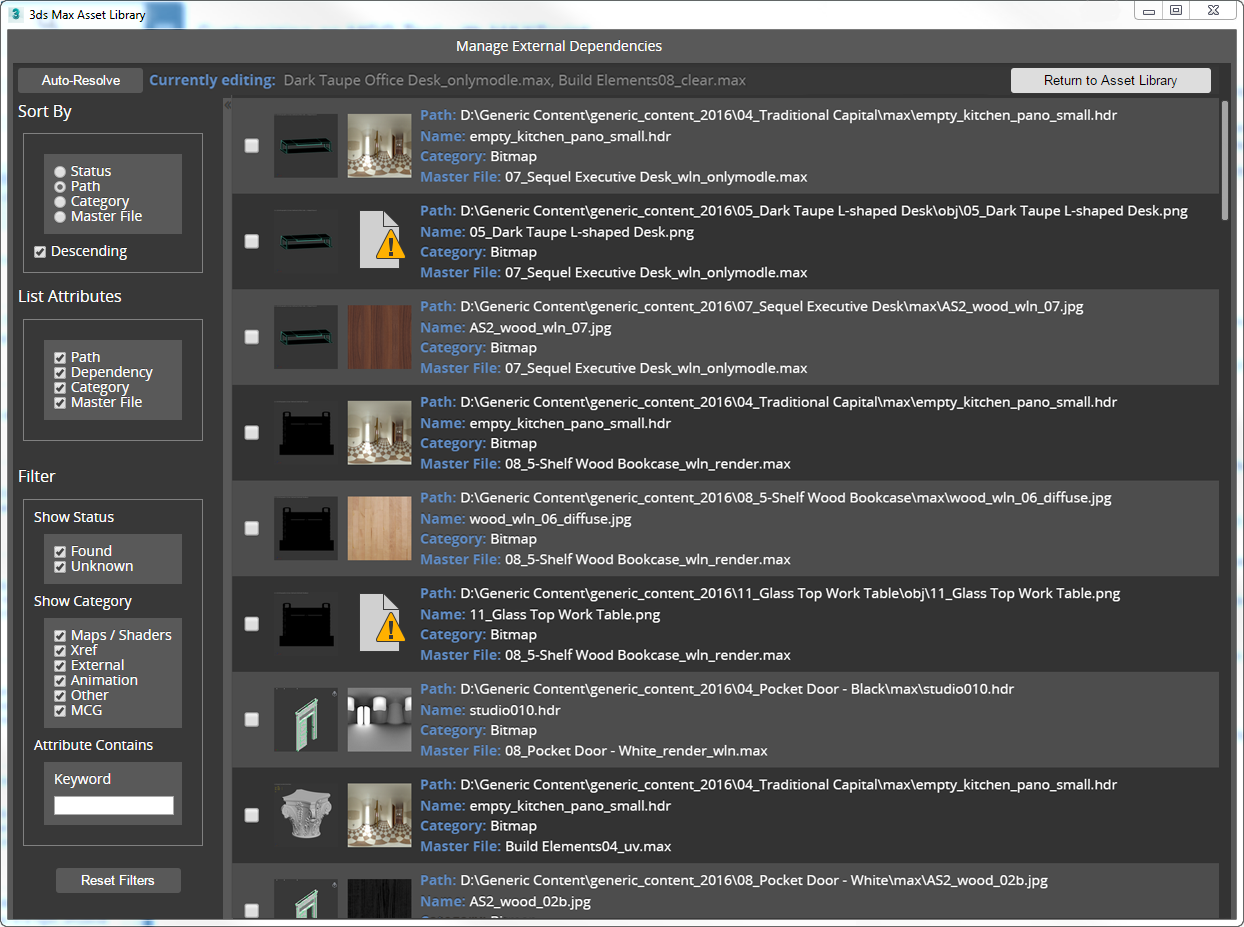
Manage External Dependencies dialog
- Auto-Resolve button
- Selects the top-level folder to search within to resolve the selected missing dependent files.
Tip: You can right-click the list and choose Select All to select all files.
- Currently editing field
- Shows the name of the file(s) whose dependencies are currently being managed.
- Return to Asset Library button
- Exits the dialog and returns to the main Asset Library interface.
Sort By group
- Status
- When enabled, sorts the list by status, either Found or Unknown.
- Path
- When enabled, sorts the list by file path.
- Category
- When enabled, sorts the list by file type.
- Master File
- When enabled, sorts by the name of the master file.
- Descending
- When enabled, sorts the list in descending order.
List Attributes group
- Path
- When enabled, shows the path of each file.
- Dependency
- When enabled, shows the name of the dependent file
- Category
- When enabled, shows the category of dependent file.
- Master File
- When enabled, shows the name of the master file.
Filter group
- Show Status
- When enabled, displays status information:
- Found: the dependent file has been located in the path specified in the Max files.
- Unknown: the dependent file has not been located in the path saved in the Max file.
- Show Category
- When enabled, displays the following categories of dependent files:
- Maps/Shaders (includes bitmaps)
- Xref
- External
- Animation
- Other
- MCG
- Attribute Contains
- Use the Keyword field to specify a keyword appearing in one of the attributes, either path, dependency, category or master file.
Reset Filters button
Resets all filters to the default setting.
Procedures
To change the path of missing dependent files:
- Select the Max files in the main Asset Library window that you wish to edit.
- Click on the Manage External Dependencies badge button (which appears while mousing over a file), or right-click selected files and choose Manage External Dependencies.
- In the Manage External Dependencies dialog, select the dependencies whose path you want to change by checking the selection box, or select all files by right-clicking and choosing Select All.
Note: The filter options on the sidebar do not select files.
- Click the Auto-Resolve button to select the path to assign to the asset. If you do not know the exact path, you can choose a higher level folder containing the dependency in its subfolders.
- After editing the dependencies, return to the main view by clicking on the return to the Asset Library button at the top right.