![]()

- As a reference position to fit a biped to a mesh: Use Figure mode to fit a biped to a character mesh. This "reference" position, in which the biped is aligned to the mesh, is necessary when a mesh is linked or attached to the biped with Physique. After positioning the biped to fit within a mesh, leave Figure mode on while attaching a mesh to the biped with Skin or Physique, or when using Select And Link on the main toolbar to link the mesh objects of a character to the biped.
You can restore the relationship or "fit" position between the biped and the mesh at any time by activating Figure mode, regardless of which motion file happens to be loaded. After fitting a biped to a mesh in Figure mode, use Save on the Biped rollout to save a figure (FIG) file. If you accidentally reposition the biped in Figure mode, load the figure file.
- For adjusting a biped after a mesh is attached to correct biped joint location: After using the Skin or Physique modifier to attach a character mesh to the biped, you might want to reposition a biped limb relative to the mesh. For example, if the biped shoulder joint is too far out relative to the mesh shoulder, then the modifier must be inactivated and the biped limbs adjusted. Then, if using Physique, apply the Reinitialize command before reactivating the modifier.
- For adjusting a biped after a mesh is attached to correct posture in a motion file: Figure mode is also used to make adjustments after a character mesh is attached or linked to the biped. After loading a BIP motion file, for example, you might find that the character is hunched too far forward during the entire animation. Rotating the biped's spine objects in Figure mode will correct the character’s posture for the entire animation. This is a basic procedure where you simply rotate the biped limbs in Figure mode and then exit Figure mode; the posture will be corrected for the entire animation.
- To define biped structure: Use the Structure rollout, available in Figure mode, to tailor the biped to a character mesh. After creating a biped, make all biped structural changes on the Structure rollout. For example, if your character wears shoes or if its toes do not need to be keyframed individually, you might want to use one toe with one toe link. Set the biped structure before "fitting" the biped to the your mesh character.
- To scale a character: Use the Height setting on the Structure rollout to scale a complete character (that is, a biped and mesh attached with Skin or Physique).
- To produce reverse-knee characters: If your character mesh has reverse knees, rotate the biped calves or thighs along the local X axis 180 degrees in Figure mode; the biped local X axis is along the length of the limb. character studio assumes you want a reverse-knees character if the calves or thighs are rotated past 90 degrees in the local X axis. When Figure mode is turned off, the biped walks, runs, and jumps with reverse knees.
Moving the Head
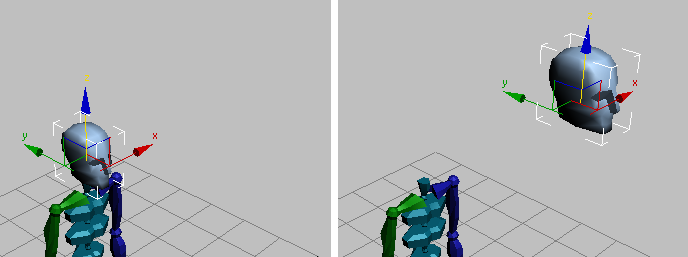
In Figure mode you can move the head relative to the body. This is another way to help fit the biped into a character’s skin.

Moving a biped’s head in Figure mode
Fitting the Biped to a Mesh in Figure Mode
Following are quick notes designed to give you a general sense of the issues involved when fitting a biped to a character mesh:


- Use the Structure rollout to set the number of toes and fingers; specify the number of links per finger and toe. One toe with one toe link is often sufficient if your character wears shoes, or if animating individual toes is not necessary.
- Place the lowest biped spine object at the character’s belt-line.
- Scale the biped fingers to protrude slightly from the character’s hand.
- Use Rubber Band mode and Scale to fit the biped limbs to a mesh.
- Use the Twist Links options to transfer twisting animation in the biped's associated mesh.
- Use Props to represent weapons or tools attached to your character.
- Use Select And Link on the main toolbar to link non-deformable (mechanical) objects to the biped. When using Physique, do this after applying the modifier to prevent Physique from generating extra links (Envelopes). Superflous envelopes (links) can be turned off in Physique however, so this is not critical. Tip: Link objects like eyeballs and weapons to the biped after applying Physique; otherwise links (Envelopes) will extend to these objects when Physique is applied.
- Reposition and use Ponytails on the Structure rollout to animate a character’s jaw, ears, hat, hair and ponytails.
- You can reload a saved FIG file if the biped is repositioned in Figure mode by mistake.

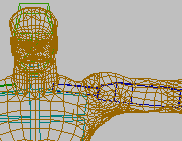
Move the first link on each finger to position the fingers relative to the mesh; use local and world coordinate systems for this. Scale the finger links to position the joints. After positioning the thumb, rotate the first thumb link around the local X-axis until the local Z-axis creates a natural rotation for the thumb (refer to the image). A User view and toggling back and forth between a shaded and wireframe display is helpful when fingers are positioned.