A CATRig can take any form you require. It can have as many spines, heads, pelvises, limbs, fingers, toes and tails as you need; it can even have extra bones.
CAT comes with a library of preset rigs for humans, animals, bugs, robots, and more.
You can create a CATRig from scratch, but usually it is easiest to load in the rig closest to your requirements and edit from there.
At any point you can save a custom CATRig as a new preset for subsequent reuse. This approach is available throughout CAT; load the preset closest to your requirements, edit it to suit your purposes, and then save the result as a new preset.
Using CAT you can create the rig you need quickly. CATRigs include built-in IK as well as easy-to-manipulate spines and tails. Advanced digit controls make it easy to position fingers and toes. By default, legs are created with IK, and arms with FK. All limb bones can be segmented for twisting bones. Segment-twist weights are spline controlled.
Even in setup mode (as opposed to animation mode), the rig is set up so that it can be manipulated intuitively. You can arrange arms using FK and legs with IK. You can move and rotate the pelvis, ribcage, and head intuitively.
During setup you can resize CATRigs without breaking the IK setup, which is useful when merging files. Once an animation layer is created, resizing is no longer possible, thus preventing problems with existing animation.
Procedures
To load a CATRig preset:
- Open the
 Create panel and click
  (Helpers).
 - Open the drop-down list at the top of the panel and choose CAT Objects.
- Click the CATParent button.
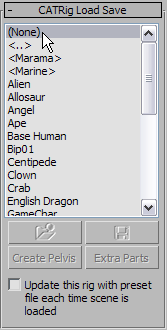
- Choose a preset rig from the list on the CATRig Load Save rollout.

- Click or drag in the viewport to add the preset to the scene. Note: Preset rigs that use the RG3 format can be added to the scene only by clicking. You can resize the rig subsequently by changing the CAT Units Scale value.
The rig appears in the viewport.
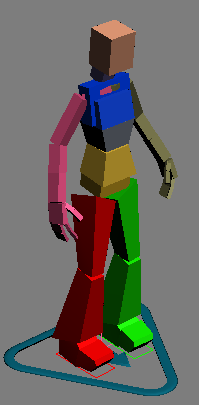
Marama CATRig preset
On the Create panel, the CATRig Parameters rollout shows the rig’s basic parameters. You can change the parameters during creation; otherwise, like other 3ds Max objects, you can edit the creation parameters later by selecting the CATParent object and opening the Modify panel.
To create a CATRig from scratch:
- Open the
 Create panel and click
  (Helpers).
 - Open the drop-down list at the top of the panel and choose CAT Objects.
- Click the CATParent button.
- In the list on the CATRig Load Save rollout, make sure <None> is highlighted, and then drag in the Perspective or Top viewport to add the CATParent object.
- With the CATParent selected go to the Modify Panel.
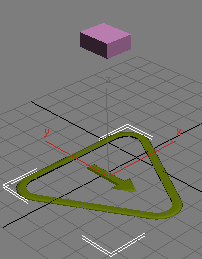
- At the bottom of the CATRig Load Save rollout, click Create Pelvis.
The pelvis appears in the viewport, centered over the CATParent.
-
 Select the pelvis.
 The pelvis is an example of a hub, and when you select it, the Hub Setup rollout appears on the Modify panel. From this rollout you can add legs, arms, spines, tails, extra bones, and additional rigging objects (props, spare parts, and so on). For more information about the Hub Setup parameters, see Hubs
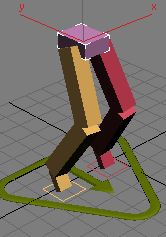
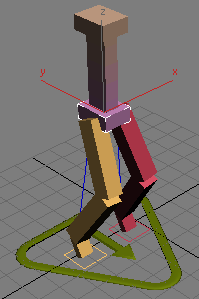
- On the Hub Setup rollout, click Add Leg twice.
Two legs are added on opposite sides of the pelvis.
- Click Add Spine.
A spine, consisting of a number of bones and another hub, appears on top of the pelvis. In effect, the second hub is a ribcage.
-
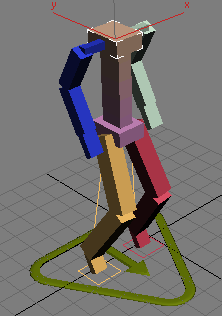
 Select the hub at the top of the spine and click Add Arm twice.
 Arms are added to either side of the ribcage.
- Click Add Spine.
A new spine and a third hub appear atop the ribcage. This third hub can act as a head.
-
 Move the head hub downward and slightly forward, to produce a more human-like structure.
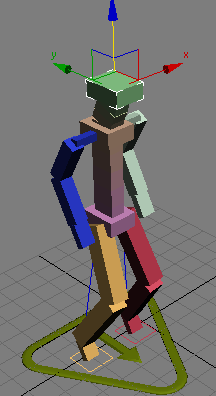
You now have a basic CATRig. All of the example cATRigs were created using variations of this method, so you can see that it’s possible to create a vast variety of CATRigs with a few basic tools.