Blending between layers is often as simple as animating the Global Weight value for a layer in the layer stack. Sometimes, however, you might want to blend between individual limbs or turn off some elements (for example, the legs) to use the animation from another layer, below the current layer on the stack. This is called feathered weighting. An example of this is when using keyframe animation for the upper body and CATMotion for the legs.
You manage global weights with the Global Weight setting and the Curve Editor. Local weights have their own setting and Curve Editor.
Weights View is stored on the CATParent. However you can also access the global and local weights directly.
To navigate directly to the Global Weight Curve Editor:
- On the
 Motion panel
  Layer Manager rollout, click
  (Curve Editor: Global Weights).
 Track View opens to display the layers in the layer stack. You can now view and edit the curves controlling the layer weights for the selected layer.

To blend on an absolute layer:
- Go to the frame to blend to, and on the Layer Manager rollout, add an
 Absolute layer.
 The Absolute layer overrides existing animation layers and the rig remains stationary on the frame that the layer is created.
- Rename the layer if you like.
- On the Motion panel
 Layer Manager rollout, click
  (Curve Editor: Global Weights).
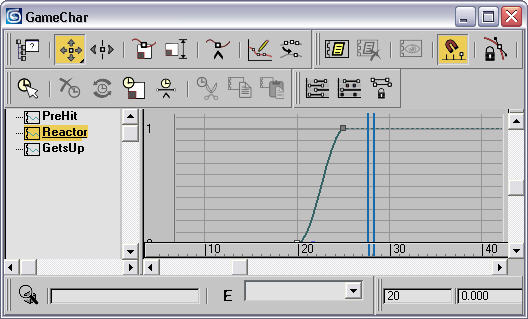
 The Curve Editor opens to the Global Layer Weights view, showing the existing layers for the rig. The following illustration shows three layers: PreHit, Reactor and GetsUp.

- Use
 (Insert Keys) to create a key at the frame to blend from and set the weight to 0.0.
 - Insert another key at the frame to blend to and set the weight to 1.0.
The layer will now blend on and the character will be controlled by the new layer.

To navigate directly to the Local Weight Curve Editor:
-
 Select the rig element for which you want to edit the local weight, and on the Motion panel
  Layer Manager rollout, click
  (Local Weight Curve Editor) . Track View opens to display the layers in the layer stack. You can now view and edit the curves that control the layer weights for the selected object in the highlighted layer.