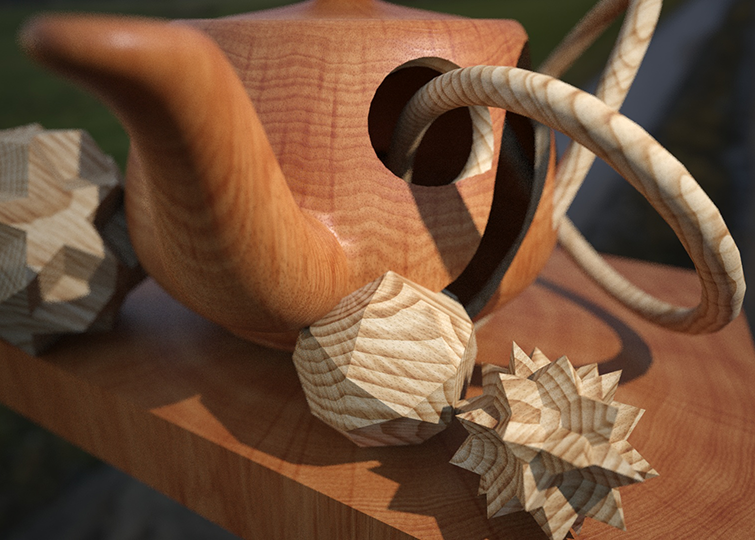
Use the Advanced Wood map to generate realistic 3D wood textures.
Note: The Advanced Wood map appears in the Browser only if the active renderer supports it.

Interface
Presets rollout
- Presets
- Choose from the presets to apply standard wood textures such as oak, pine, and walnut, along with a variety of finishes.
General rollout
Overall group
- Scale
- Sets the overall scale of the wood texture.
- Axis
- Sets the local axis for aligning the grain of the wood, either X, Y or Z.
- Use Scene Units
- Uses scene units to calculate scale.
- Roughness
- Sets the level of roughness to send to the material. The maximum setting is 1.
Early Wood group
- Color
- Sets the color of the early wood, which begins growing in the spring and is lighter in color. The difference in shade between the early wood and late wood helps define the look of the wood.
Alternatively, you can use a map to define the color.
- Use Perlin Noise
- Applies realism-enhancing visual noise to the early wood.
- Use Groove Roughness
- When enabled, sets the level of roughness for the early wood only. The maximum setting is 1.
Late Wood group
- Power
- Sets the intensity of color for the late wood, which is darker than the early wood. For most purposes, you can use the Power setting instead of selecting a specific color. The maximum setting is 4.
- Use Color
- Enables the use of a specific color for late wood.
- Color
- Sets the custom color of the late wood.
- Use Perlin Noise
- Applies realism-enhancing visual noise to the late wood.
- Use Bump
- When enabled, generates a bump map from the late wood. Note that you must connect the Bump output from the Advanced Wood to the Bump map input of the material for this setting to take effect. The maximum setting is 1.
Global group
- Use Diffuse Perlin Noise
- Applies Perlin noise to the diffuse color. Use this to add very fine details to the wood color.
- Scale (Z)
- Sets the scale for noise. The maximum value is 1.
- Diffuse Lobe Weight
- Sets the diffuse reflectance of the wood surface. The maximum value is 1.
Weights and Ratios rollout
Weights and Ratios group
- Fiber Cosine
- When enabled, uses a cosine function to make the grain appear less parallel and more irregular, as well as introducing larger undulations. For more realistic results, this option is usually enabled with Fiber Perlin Noise.
- Fiber Perlin Noise
- Enables Perlin noise to make the grain appear less parallel and more irregular, as well as introducing larger undulations. For more realistic results, this option is usually enabled with Fiber Cosine. The maximum value is 1.
- Growth Perlin Noise
- Enables Perlin noise to randomize the thickness of the growth rings, as happens in nature over the years when a tree is exposed to various temperatures. These rings can be seen on the ends of the object and much like the tops of a series of nested cylinders, when cut into produce the grain along their length.
- Late Wood Ratio
- Sets the ratio of late wood for each ring. The maximum value is 1.
- Early Wood Sharpness
- Sets the sharpness for the edges of the early wood color. The maximum setting is 1.
- Late Wood Sharpness
- Sets the sharpness for the edges of the late wood color. The maximum setting is 1.
- Ring Thickness
- Sets the thickness for the growth rings. Lower values will produce a more finely-grained surface while higher values will create more space between the grain. The maximum setting is 1.
Pores rollout

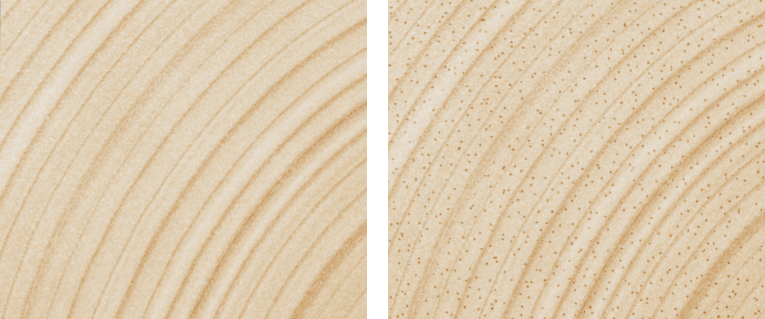
Unfinished pine with early wood pores enabled (right)
Pores group
- Use Pores
- Enables the generation of imperfections on the wood surface, which appear as dots on the growth rings and as streaks along the grain.
- Pore Type
- Sets where to generate pores: either on Early Wood, Late Wood, or Both.
- Pore Radius
- Sets the radius of the individual pores. Lower values such as 0.04 tend to provide a higher level of realism. The maximum setting is 2.
- Pore Cell Dim
- Increases the density of generated pores. The maximum setting is 3.
- Color Power
- Sets the intensity of color for the pores. The maximum setting is 5.
- Pore Depth
- Sets the depth of individual pores for the purposes of bump mapping. The maximum setting is 1.
Rays rollout

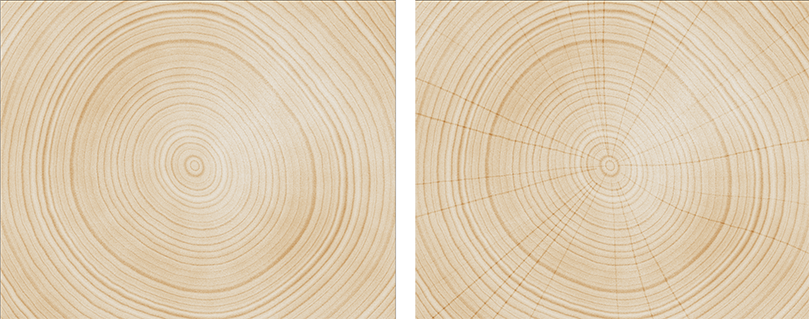
Unfinished pine with rays enabled (right)
Rays group
- Use Rays
- When enabled generates ribbon-like medullary rays, which depending on the settings can be seen as lines radiating from the center of the growth rings and as short vertical lines in the grain.
- Color Power
- Sets the intensity of the ray color. The minimum setting is 0.5 (light colored); the maximum setting is 3 (dark colored).
- Seg Length
- Sets the length of the ray segments. The maximum setting is 10.
- Num Slices
- Sets the approximate number of rays to radially generate. Other ray settings may increase or decrease the visible number. The maximum setting is 400.
- Ellipse Z2X
- Sets the depth of the cells used to generate the ray. The maximum setting is 40.
- Ellipse Radius X
- Sets the radius of the cells used to generate the ray. The maximum setting is 1.
Coordinates rollout
These settings move the map relative to the volume of the object to which it is applied. For more information, see the Coordinates Rollout (3D) topic.