The Skylight light models daylight. You can set the color of the sky or assign it a map. The sky is modeled as a dome above the scene.
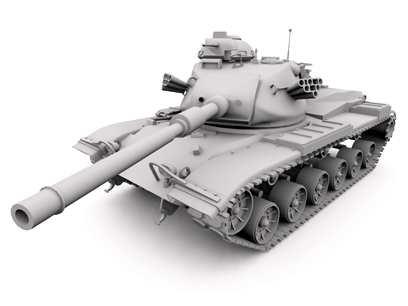
Model rendered with a single skylight, and light tracing
When you render with the default scanline renderer, Skylight works best with advanced lighting: either the Light Tracer or radiosity.
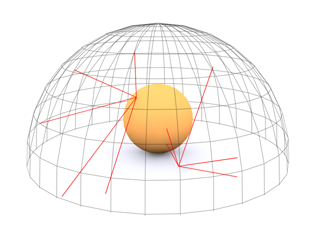
A skylight is modeled as a dome above the scene.
Using a Map with the Skylight
If you use a map with a Skylight, the following guidelines can improve its effect:
- Make sure that the mapping coordinates are spherical or cylindrical.
- For light tracing, make sure you use sufficient samples. A good rule of thumb is to use at least 1,000 samples: set Initial Sample Spacing to 8x8 or 4x4, and increase the value of Filter Size to 2.0.
- Use an image-processing application to blur the map before you use it. With a blurred map, you can use fewer samples to obtain good results. When used with Skylight, a blurred map will still render well.
Be aware that using sufficient samples with a mapped Skylight will take longer to render than if the light were not mapped.
Skylight and Radiosity in Architectural Design
In order for radiosity to be processed correctly when a Skylight is added to the scene, you need to make sure that walls have closed corners and floors and ceilings have thickness under and over the walls. In essence, your 3D model should be built just like the real-world structure is built.
If you build your model with walls that meet along a single edge or floors and ceilings are simple planes, when you process radiosity after adding a Skylight, you can end up with “light leaks” along those edges.
Some of the ways to repair a model so light leaks do not occur are as follows:
- Make sure floors and ceilings have thickness.
You can fix this by extruding those surfaces at a sub-object level or by applying modifiers like Shell or Extrude.
- Use the Wall command to create walls.
The Wall command is programmed to make sure corners are constructed of solid objects instead of leaving a single, thin edge.
- Ensure that floor and ceiling objects extend beyond walls.
Floor objects need to extend under walls and ceilings need to extend over walls.
By building your 3D model using these guidelines, light leaks will not occur when you process radiosity after adding a Skylight to the scene.
Using Render Elements with a Skylight
If you use Render Elements to output the lighting element of a skylight in a scene using either radiosity or the light tracer, you cannot separate the direct, indirect, and shadow channels of the light. All three elements of the skylight lighting are output to the Indirect Light channel.
Procedures
To create a Skylight:
- On the Create panel, click Lights.
- Choose Standard from the drop-down list.
- On the Object Type rollout, click Skylight.
- Click a viewport.
The light is now part of the scene.
Note: The position of the Skylight, and its distance from objects, has no effect. The Skylight object is simply a helper. Skylight always comes from “overhead.” - Set the creation parameters.
Interface
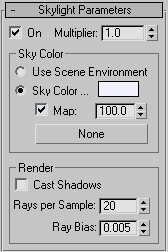
- On
- Turns the light on and off. When On is on, shading and rendering use the light to illuminate the scene. When off, the light is not used in shading or rendering. Default=on.
- Multiplier
- Amplifies the power of the light by a positive or negative amount. For example, if you set the multiplier to 2, the light will be twice as bright. Default=1.0.
Using this parameter to increase intensity can cause colors to appear "burned out." It can also generate colors not usable in videos. In general, leave Multiplier set to its default of 1.0 except for special effects and special cases.
Sky Color group
- Use Scene Environment Colors the light using the environment set up on the Environment panel.
-
Sky Color Click the color swatch to display a Color Selector and choose a tint for the Skylight.

[map controls] These let you use a map to affect Skylight color. The button assigns a map, the toggle sets whether the map is active, and the spinner sets the percentage of the map to use (when the value is less than 100%, map colors are mixed with the Sky Color).
Tip: For best results, use a high dynamic range (HDR) format such as OpenEXR.Sky Color maps, including HDR maps, provide illumination for all renderers. They also provide lighting levels and shadows for Nitrous viewports. Unlike releases prior to Autodesk 3ds Max 2022, Sky Color maps do not require the Light Tracer.
Tip: Shadows from a Sky Color map enhance outdoor scenes, but they can cause interior scenes to appear too dark in Nitrous viewports. You can avoid this by setting the Skylight to cast light but no shadows. See the Skylights as Ambient Color viewport setting in Per View Presets.
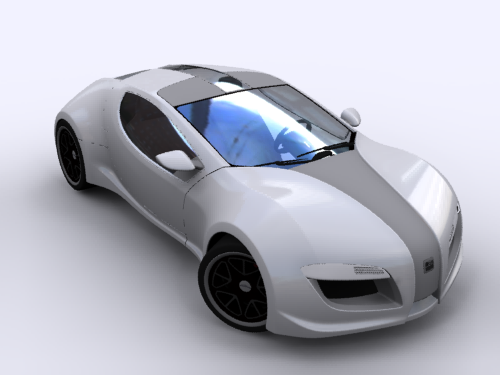
Car rendered with a plain white skylight
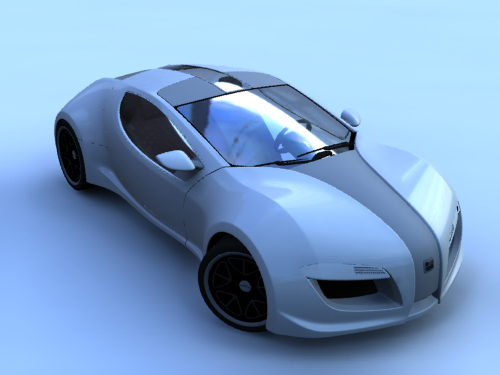
Skylight color and levels from an HDR image
Render group
- Cast Shadows
- Causes the skylight to cast shadows. Default=off.
Note: The Cast Shadows toggle has no effect when using radiosity or the light tracer.Note: Skylight objects will not cast shadows in an ActiveShade rendering.
- Rays per Sample
- The number of rays used to calculate skylight falling on a given point in the scene. For animation, you should set this to a high value to eliminate flickering. A value of around 30 should eliminate flickering.
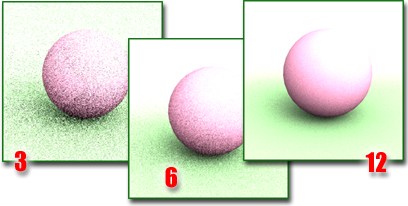
Increasing the number of rays increases the quality of your image. However, it also increases rendering time.
- Ray Bias
- The closest distance at which objects can cast shadows on a given point in the scene. Setting this value to 0 can cause the point to cast shadows upon itself, and setting it to a large value can prevent objects close to a point from casting shadows on the point.