To XRef parameters, you use the Track View - Curve Editor to publish the parameter tracks as custom attributes. The parameters can be animated.
- In the source scene, select the object whose parameters you want to XRef.
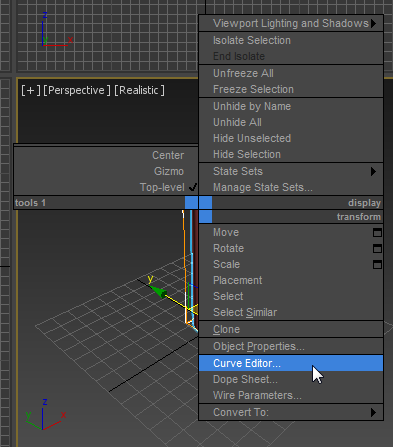
- Right-click and choose Curve Editor.
- In the Curve Editor
 hierarchy view, click and
Ctrl+click to highlight the tracks you want to publish.
hierarchy view, click and
Ctrl+click to highlight the tracks you want to publish.

- Right-click, and from the hierarchy quad menu, choose Publish Parameters.

A selection cursor with a rubber-band line appears in viewports.
- Click the original object. A pop-up menu gives you two choices.

If you are publishing creation parameters for the object, choose Base Object. If you are publishing modifier parameters, choose Top Object Space Modifier.
3ds Max publishes the parameters are custom attributes.
- Save the source scene.
- In the local scene, choose File menu References XRef Objects.
- Select the XRef'd object and go to the Modify panel. The published parameters appear in a Custom Attributes rollout.

You can adjust and animate these parameters locally. You can also use the Track View - Curve Editor
hierarchy right-click menu to revert to the original settings in the source scene.
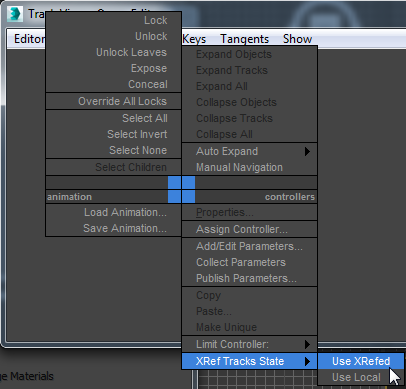 Warning: Choosing XRef Tracks State Use XRefed discards local settings for the parameters, and deletes the local controllers.