Lets you view and manage all objects that you have imported as civil-design data.
Specifically, this panel allows you to:
- Update imported objects from their original source files.
When you update imported objects, the positions of any dependant objects such as load markings, placed objects, swept objects, rails, and buildings are also updated.
- Sort the list in ascending or descending order.
- Filter the contents of the panel based on an individual source file, model name, string label mask, or object name mask.
- View the overall length and number of points for an individual object.
- Change the source file association for an object.
This can be useful when the original source file no longer exists or has been moved to a different location. It is even possible to associate strings that were originally imported from one file format to a file with a different format, as long as the string and model names can be detected in the new file.
- See whether linked source files have been updated since the contents of the file were imported into the current scene.
Procedures
To sort a column in ascending or descending order:
- Click the label at the top of the column.
To apply a filter to the object list:
- Choose the criterion on which you wish to apply a filter.
- Enter the mask (wildcard) string.
- You can click
 to choose an object name for the initial value of the mask string.
 - Click the Apply Filter button.
To remove a filter from the list:
- Click the Remove Filter button.
Interface
[filtering options]

Let you filter the list to help you focus on particular objects. This can help you manage complex scenes.
- [drop-down list]
- Choose the criterion by which to filter the list:
- 3ds Max Object Name Lists only objects that match a full or partial 3ds Max object name mask.
- By Source String/Object Name Lists only objects that match a specified string label mask.
- By Source Model/Layer Name Lists only objects that were derived from a particular source model.
- Source File Lists only objects that were derived from a specific source file.
-
[initial string]
- Click to open a dialog that lets you choose an object name to use as the initial mask (wildcard) string.
- [mask (wildcard) string]
- Lets you narrow the filter set by entering a wildcard expression. Default = * (select all).
- Apply Filter
- Click to filter the object list.
- Remove Filter
- Click to remove the active filter from the object list.
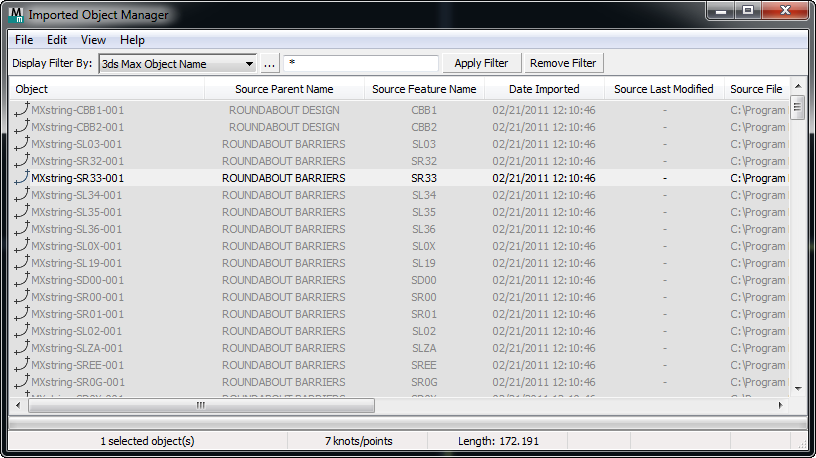
- [object list]
- Displays the imported objects.
Objects in the list are color coded to indicate their status:
- Black The object was derived from a source file that still exists and has not been updated since you imported the data into Civil View.
-
Gray The source file has either been deleted or moved, causing the link to the source file to be broken. The Update option is disabled for this object.
To re-associate the object with an alternative source file, right-click the entry and choose Change Source File Association.
Tip: The alternative source file can have a different format from the file originally used. The only requirement is that the new source file must contain the same combination of model and string label name. For example, if a source MX GENIO file has been lost, you can re-associate affected objects with an MX model file from the same project. -
Red The source file has been updated since you imported this object into Civil View.
A red entry suggests that your visualization might be out of step with your source civil-design data. The File Last Modified column indicates the date that the source data was updated.
Note: For objects derived from MX model file data, the last modified date of the source model is displayed instead of the last modified date of the entire model file.To synchronize the Civil View model with its source, right-click the entry and choose Update.
- [status line]
- Shows the status of the object list.
When you click to highlight an individual object, the status line also shows the number of points in the object, and its length.