The U-Type Stair object lets you create a two-flight staircase, with the two flights parallel to each other and a landing between them.

Types of U-type stair: open, closed, and boxed
U-type stairs have two flights in opposite directions, and a landing.
For using materials with stairs, see Stairs and Materials.
Procedures
To create U-Type stairs:
- In any viewport, drag to set the length for the first flight. Release the mouse button, then move the cursor and click to set the width of the landing, or the distance separating the two flights.
- Click and move the cursor up or down to define the rise of the stairs, then click to end.
- Adjust the stairs by using the options in the Parameters rollout.
Interface
Parameters rollout
Generate Geometry group

- Stringers
-
Creates stringers along the ends of the treads of the stairs. To modify the stringers’ depth, width, offset and spring from the floor, see Stringers rollout.
- Carriage
-
Creates an inclined, notched beam under the treads which supports the steps or adds support between the stringers of the stairs. You might also know this as a carriage piece, a horse, or a roughstring. See Carriage rollout to modify the parameters.
- Handrail
-
Creates left and right handrails. See Railings rollout to modify the handrails’ height, offset, number of segments, and radius.
- Rail Path
-
Creates left and right paths you can use to install railings on the stairs. See Stairs for the instructions on how to do this.
Layout group

- Left/Right
-
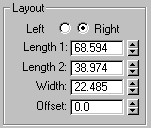
Controls the position of the two flights (Length 1 and Length 2) relative to each other. If you select left, then the second flight is on the left from the landing. If you select right, then the second flight is the right from the landing.
- Length 1
-
Controls the length of the first flight of stairs.
- Length 2
-
Controls the length of the second flight of stairs.
- Width
-
Controls the width of the stairs, including the steps and the landing.
- Offset
-
Controls the distance separating the two flights and thus the length of the landing.
Steps group

- Thickness
-
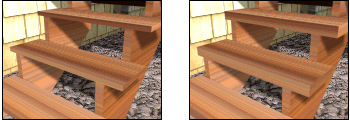
Controls the thickness of the steps.

Step thickness variance between two stairs
- Depth
-
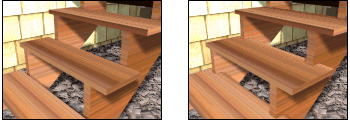
Controls the depth of the steps.

Step depth variance between two stairs
- Generate Mapping Coords
-
Applies default mapping coordinates to the stairs.
Note: If a visible viewport is set to a non-wireframe or non-bounding-box display, Generate Mapping Coordinates is on for all primitives to which you apply a material containing a map with Show Map In Viewport on. If all viewports are set to wireframe or bounding box, 3ds Max turns on Generate Mapping Coordinates for primitives containing mapped materials at render time. - Real-World Map Size
-
Controls the scaling method used for texture mapped materials that are applied to the object. The scaling values are controlled by the Use Real-World Scale settings found in the applied material's Coordinates rollout. Default=off.