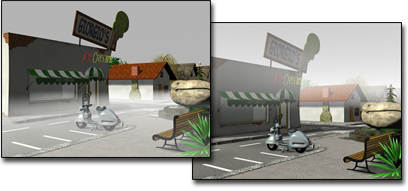
This plug-in effect gives the appearance of fog or smoke. Fog can cause objects to appear to fade as they increase in distance from the camera (standard fog), or can be layered fog that envelops all or parts of objects in a blanket of mist.
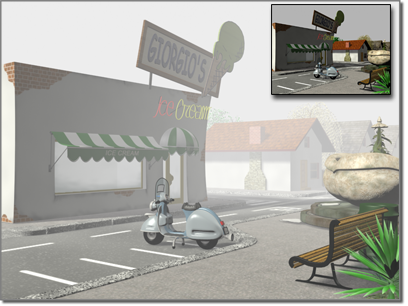
Fog added to a scene
Fog renders only in Camera or Perspective views. Orthographic or User views don’t render Fog effects.
Procedures
To use standard fog:
- Create a Camera view of your scene.
- In the camera's creation parameters, turn on Show in the Environment Ranges group.
Standard fog is based on the camera's environment range values.
- Set Adjust Near Range and Far Range to include the objects you want to fog in your rendering.
As a general guideline, set Far Range just beyond the objects, and Near Range to intersect the object geometry closest to the camera.
- Choose Rendering
 Environment.
 - Under Atmosphere on the Environment panel, click Add.
The Add Atmospheric Effect dialog is displayed.
- Choose Fog, and then click OK.
- Make sure you choose Standard as the type of fog.
To use layered fog:
- Create a Camera or Perspective view of your scene.
- Choose Rendering Environment.
- Under Atmosphere on the Environment panel, click Add.
The Add Atmospheric Effect dialog is displayed.
- Choose Fog, and then click OK.
- Choose Layered as the fog type.
- Set the parameters for layered fog.
You can have multiple fog layers in the scene by adding multiple Fog entries to the list and choosing Layered.
Interface

Fog group
- Color
- Sets the color for the fog. Click the color swatch, and then select the color you want in the Color Selector. You can animate the color effect by changing the fog color at a nonzero frame with the Auto Key button on.
- Environment Color Map
- Derives the fog color from a map. You can map the background and the fog color, you can animate the procedural map parameters in Track View or Material Editor, and you can opacity-map the fog.
The large button displays the name of the color map, or "None" if no map is assigned. Click to assign a bitmap or map from the Material/Map Browser.
You can also drag and drop a map from a Material Editor sample slot. If the Slate Material Editor is open, you can drag from a map node's output socket, then drop onto this button. You can also drag and drop from a map button in the Material Editor or anywhere else in the 3ds Max interface. When you drop a map onto the map button, a dialog asks if you want the map to be a copy (independent) or an instance of the source map.
To adjust the map's parameters (for example, to assign a bitmap or change the coordinate settings), drag the Map button to the Material Editor, and be sure to drop it as an instance. In the Compact Material Editor, drop the map over an unused sample slot. In the Slate Material Editor, drop it over the active View.
Important: The map must use Environmental mapping coordinates (spherical, cylindrical, shrink wrap, or screen). - Use Map
- Toggles the effect of this map on or off.
- Environment Opacity Map
- Alters the density of the fog.
You assign the opacity map, edit it, and toggle its effect in the same way as the Environment Color Map.
- Fog Background
- Applies the fog function to the background of the scene.
- Type
- When you choose Standard, Fog uses the parameters in the Standard group, and when you choose Layered, Fog uses the parameters in the Layered group.
- Standard Enables the Standard group.
- Layered Enables the Layered group.
Standard group
Thins and thickens the fog based on the distance from the camera.
- Exponential
- Increases density exponentially with distance. When turned off, density increases linearly with distance. Activate this checkbox only when you want to render transparent objects in volume fog. Tip: If you turn on Exponential, this increases the Step Size value to avoid banding.
- Near %
- Sets the density of the fog at the Near Range (Camera Environment Range parameter).
- Far %
- Sets the density of the fog at the Far Range (Camera Environment Range parameter).
Layered group
Thins and thickens the fog between an upper and lower limit. You can have multiple layers of fog by adding multiple fog entries to the list. Because you can animate all the fog parameters, you can also animate fog rising and falling, changing density and color, and add horizon noise.
- Top
- Sets the upper extent (in world units) of the fog layer.
- Bottom
- Sets the lower extent (in world units) of the fog layer.
- Density
- Sets the overall density of the fog.
- Falloff (Top/Bottom/None)
- Adds an exponential falloff effect so that the density is reduced to 0 at either the Top or Bottom of the fog extent.
- Horizon Noise
- Turns on the horizon noise system. Horizon Noise perturbs just the horizon of the fog layer to add realism.
- Size
- Scale factor applied to the noise. Larger scale values make the fog tendrils larger. Default=20. Tip: If you want tendrils to really pop out, try making the density greater than 100.
- Angle
- Determines the affected angle off the horizon line. For example, if the angle is set to 5 (a reasonable value), then starting at 5 degrees below the horizon, the fog will begin to break up.
This effect is mirrored above and below the horizon, which can produce strange results when the height of the fog layer traverses the horizon. Typically you'd want the fog to be either above or below the actual camera horizon. (You can use the horizon line in the camera parameters as an aid to help you position this.)
- Phase
- Animating this parameter animates the noise. If Phase is moving in the positive direction, then the fog tendrils will drift upward (and deform at the same time). If your fog is above the horizon you may want to animate Phase in the negative direction to make the tendrils fall downward.