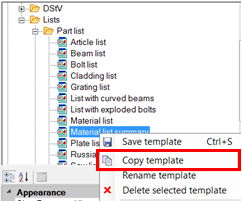
User-defined material lists can be created from existing BOM templates.
Select an existing template, copy and rename it (in this example, a copy of Material list summary is renamed My Material list summary).
The list becomes immediately available and can be modified.

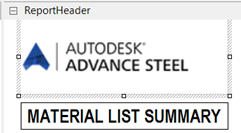
Inserting your own logo
- Click in the field with the logo. The source file of the logo appears in the properties list, in the Image field.
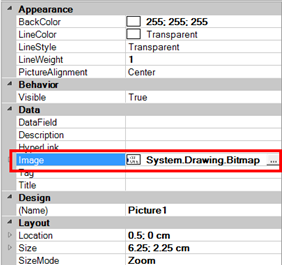
- Click
 to open Explorer.
 - Select the corresponding folder with the new logo and click OK to confirm the selection.
The new logo is inserted.
Modifying the Company text field
- Select the Company text field.
- Right-click and select Content from the context menu. The following dialog box appears:
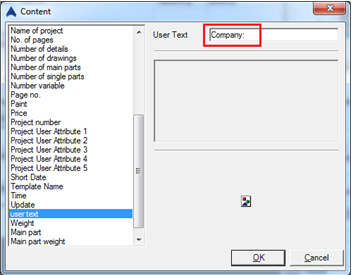
Since the text field has the "User Text" property, the desired text can be inserted in the corresponding field (e.g., company description, address, contacts, etc.).
- Click OK.
The inserted information appears in the list template.
Inserting a new text field
New text fields with additional information can be inserted in the header of the list.
- Use the command for inserting a new text from the left side of the BOM Editor.
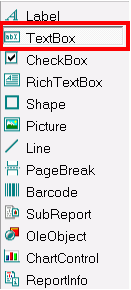
- Draw a rectangle, using the mouse, to place the text field in the header of the list.

All information for the newly inserted text field is available in the properties list. The information can be edited, if necessary:
Alignment (Text position) Back Color (Background color) Font (Text style and text size) Location (Location of the text field, in this example in the BOM header) Size (Width and height of the field) Text (Content of the text field)  Note: The coordinates in the Location row refer to the upper left corner of the text box. The coordinates can be overwritten, and thus the text box can be later modified. Correspondingly, the width and the height of the text box can be modified by overwriting the values in the Size row.
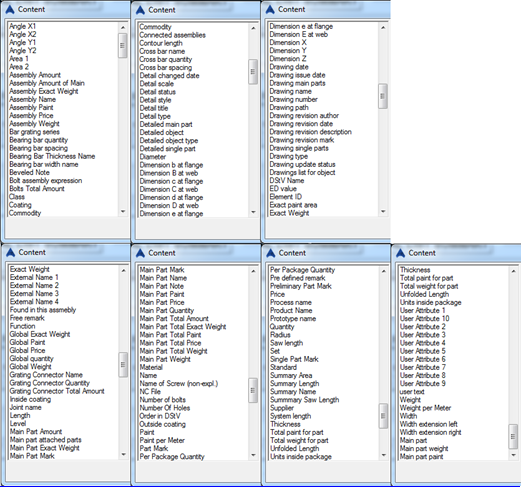
 - Select the new text field, right-click and select Field Content to select the information that will appear in the text box. The following options are available:
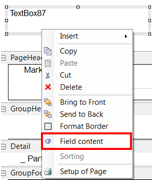
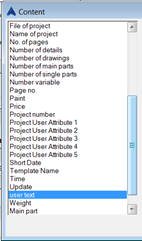 Note: The incorrect modifications can be undone using Undo.
Inserting a new column
Follow the same steps as when inserting a new text field. When introducing a new column, the required space must be created in the first place, in each section of the template (Page Header, Group Header, Detail, Group Footer and Page Footer).
This can be done by reducing the size of the existing columns and by repositioning the existing columns using the "Location" field or by dragging the fields in the template.
A new field must be inserted, one under the other, in each section of the template, starting from the "Page Header" down to the "Details" and the "Page Footer" section.
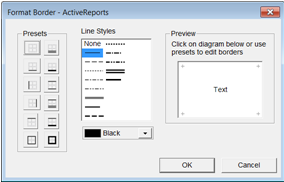
The page borders can be selected individually.
To access the Format Border dialog box, select a field, right-click and select Format Border from the context menu.

In the Detail section of the template, select the newly created field, right-click and select Field content. Select the necessary attribute. See the Appendix for all the available attributes.
Adding new model objects to the content of the list
In addition to the visual adjustment of the list, you can add or remove objects from the model to the list using the "Report Content" function.
- Right click the list template and select Report content from the context menu.
- In the Report content dialog box, select or unselect the corresponding options.

Defining sorting functions
Each list is provided with predefined sorting. You can modify the existing sorting or change the importance of the elements.
- Right click the Detail row and select Sorting from the context menu.
The Template sorting dialog box appears. The left area of the window contains variables defined as sorting criteria.
- Select the corresponding criterion (for example: material) and move it to Result by clicking the right arrow.


- By clicking the "Up Arrow", the criterion becomes more important (for instance, the second in importance after "Name").
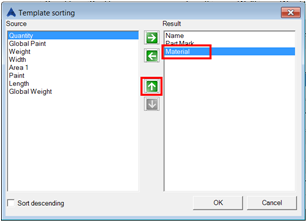

The newly created sorting criteria will sort individual elements from the lists by name, quality of the material (S235 before S355) and part marks. To confirm the selection click OK.
Click "Save template" to save the information in the user-defined list.
Structure of the material lists
Each list consists of the following parts:

| ReportHeader |
List header The fields appear only on the first page of the list. |
| PageHeader |
Page header The fields appear at the top of each page of the list and under the header of the first page of the list. |
| GroupHeader X |
Header of the group X A group header can be used for structuring a list. The easiest way for structuring it is by sorting it after main parts (see template - structured BOM). It is possible to define several group headers. Right-click in the GroupHeader area and, then, "Add rows...". A group header requires a corresponding group footer. This way a new structure can be added to the lot. |
| Detail |
Part Lists The elements from the model corresponding to the selection are listed here. |
| GroupFooter X |
Footer of the group X This row represents the ending of a group. In the group footer certain calculations of the group are possible. |
| PageFooter |
Page footer This row appears at the bottom of each page of the list. |
| ReportFooter |
Footer of the list Numerous combinations of the parts described above are available. |
Structure of the list
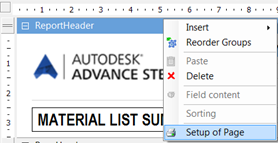
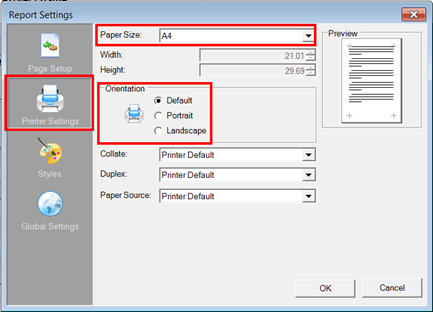
Most material lists are created in landscape format for the DIN-A4 sheet. To change the format, go to "Setup of Page". Modifications can be made in the Printer Settings (see following figures):
Appendix
