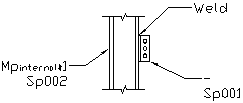
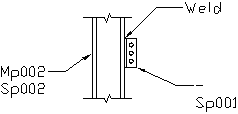
Transforming a main part into a single (attached) part can create numbering problems. The following steps are performed to fix this problem.
- Fix the modeling problem.
- Run another numbering.
- Update the Single Part drawing.
- Erase the assembly drawing.
- Re-detail the assembly.
Step 1: Fix the modeling problem
- Fix the assembly problem in your model.
- For example, add a missing weld between a column and a clip angle.

Step 2: Run another numbering
Run another numbering on the entire job or by phase as it was previously performed. The result will be:
- The single part number will be kept.
- The new single (attached) part will get the main part number of the assembly.
- The main part of the assembly will get a new assembly number or one according to an equal existing assembly.

Step 3: Update the Single Part drawing
In the Document Manager, update the single part drawing for the attached piece (angle).
Step 4: Erase the assembly drawing
In the Document Manager, delete the assembly drawing (column).
Step 5: Re-detail the assembly
The last step is to detail the assembly drawing (column).

From now on, the assembly will be back to normal with one assembly number (on the column) and a single part number for both pieces (column and angle).