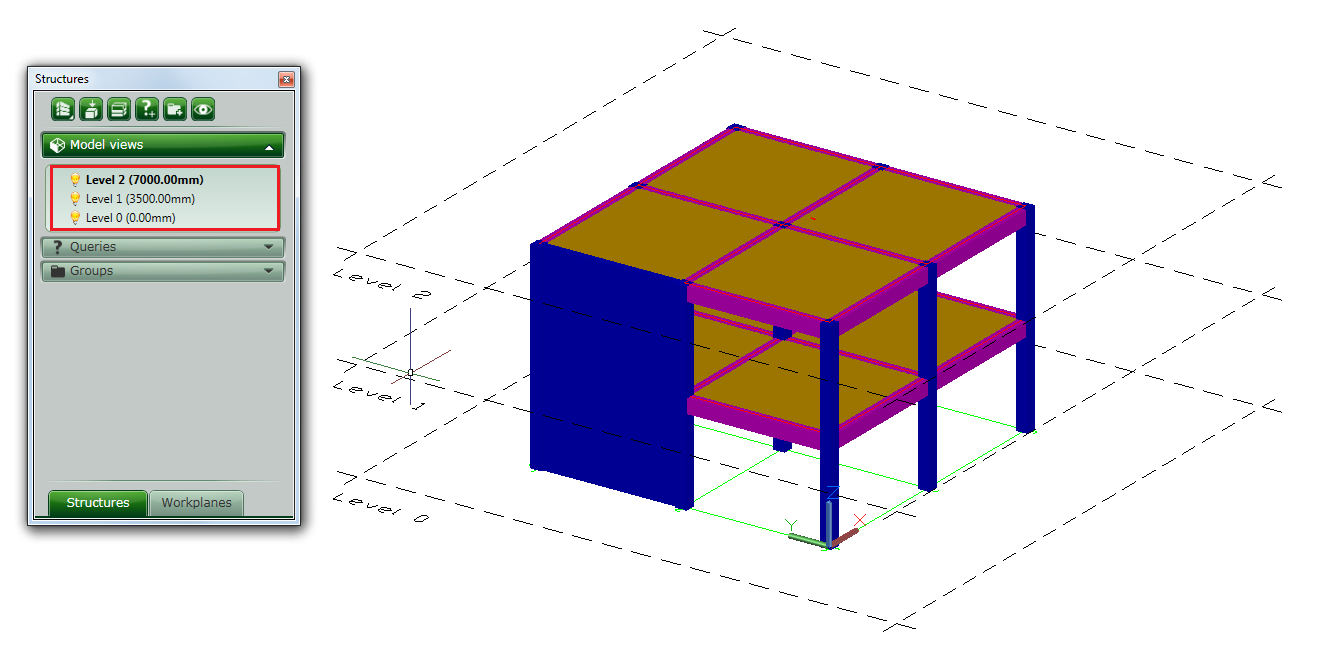
Workplanes can be used for an easier modeling of a structure with levels.
A level is defined by two work planes: one defines the base of the level and the other one defines the upper part of the level.
An element can be attached geometrically to one or two work planes (depending on the type of the element) and is relative to one level.
When you create a structure with levels, each created element will be attached to the active level.
The levels are displayed in the Project Explorer. You can access the Project Explore by clicking
 (Project Explorer) in the
Home
tab >
Project
panel.
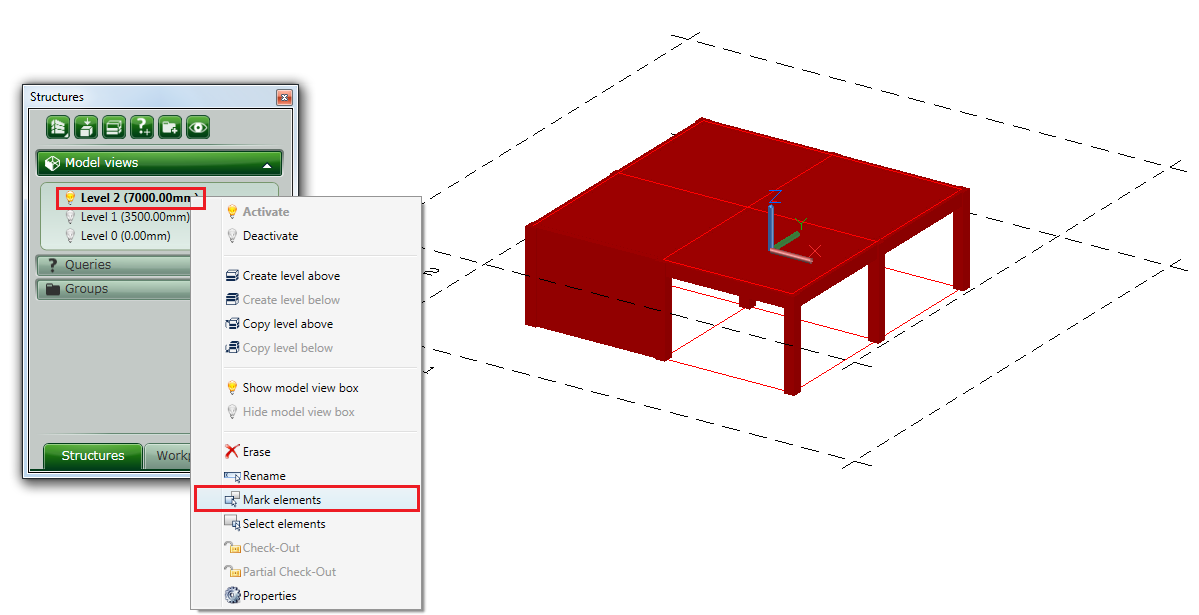
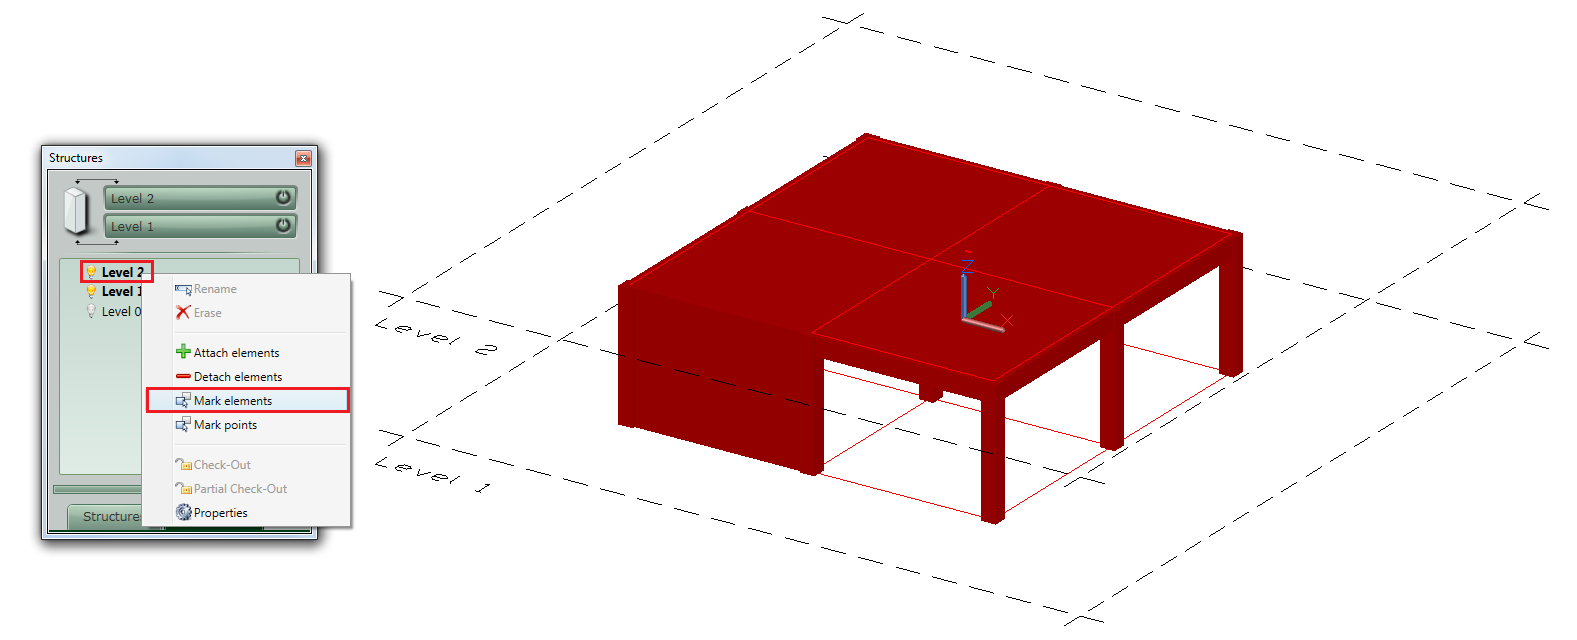
To see the elements that are attached to a level, right click on the level and select Mark elements. The elements that are attached to the level are highlighted.

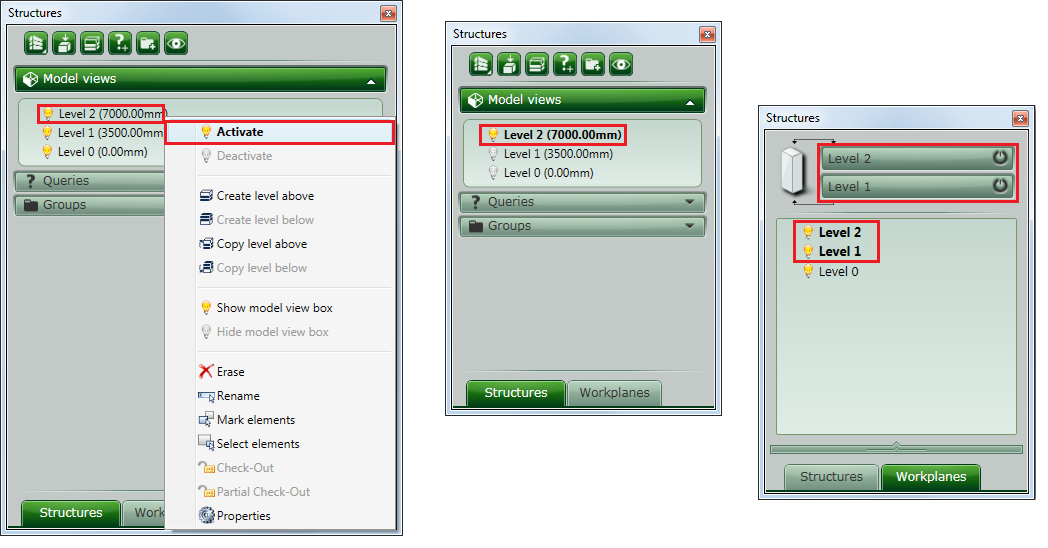
In the Project Explorer, the active level is displayed in bold.
To activate a level, double click on it or right click and select Activate.
When the level is active, the work planes that define the level will become active.
If you forget to activate the level when defining an element, you can later attach it to the desired level.
Attaching different types of elements to workplanes and levels
If a level is activated, the new model elements will be created on the workplane(s) of the activated level.
- Walls and columns, whether they are concrete or steel, will always attach to the two workplanes that define the activated level and then you can assign them to a desired level*.
- Slabs and beams, whether they are concrete or steel, will always attach to the workplane that defines the upper part of the activated level and then you can assign them to a desired level*.
If a level is NOT activated, the new model elements will be created according to the UCS. To attach these newly created elements to levels:
- First activate the level where you want these elements to be on.
- For walls and columns, whether they are concrete or steel, attach them to the two workplanes that define the activated level and then assign them to a desired level*.
- For slabs and beams, whether they are concrete or steel, attach them to the workplane that defines the upper part of the activated level and then assign them to a desired level*.
*To assign elements to a level, use the properties dialog of each element and select the desired level in the Naming tab, Level field.

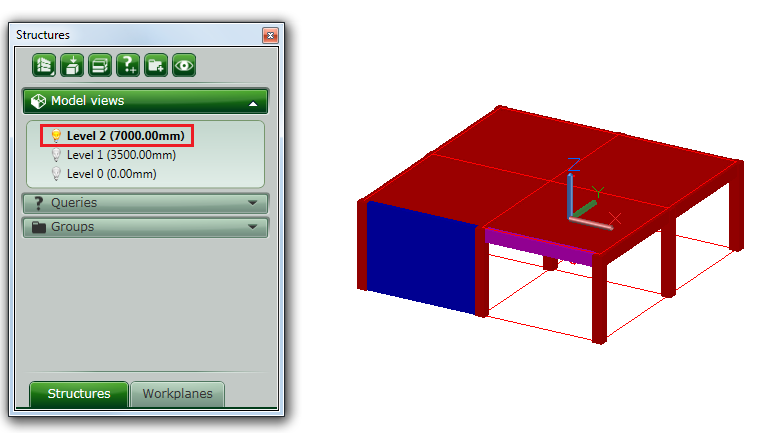
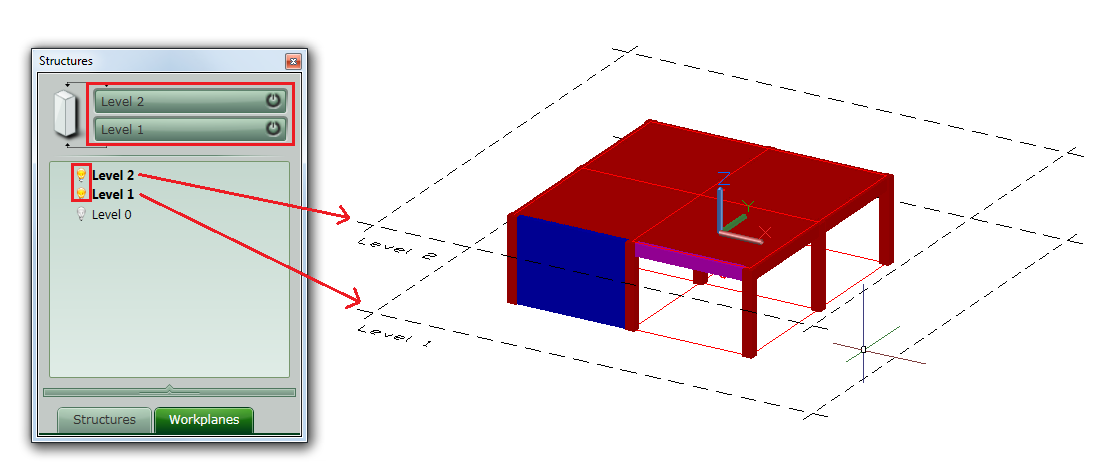
Example: Displaying elements that are not attached to a level
The wall and the beam are not attached to Level 2. To properly attach elements to the desired level, you must follow two steps:
- Attach the elements to the work planes of Level 2.
- Attach the elements to the corresponding level.
Attach the elements to the work planes of Level 2
Activate Level 2 and then "turn on" the work planes that define the level so you can easily see them.
Right click on the base work plane, Level1, and select Attach elements.
Advance Steel then asks you to select the objects to bind on the work plane. In this example, select the wall, because the wall, as a structural element, is also defined on the height of the level, so the wall must be bound to the lower and upper work planes.
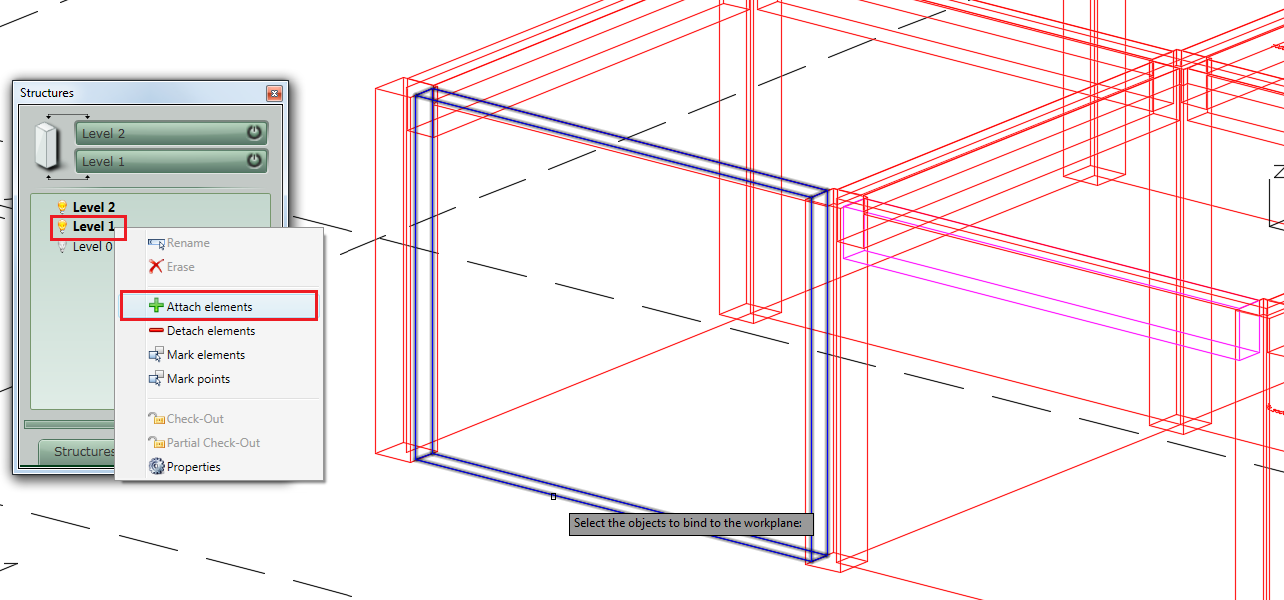
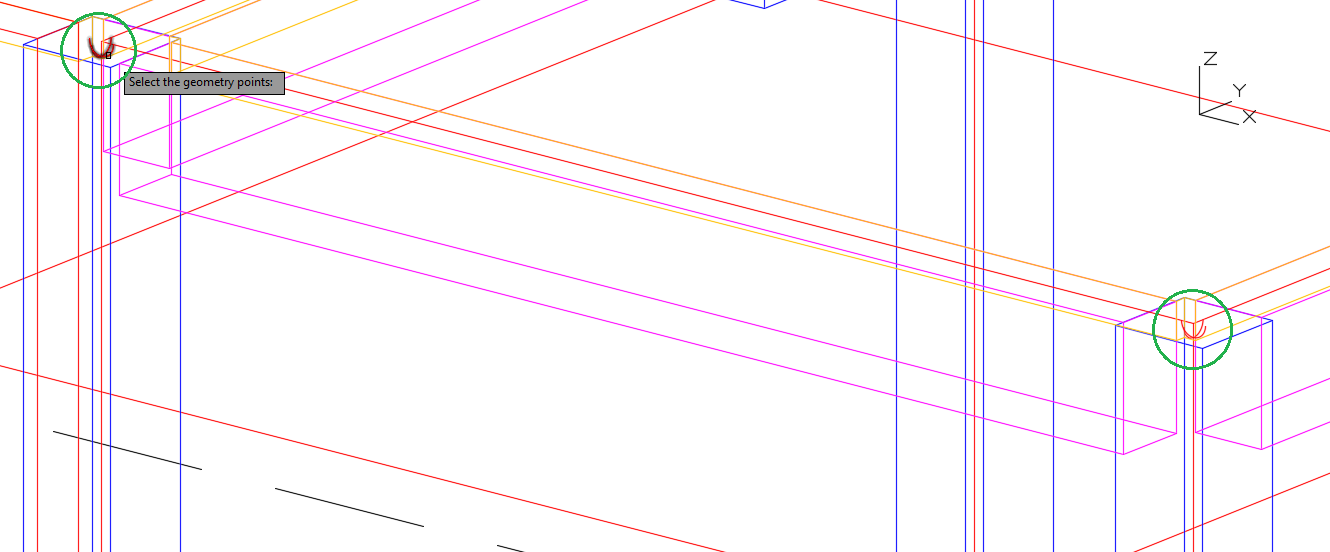
Press Enter to confirm the selection and select the points of the element that will bind it to the work plane.
Select the points on the base of the wall and press Enter.

To check if this element is attached to the "Level 1" work plane, right click on the plane and select "Mark elements". Notice that the wall is marked.
The same applies to bind the top part of the wall to the "Level 2" work plane, but this time you will select the upper points of the wall. Attach the beam using the same method, with the difference that it will only be attached to the upper work plane of "Level 2".
Note that both elements are attached to the upper work plane.
Assign the elements to the corresponding level
This can be done from the properties of each element.
Wall properties:
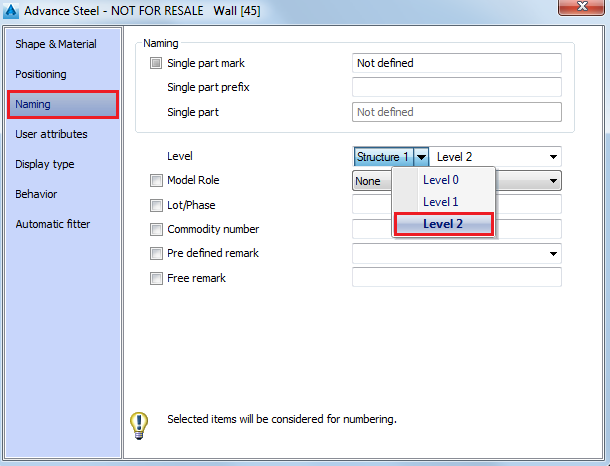
After selecting the level to which each element will be assigned you can check if the elements belong to the right level.
