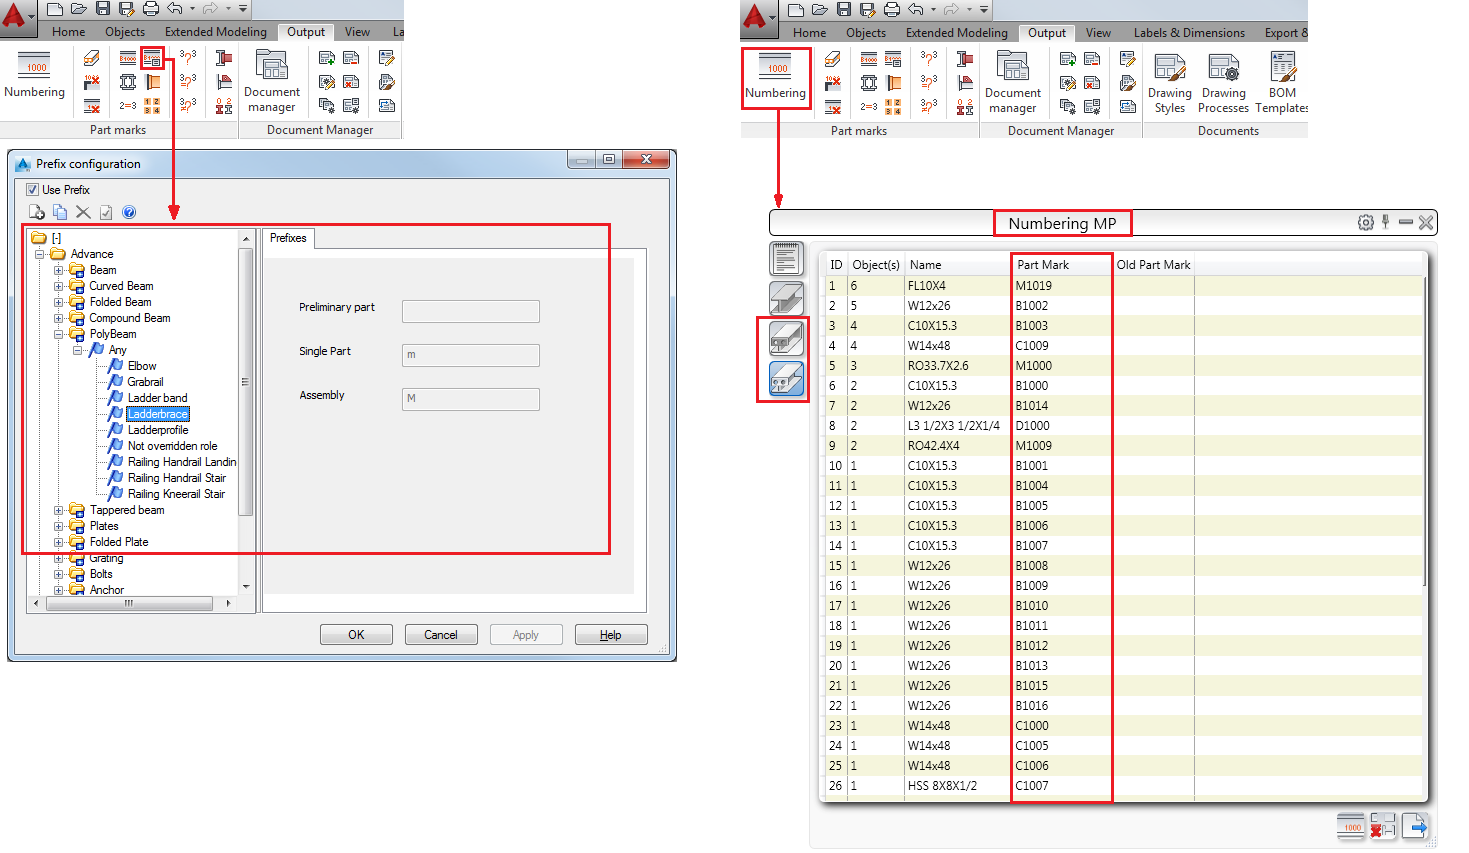
The automatic prefixes for single part and assembly numbering can be configured based on the model role.
You can set different profiles for different jobs. The profile to be used in the numbering should be set as current.
The prefix profiles are grouped according to the elements for which they are defined (beams, plates, folded plates, special parts).
The prefix profiles are separated in two main groups:
- Advance - This category includes all the prefix profiles available in Advance Steel. Their properties cannot be modified.
- User - This category includes a copy of all the prefix profiles from the Advance category and can be modified.
Access the command
In the Output tab  Part Marks panel, click
 (Prefix settings).
Command line: _AstM5PrefixConfigurationExplorer
- In the Output tab
 Part Marks panel, click
 (Prefix settings). The Prefix configuration dialog appears.
- Check the Use prefix box.
- On the left side of the dialog, right-click the required profile and select Set as current profile from the contextual menu.
- The current profile will be used for numbering.
- In the Output tab
 Part Marks panel, click
 (Prefix settings). The Prefix configuration dialog appears.
- Check the Use prefix box.
- Select the User category.
- Click
 (New) or right-click and select New profile from the contextual menu.
- In the New profile dialog box enter the profile name.
- Click OK.
- The new profile appears on the right side of the dialog box. You can configure it or set as the current profile.
- In the Prefix configuration dialog, from the Advance group, select the category to move to another prefix profile.
- Click
 (Copy).
- In the Select target dialog, select the group in which to move the selected category.
- Click OK.
- In the Copy data to profile dialog, select a prefix profile from the drop-down list.
- The selected category is copied in the selected prefix profile.
To configure a new prefix profile
For a new prefix profile it is possible to define prefixes for each object profile. Add a new object type in the selected profile, then define the prefixes.
Define the object types in the selected profile (new profile).
- In the Prefix configuration dialog, select the prefix profile to configure.
- Right click and select New from the contextual menu.
- In the New prefix dialog, select the objects for which the prefix is set. This selection acts like a filter for the objects from the 3D model.
- Select the object type (beam, plate, bolt, etc.).
- Select the model role within the structure.
- If the object type is Beam, select the profile subtype.
- Click OK.
- In the tree panel, the new prefix profile contains the added object type. Now you can set the prefix separately for single and main part numbers. This user configuration is stored to be re-used in future projects.
- In the Prefix configuration dialog, select the prefix profile to delete.
- Click
 (Delete).
- Confirm by clicking Yes in the confirmation dialog box.
- The prefix profile is deleted.
Assign prefixes to different element types according to prefix configuration
