Customize scripts for Dynamo Player
To make Dynamo scripts more adaptable to your needs, they can be designed to include labels, parameters, parameter labels, maximum and minimum value ranges, and more.
You can also assign custom icons to your new and updated scripts. For more information, see Assign custom icons to your scripts.
1. Turn on Is Input
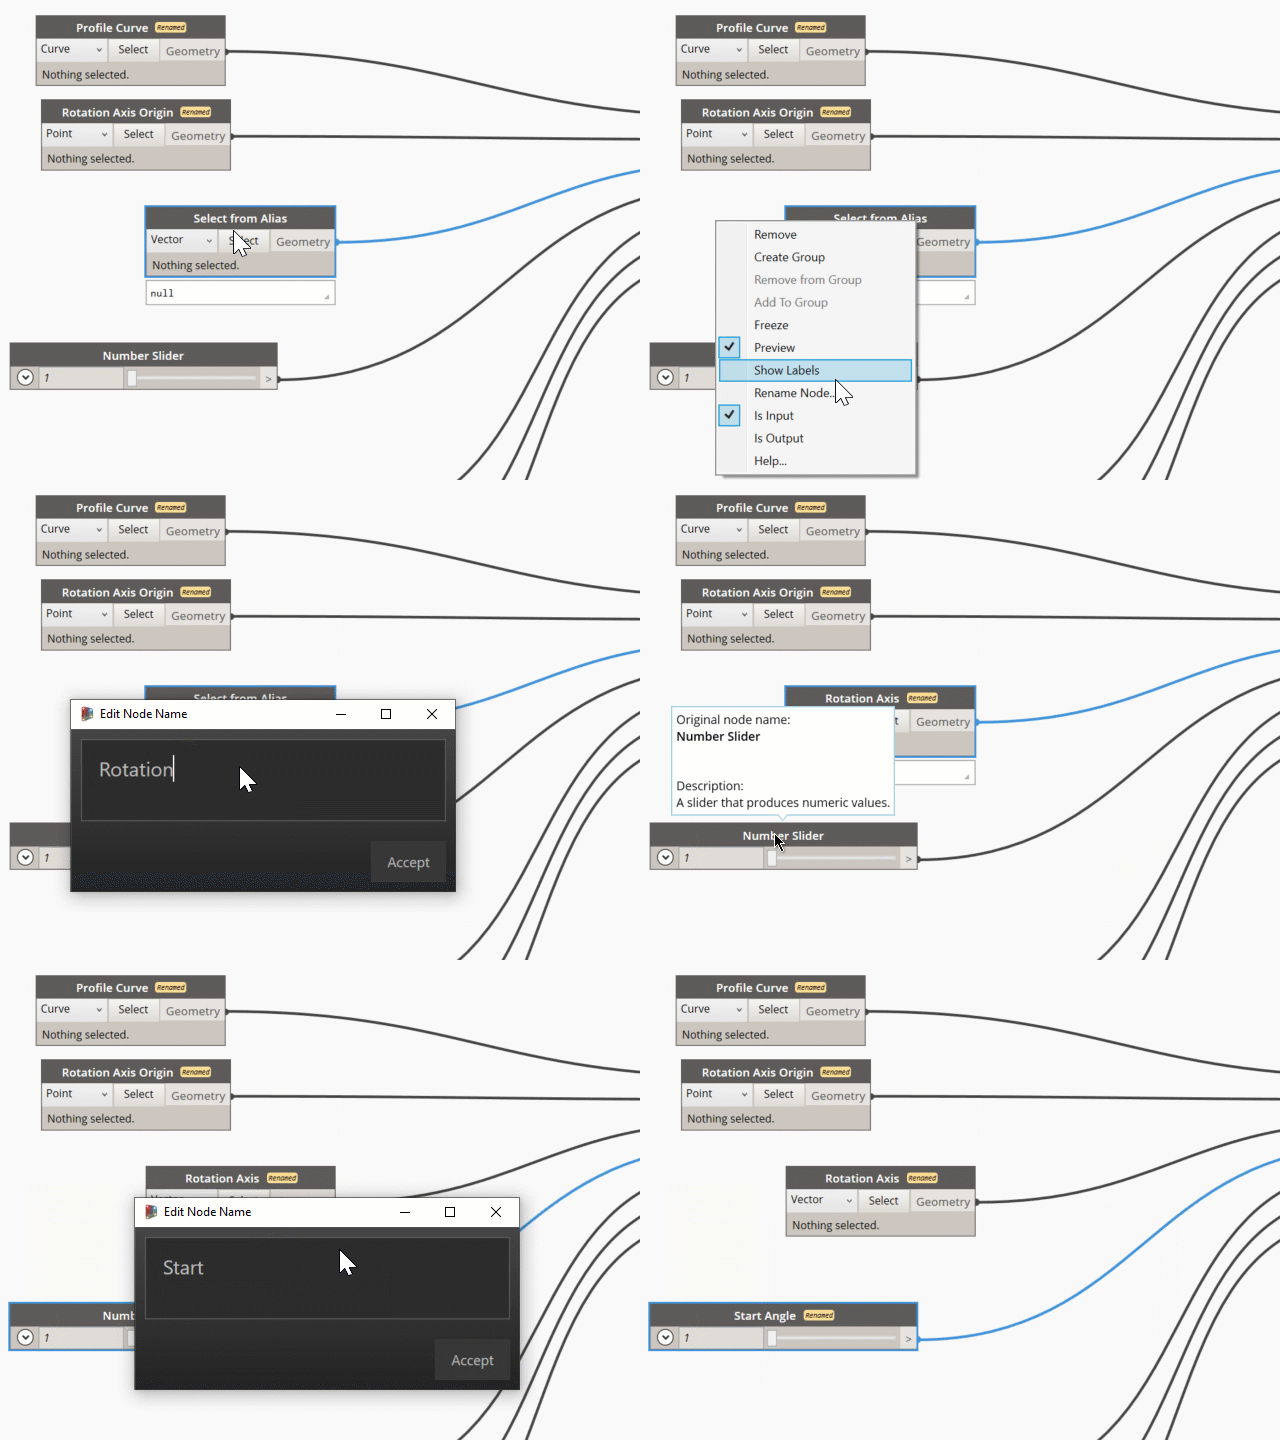
Ensure that all the script input nodes you want to control in Dynamo Player are configured with the Is Input flag turned on. This includes Select from Alias, Number Slider, Integer Slider, and File Path nodes. Otherwise they cannot be read or displayed by the Dynamo Player.
Starting in Dynamo version 2.7.0.9206, you can specify the geometry type for Select from Alias nodes. You can update scripts created in previous versions to take advantage of this feature. When you predefine the geometry inputs, Dynamo Player automatically activates the selection filters for each input. This can simplify the process of setting up and running the script for Dynamo Player users.

To hide inputs that you don't want to appear in Dynamo Player, such as parameter values, turn off Is Input flag. This is a good way to prevent the script user from adjusting parameter values that should not be changed.
For more information, see Set up a Dynamo script for Dynamo Player.
2. Rename nodes
Provide useful names of the nodes you expose in Dynamo Player. This makes it easier for the script user to identify the nodes and how they function in the script.
-
Do either of the following:
- Right-click the node and select Rename Node.
- Double-click the node name.
-
Type a name in the Edit Node Name window.

In Dynamo, you can hover over a node to see its default name.
3. Create groups to organize input nodes
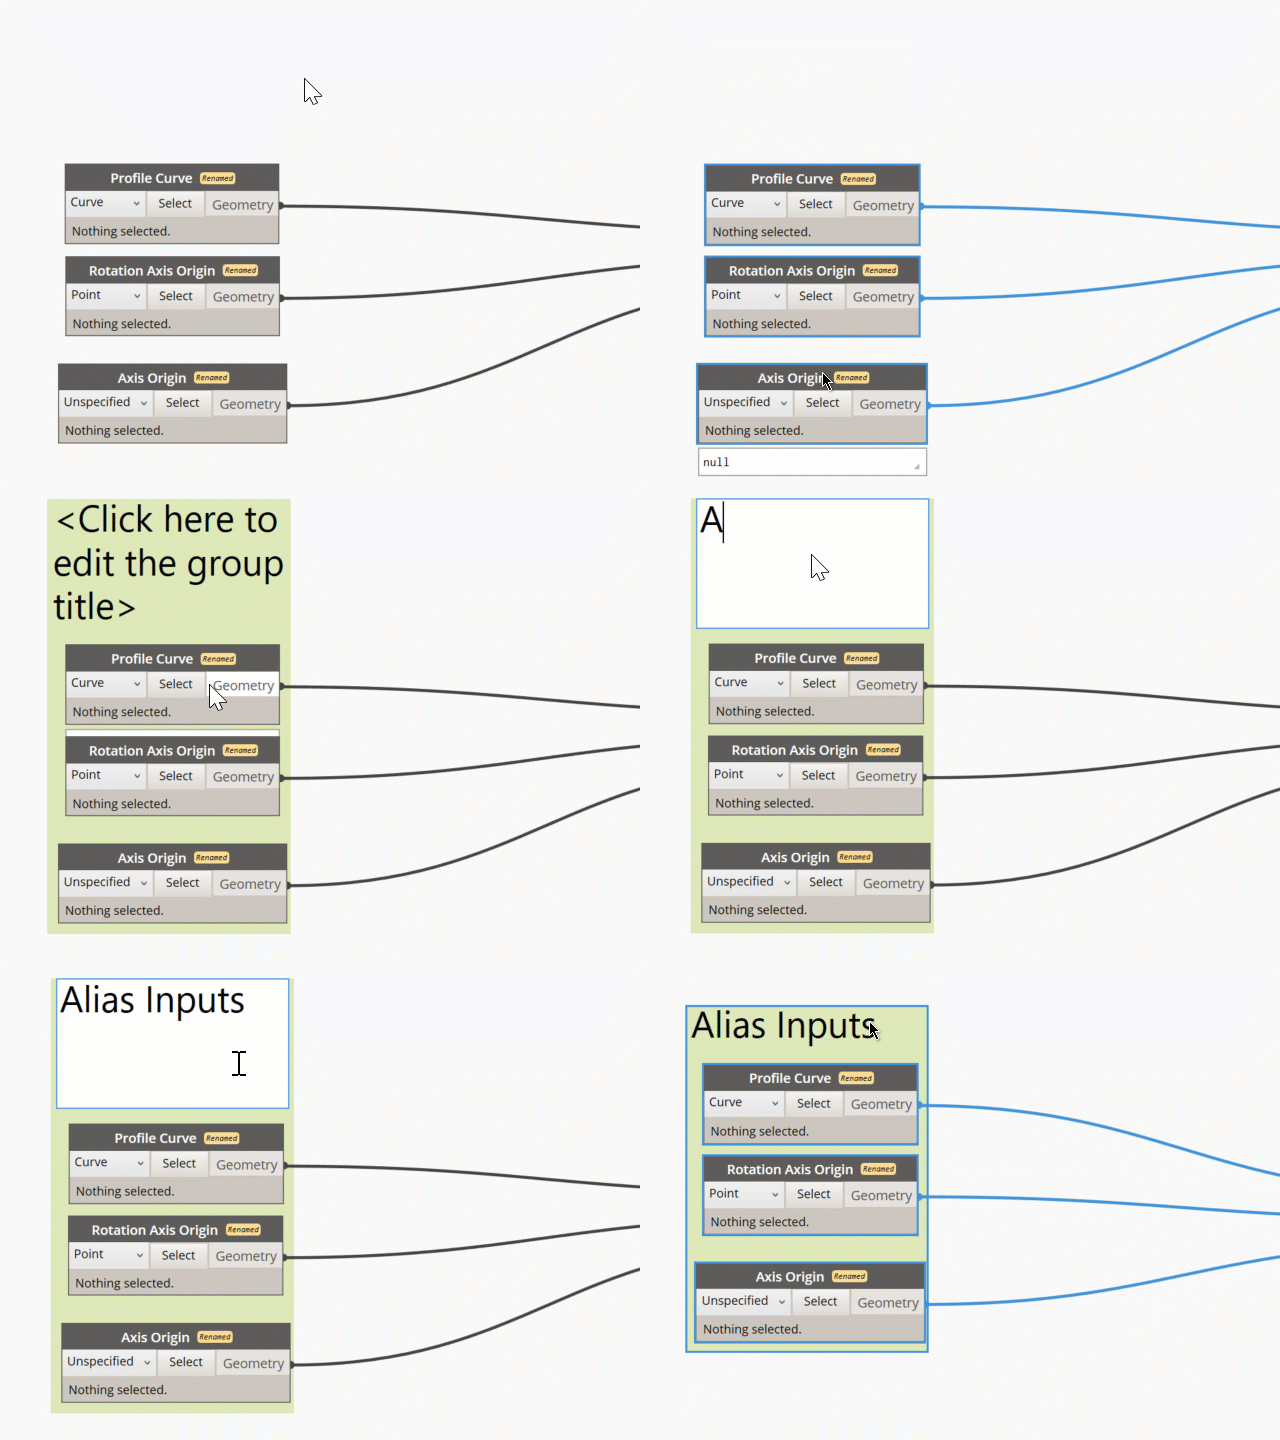
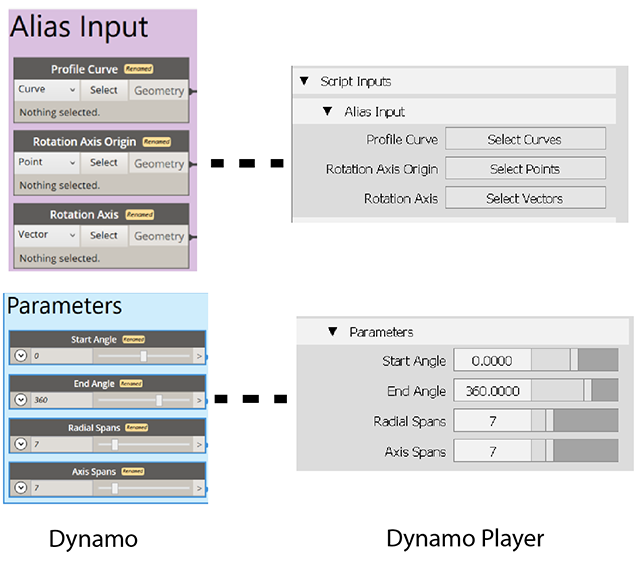
Grouping your input nodes in Dynamo lets you organize how they display in the Script Input section of Dynamo Player. Ungrouped nodes always appear at the top of the Script Inputs section no matter where they appear in the script.
-
Drag the input nodes in the order you want them to appear.
-
Shift - select the nodes you want to contained in a group, then right-click and select Create Group.
-
In the new group, double-click the
<Click here to edit the group title>label and type a name for the group.
4. Organize input nodes from top to bottom
Input nodes display in Dynamo Player in the order they appear in Dynamo starting from the top to bottom. Typically, the Select From Alias nodes should appear at to the top of the script followed by other inputs such as Number Sliders and File Path inputs.

5. Set minimum and maximum value ranges for slider controls
You can set minimum and maximum values for the numeric parameters you expose to Dynamo Player. To do this, expand the slider node and set the desired value ranges. The parameter values that are set when the script is saved in Dynamo, appear as the parameter's default values in Dynamo Player.

Dynamo Player does not support the step parameter of Number Slider and Integer Slider nodes. As a workaround, you can place a Code Block node after the slider node to generate the step value before the value gets passed to the next node in the script.
For example, if you want to step the slider value by 0.5, create a Code Block node and add this simple function: x*0.5;
Assign custom icons to your scripts
You can also assign custom icons to your scripts. For example, if you have created a new script or customized an existing one, you can assign a custom icon to script so that your script is easy to identify in a shelf.
To use customized icons, note the following:
- The icons must be .tiff image files.
- The names of the icon image files must match the name of the script.
- The .tiff file extension must be removed from image file name.
Do the following:
- Create a folder in the directory containing your sample scripts.
- Name the folder
smalland copy the icon images to this folder.
